- Published on
MLOps Basics [Week 5]: Model Packaging - Docker
- Authors

- Name
- Raviraja Ganta
- @raviraja_ganta
Why do we need packaging? We might have to share our application with others, and when they try to run the application most of the time it doesn’t run due to dependencies issues / OS related issues and for that, we say (famous quote across engineers) that It works on my laptop/system.
So for others to run the applications they have to set up the same environment as it was run on the host side which means a lot of manual configuration and installation of components.
The solution to these limitations is a technology called Containers.
By containerizing/packaging the application, we can run the application on any cloud platform to get advantages of managed services and autoscaling and reliability, and many more.
The most prominent tool to do the packaging of application is Docker 🛳
In this post, I will be going through the following topics:
FastAPI wrapperBasics of DockerBuilding Docker ContainerDocker Compose
⚡️ FastAPI wrapper
We have built a nice application. But it is of no use if there is not a way to access by other people. Let's build a API around the application we built.
I will be using FastAPI for this purpose (since it is fast and very easy to get started).
🏗 Installation
pip install fastapi
pip install uvicorn
Create a file called app.py and import FastAPI as following:
from fastapi import FastAPI
app = FastAPI(title="MLOps Basics App")
Now we can use this app to create the required routes
@app.get("/")
async def home():
    return "<h2>This is a sample NLP Project</h2>"
Now Let's run the application using the command
uvicorn app:app --ip 0.0.0.0 --port 8000 --reload
Now open the browser and go to http://localhost:8000/
The advantage of using FastAPI ⚡️ it has inbuilt swagger documentation linking. Open this link http://localhost:8000/docs
It will look something like this:

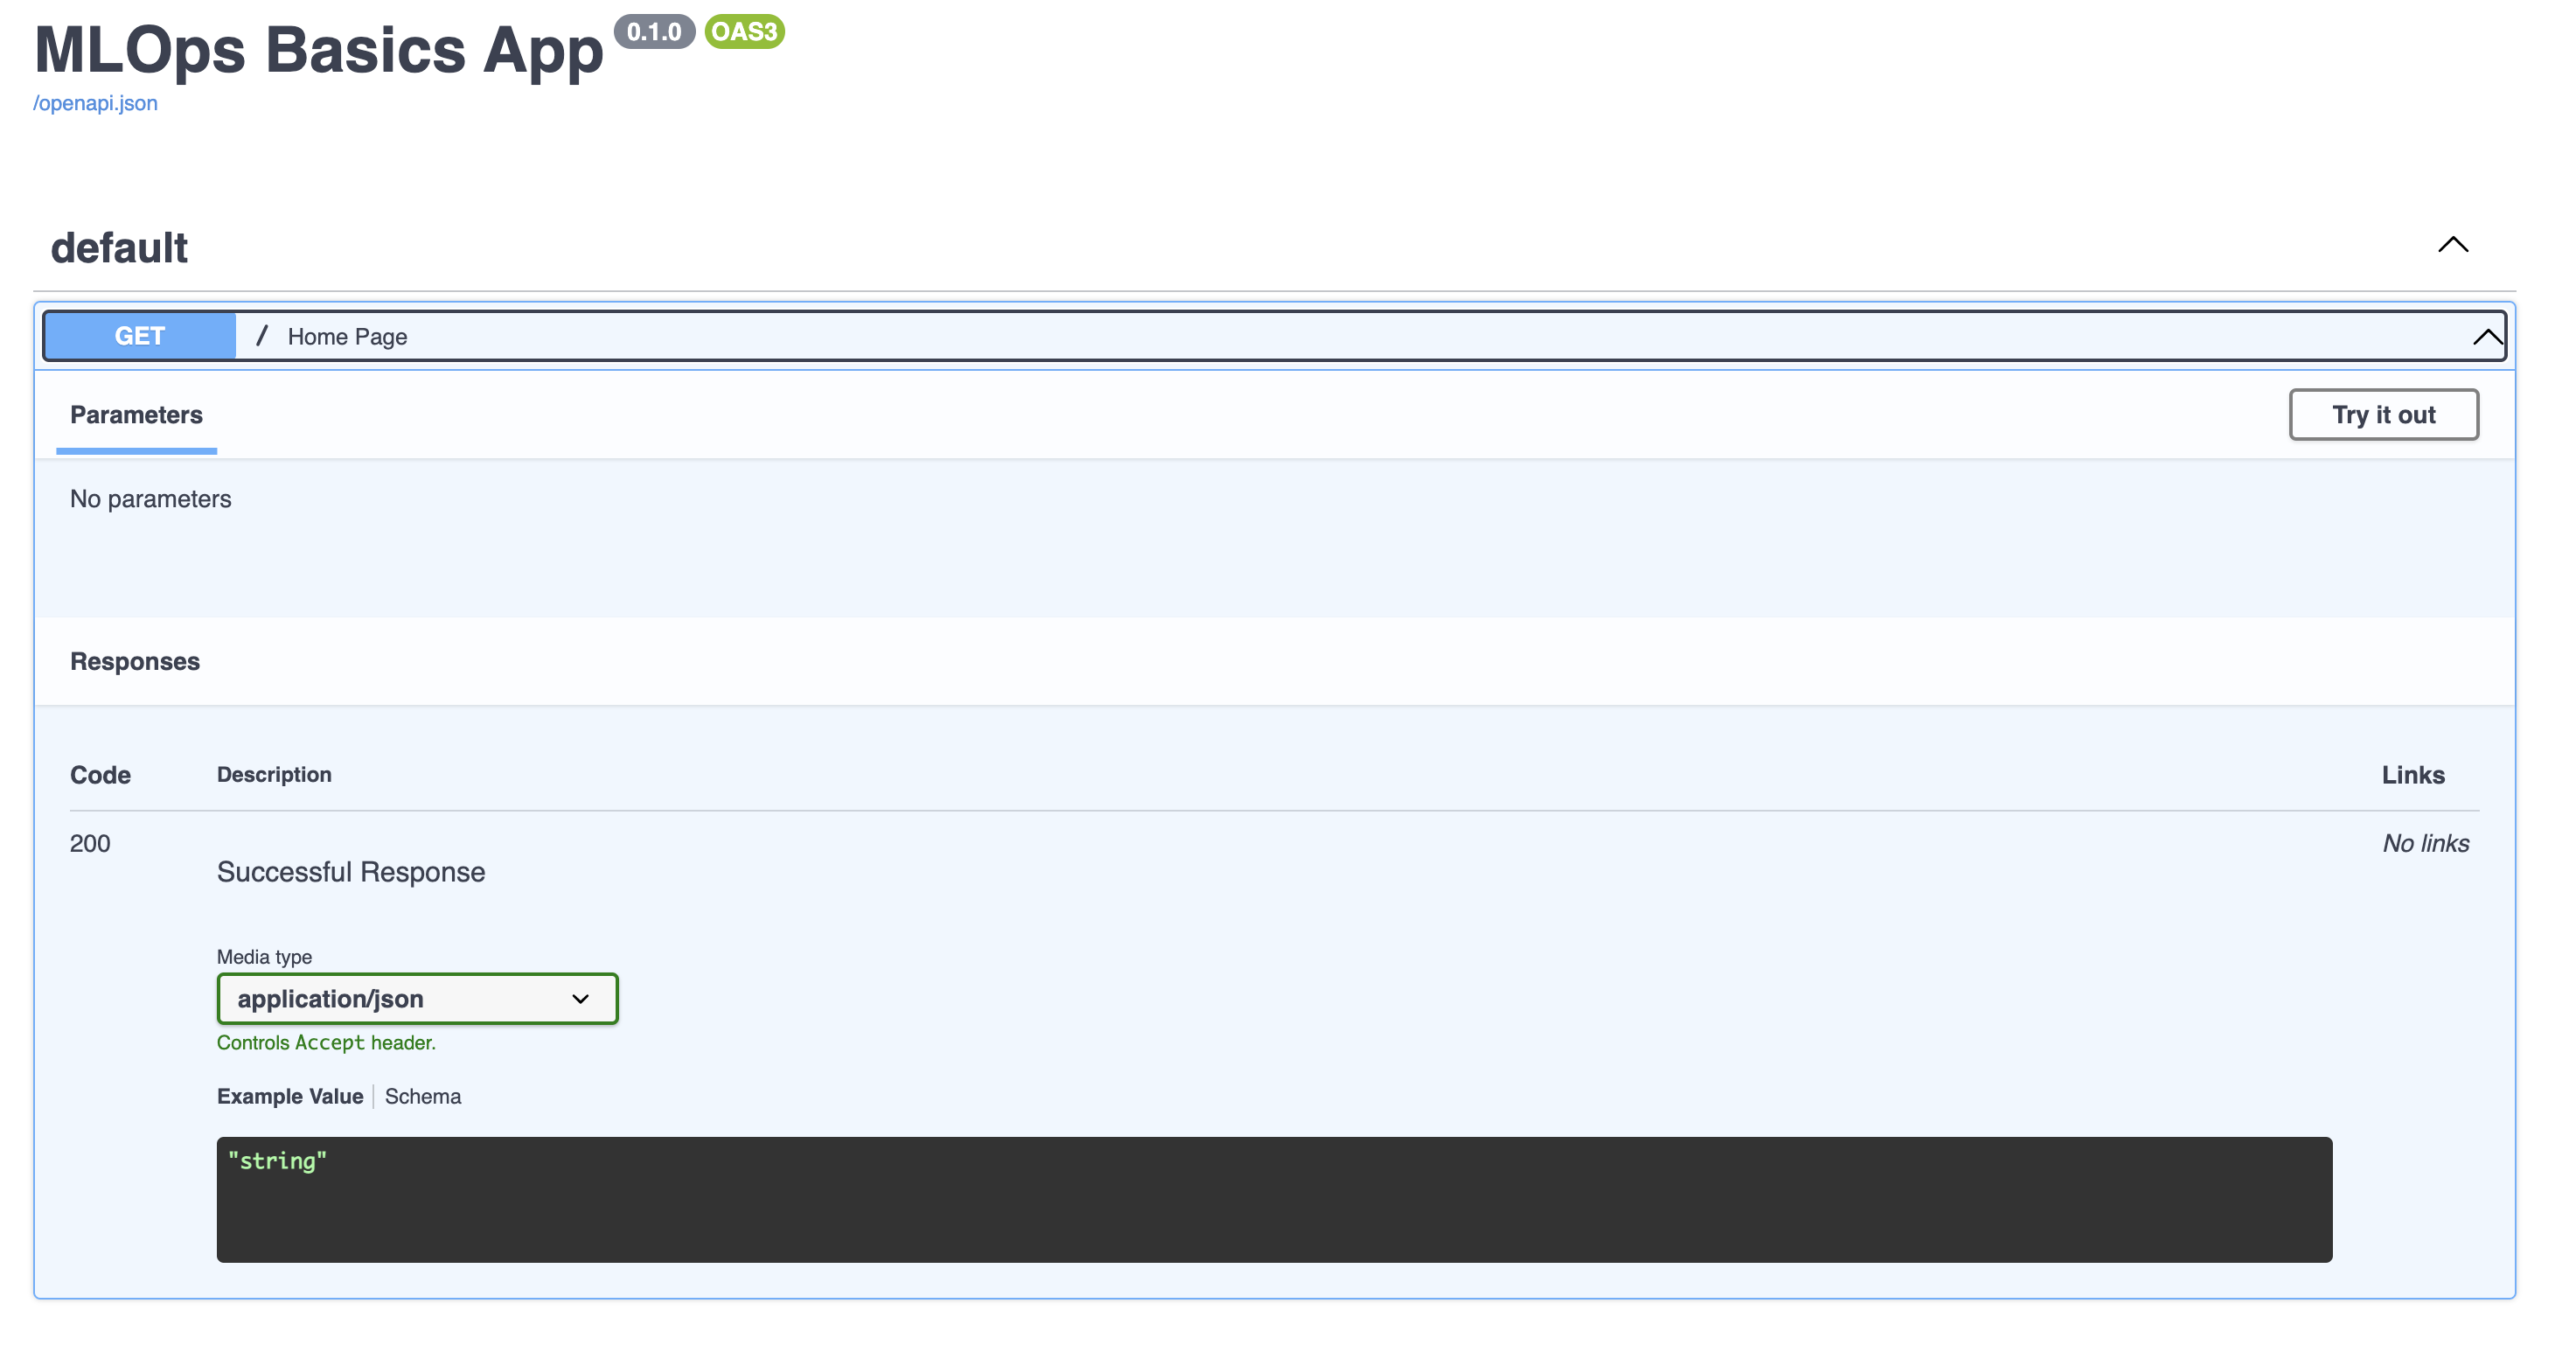

Now let's create an API which will take text as input and returns the prediction.
from inference_onnx import ColaONNXPredictor

# load the model
predictor = ColaONNXPredictor("./models/model.onnx")

@app.get("/predict")
async def get_prediction(text: str):
    result =  predictor.predict(text)
    return result
Run the application using the command:
uvicorn app:app --ip 0.0.0.0 --port 8000 --reload
This http://localhost:8000/docs will look like this:

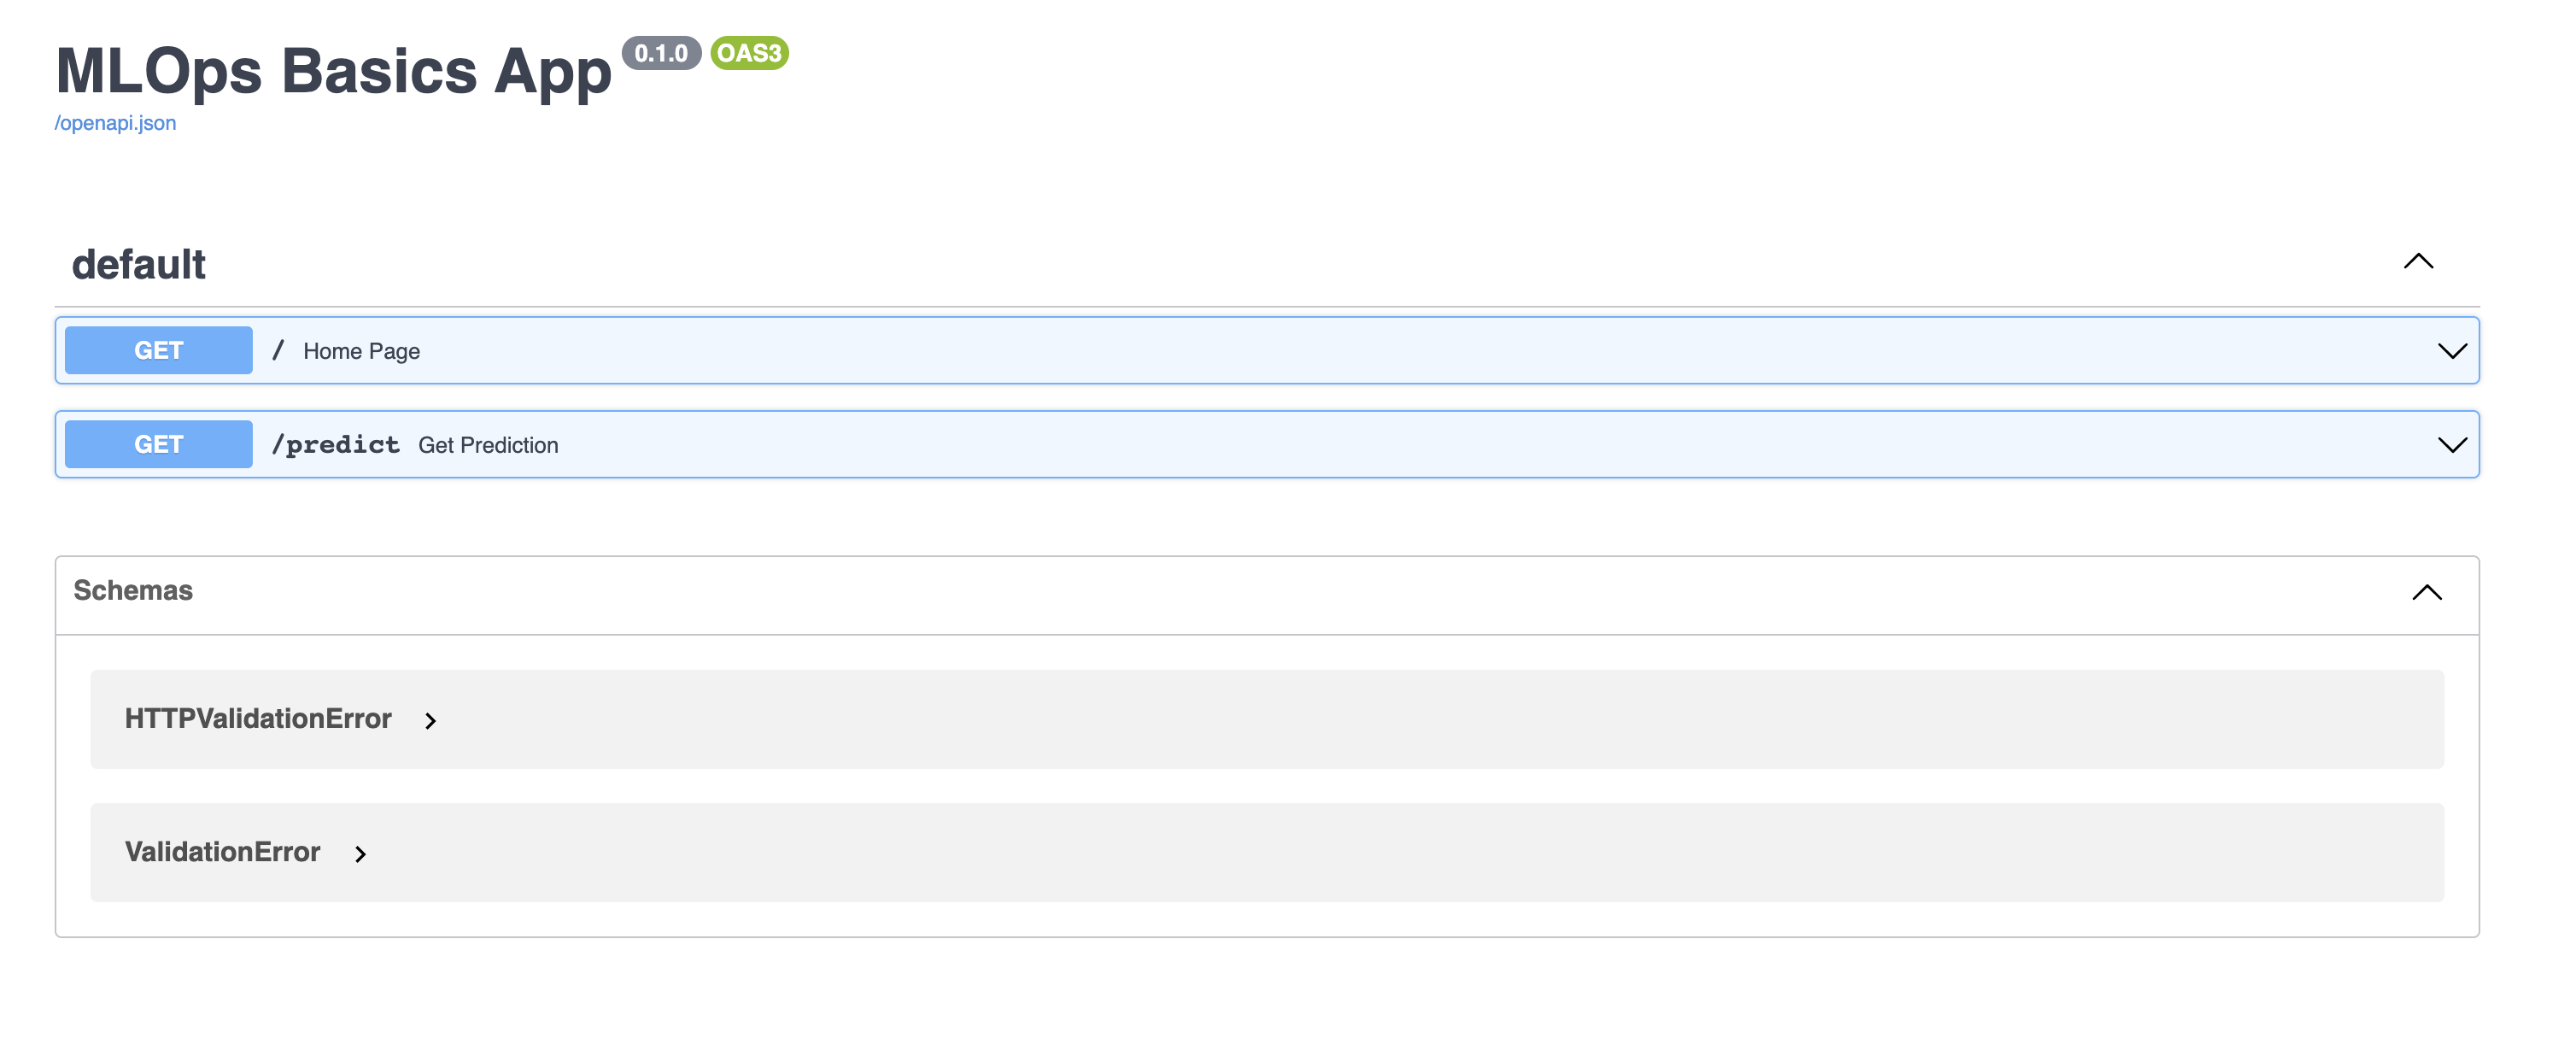
Now you run the get the predictions directly by calling this /predict api.
🛳 Basics of Docker
Docker is a container management tool, which packages the application code, configuration, and dependencies into a portable image that can be shared and run on any platform or system.
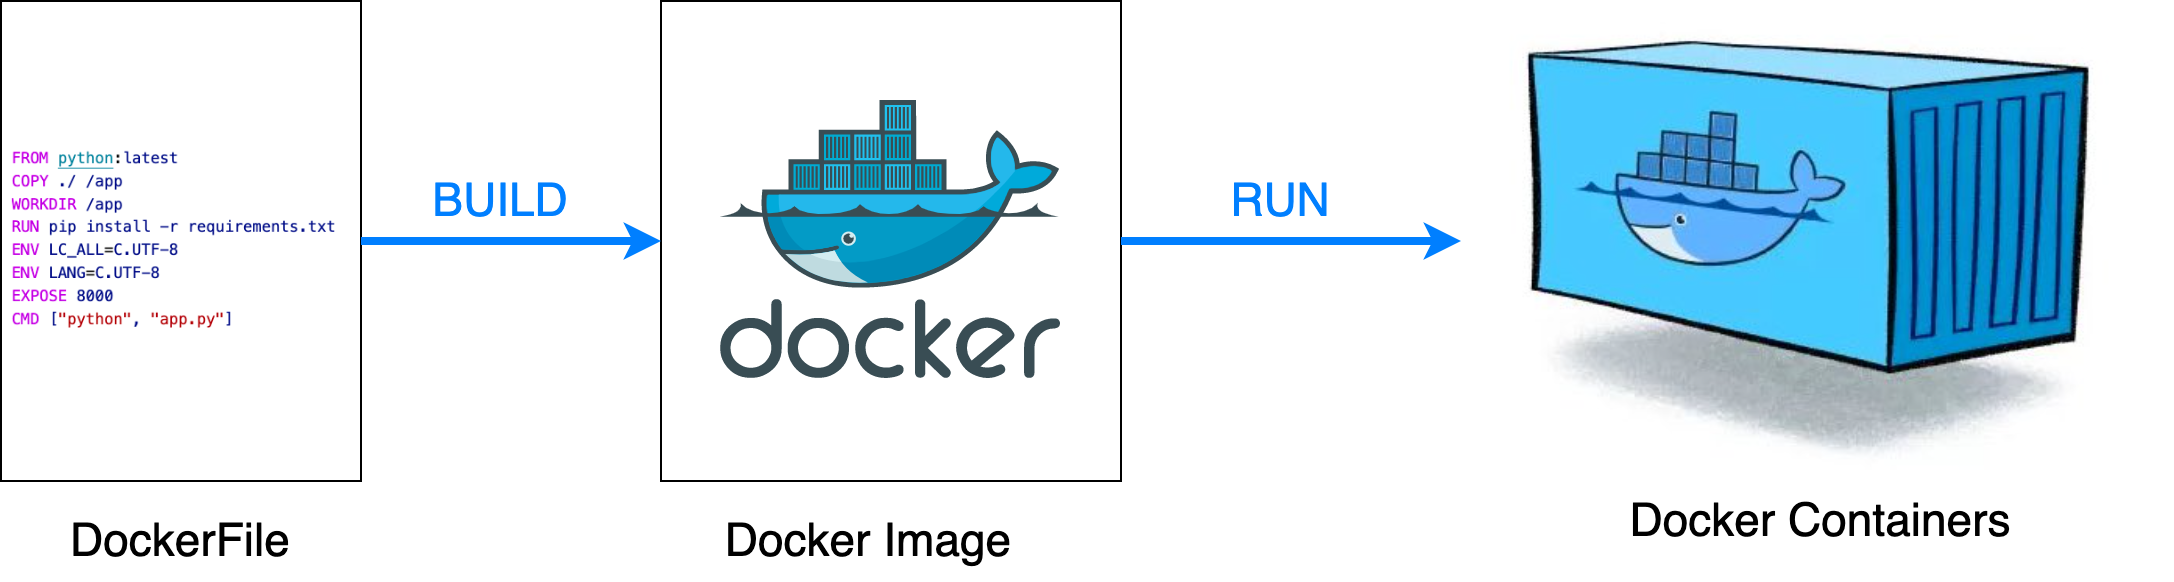
There are three three main things in docker:
Docker FileDocker ImageDocker Container
A Docker File contains the list of commands to run which are necessary for the application to run (like dependencies, codes, command to run etc.)
A Docker Image is a lightweight, standalone, executable package of software (built using dockerfile) that includes everything needed to run an application: code, runtime, system tools, system libraries, and settings.
A Docker Container is an instance of Docker Image which contains the running application.

🛳 Building Docker Container
Let's package the application using docker.
Note: I am doing this only for inference (trained model) can also be used for training.
📝 Docker File
A simple file that consists of instructions to build a Docker Image. Each instruction in a docker file is a command/operation, for example, what operating system to use, what dependencies to install or how to compile the code, and many such instructions which act as a layer.
The best part is all layers are cached and if we modified some instructions in the Dockerfile then during the build process it will just rebuild the changed layer.
A sample Dockerfile will look as below
FROM huggingface/transformers-pytorch-cpu:latest
COPY ./ /app
WORKDIR /app
RUN pip install -r requirements_inference.txt
EXPOSE 8000
CMD ["uvicorn", "app:app", "--host", "0.0.0.0", "--port", "8000"]
FROM: creates a layer from the base image, here we have usedhuggingface/transformers-pytorch-cpu:latestDocker image. This is pulled from Docker Hub.WORKDIR: specifies the working directoryCOPY: adds files from your Docker client’s or host system current directory, here we are adding current directory files to the container’s app directoryRUN: specifies what commands to run within the container, here running pip command to install dependencies fromrequirements_inference.txtfileEXPOSE: specifies which port to expose our application, here it’s 8000CMD: specifies what command to run at the start of the container
🌉 Docker Image
Now let's build the Docker Image 🌉 using the command:
docker build -t inference:latest .
Once the image is built, cross check it using the command:
docker images
You will see output something like this:
REPOSITORY          TAG          IMAGE ID       CREATED        SIZE
inference           latest       d4aa9dad9eaa   1 hours ago   3.12GB
📦 Docker Container
Now let's create the container from the image created using the command:
docker run -p 8000:8000 --name inference_container inference:latest
You are saying to create a docker container with name inference_container using the docker image infenrece:latest. Tie the port 8000 with the port 8000 of the docker container.
You will see output something like:
(week5) ravirajas-MacBook-Pro MLOps-Basics/week_5_docker ‹week5*› » docker run -p 8000:8000 --name inference_container inference:latest
Downloading: 100%|██████████| 382/382 [00:00<00:00, 201kB/s]
Downloading: 100%|██████████| 232k/232k [00:00<00:00, 583kB/s]
INFO:     Started server process [1]
INFO:     Waiting for application startup.
INFO:     Application startup complete.
INFO:     Uvicorn running on http://0.0.0.0:8000 (Press CTRL+C to quit)
🚢 Docker Compose
Docker Compose is a tool for defining and running multi-container Docker applications. With Compose, you use a YAML file to configure your application’s services. Then, with a single command, you create and start all the services from your configuration.
Let's see how to create a compose yaml file:
version: '3'
services:
  prediction_api:
    build: .
    container_name: 'inference_container'
    ports:
      - '8000:8000'
Services: These are the multiple docker containers which needs to be created (in our case it's only one)
Now simply run the command:
docker-compose up
You will output something like:
(base) ravirajas-MacBook-Pro MLOps-Basics/week_5_docker ‹week5*› » docker-compose up
Starting prediction_api ... done
Attaching to inference_container
inference_container    | INFO:     Started server process [1]
inference_container    | INFO:     Waiting for application startup.
inference_container    | INFO:     Application startup complete.
inference_container    | INFO:     Uvicorn running on http://0.0.0.0:8000 (Press CTRL+C to quit)
🥂 Sharing
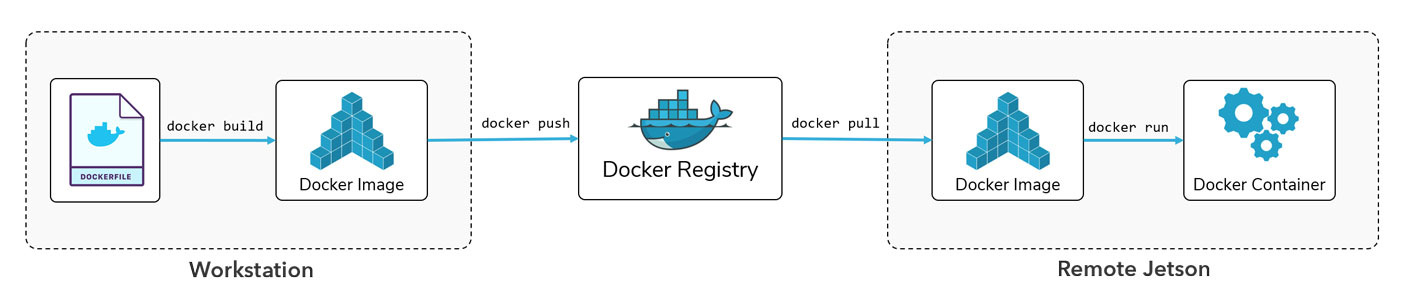
Now sharing can be done in 2 ways:
- Commit the
Dockerfilewhich can be used to build the image and container - Push the docker image to a central repository like Docker Hub and pull it from there.

You need to create an account in docker hub in-order to be able to push the image. Refer to this documentation for more information.
🔚
This concludes the post. These are only a tip of the mountain capabilities of FastAPI and Docker. For more information and other usecases, refer to the documentations.
Complete code for this post can also be found here: Github