- Published on
MLOps Basics [Week 6]: CI/CD - GitHub Actions
- Authors

- Name
- Raviraja Ganta
- @raviraja_ganta


What is CI/CD ?
CI/CD is a coding philosophy and set of practices with which you can continuously build, test, and deploy iterative code changes.
This iterative process helps reduce the chance that you develop new code based on buggy or failed previous versions. With this method, you strive to have less human intervention or even no intervention at all, from the development of new code until its deployment
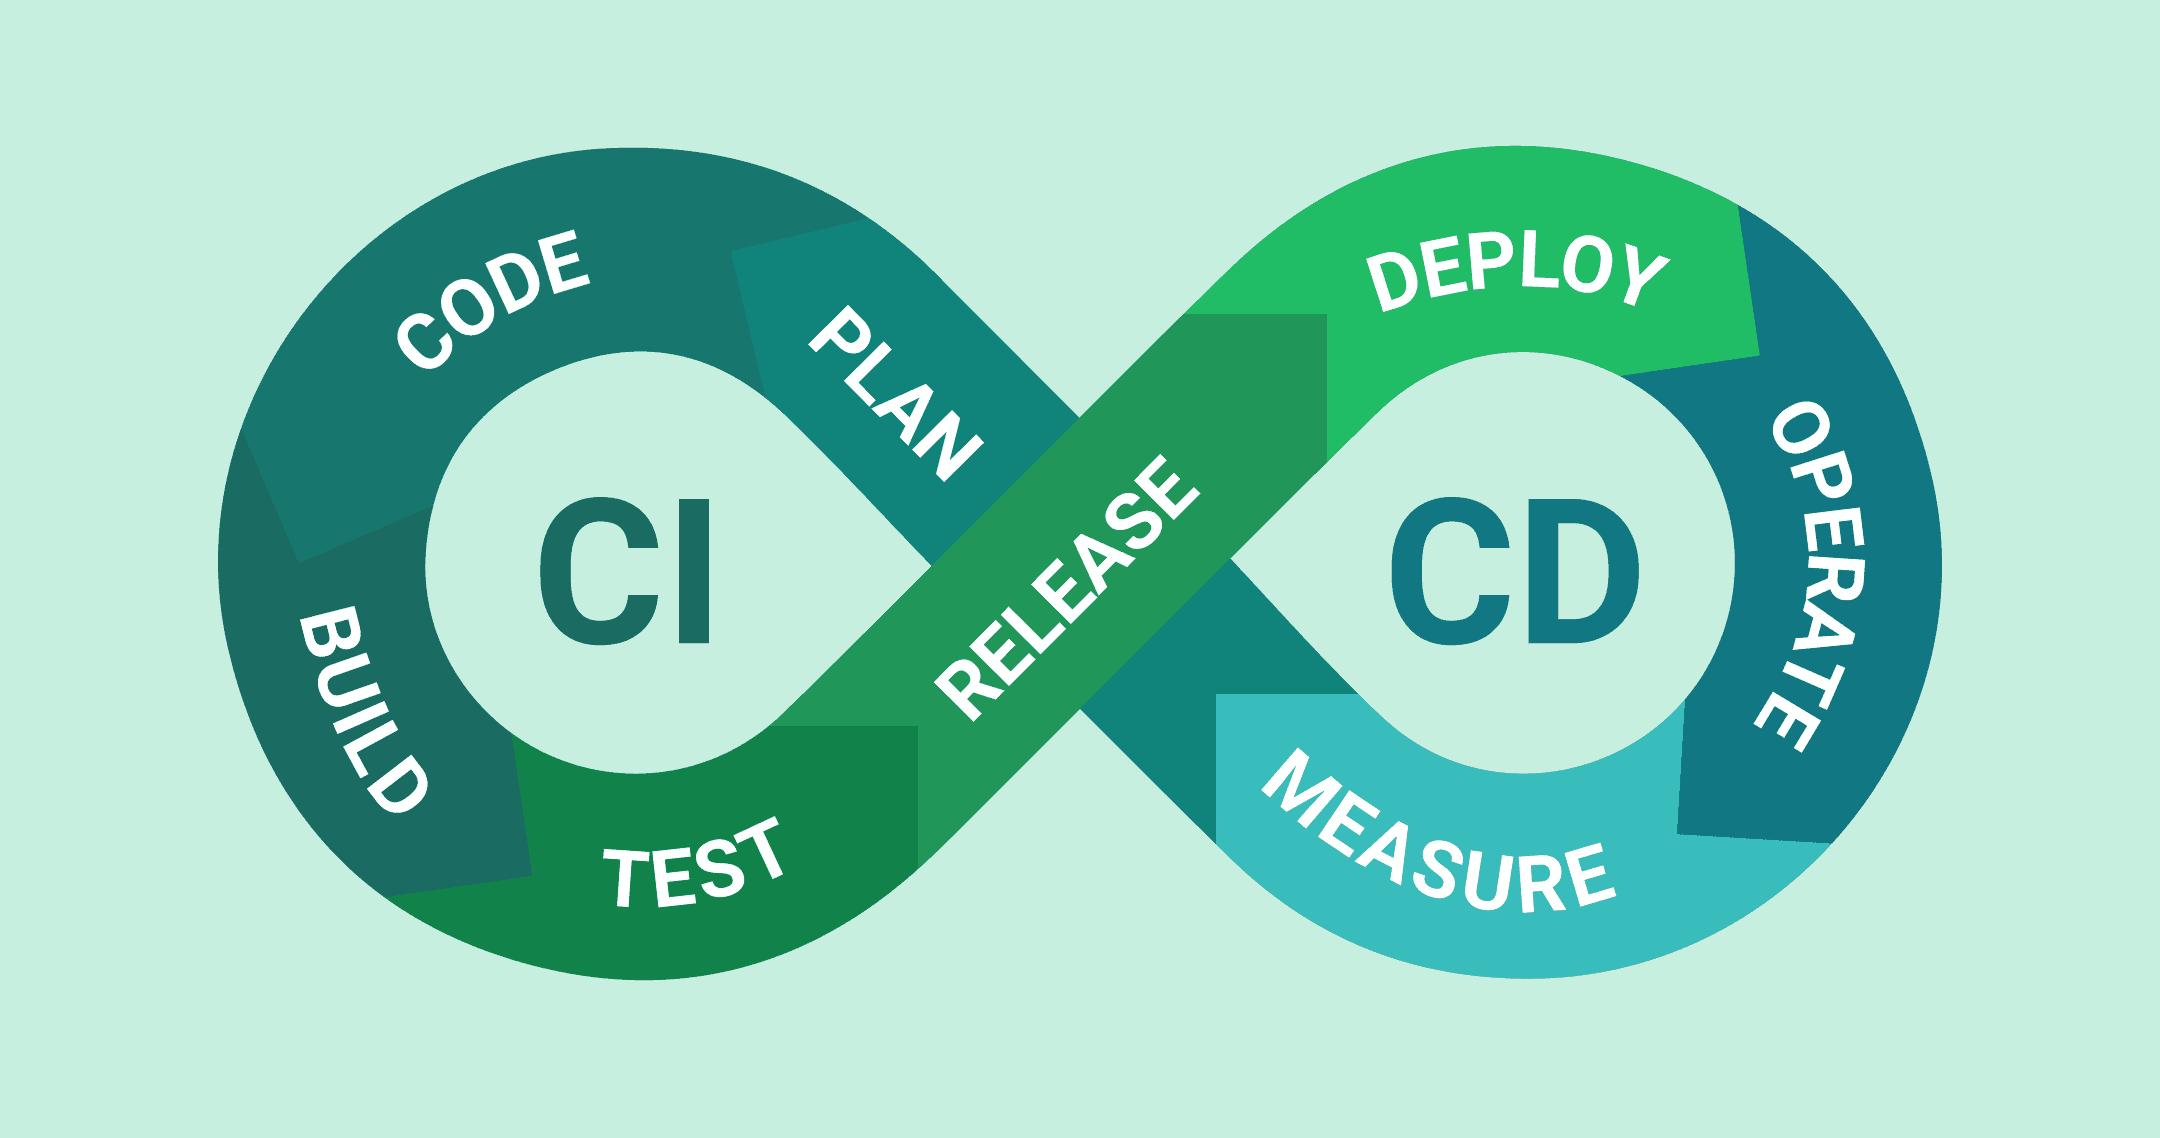
A simple flow looks like:

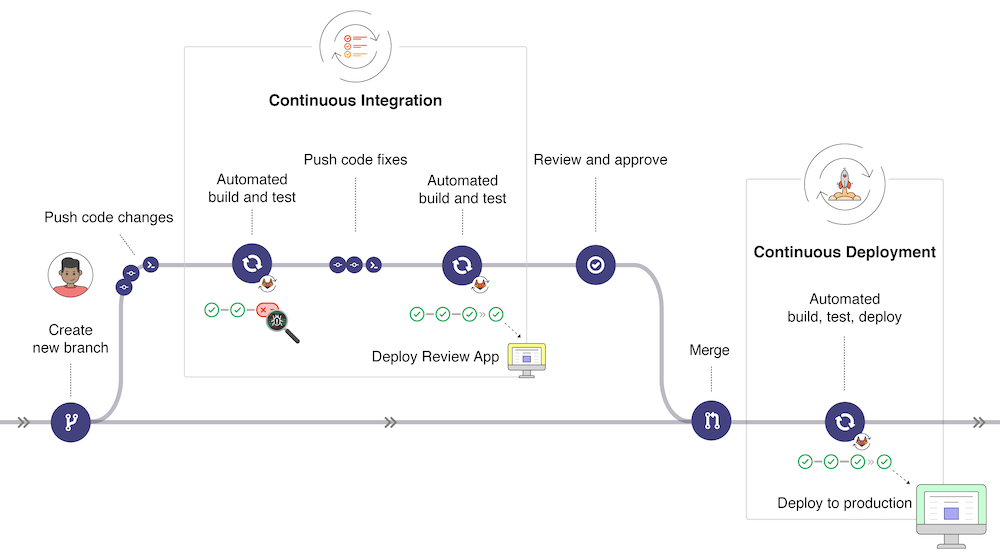
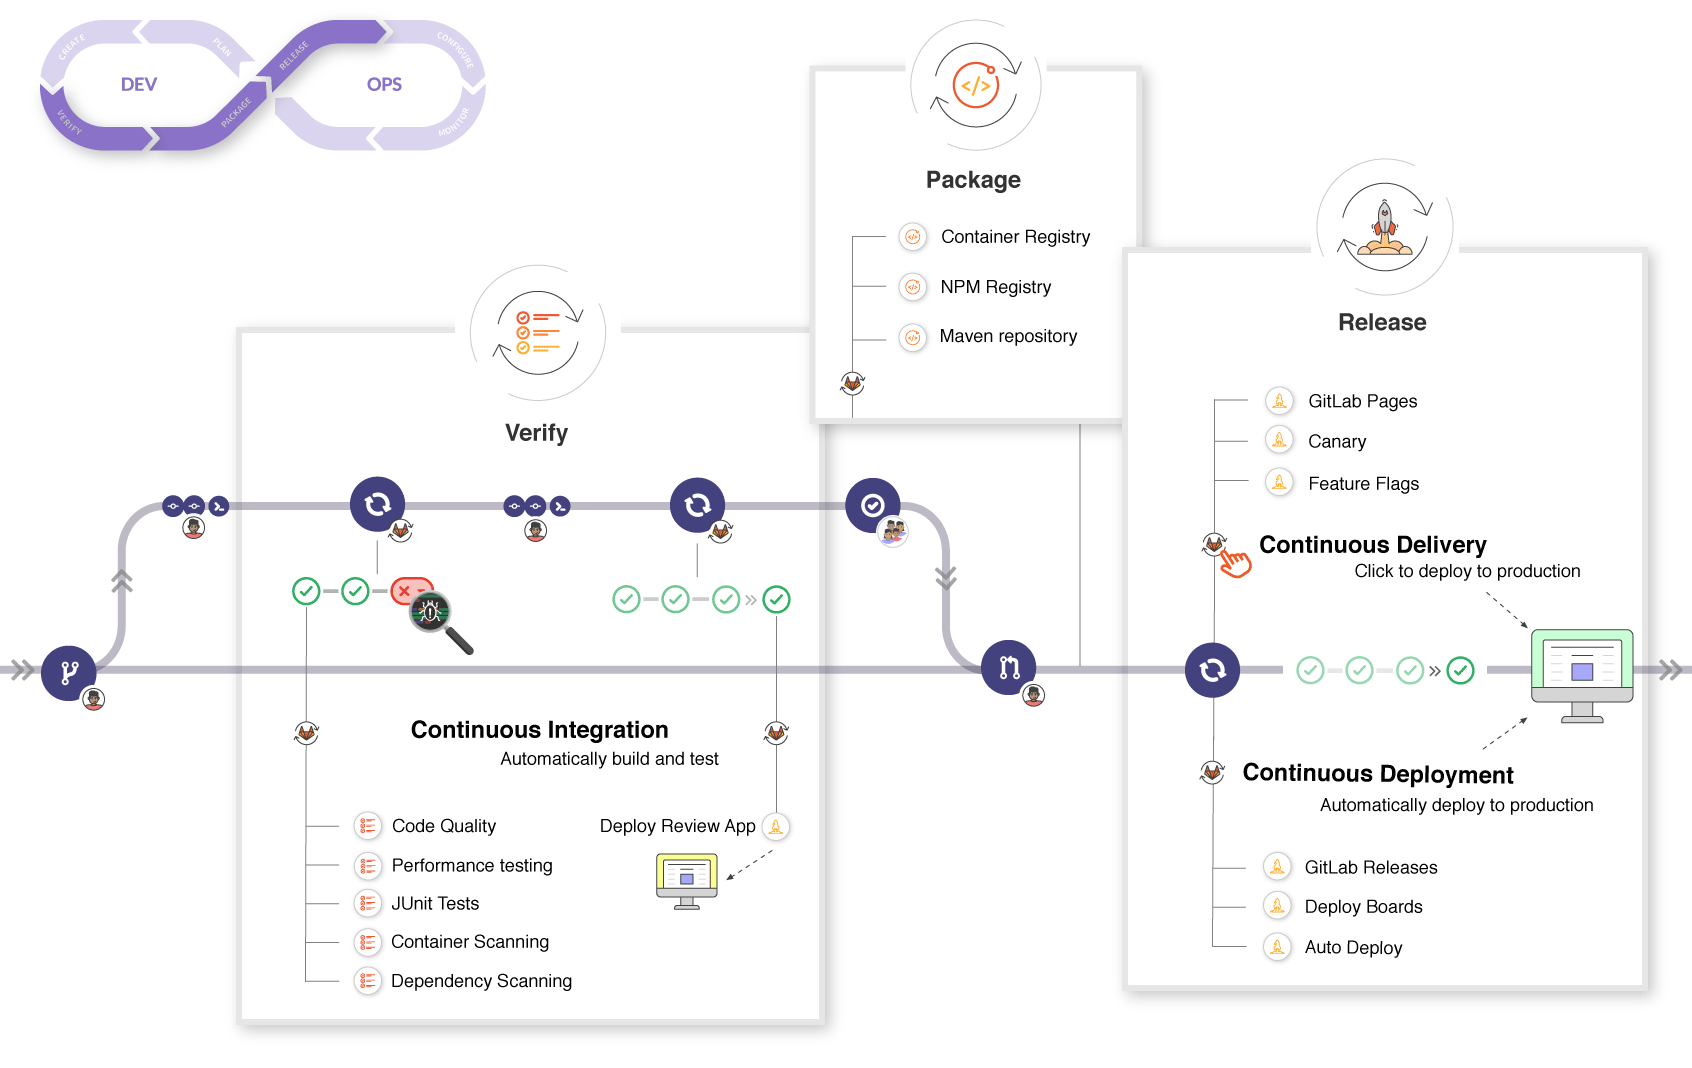
And a complex flow looks like:

Let's stick to the basic flow for now.
There are many tools with which we can perform CI/CD. The prominent ones are:
and many more...
I will be using GitHub Actions.
In this post, I will be going through the following topics:
Basics of GitHub ActionsFirst GitHub ActionCreating Google Service AccountGiving access to service accountConfiguring DVC to use Google Service accountConfiguring Github Action
Note: MLOps includes model development also as a part of the cycle. This post covers only devops part.

Basics of GitHub Actions
 as the version control system, we can use GitHub Actions right off the bat without having the need to setup another tool. (Might not be the same if you are using different version control system.)
GitHub Actions are just a set instructions declared using yaml files.
These files needs to be in a specific folder: .github/workflows and this has to be in the root directory (where .git folder is present).
There are 5 main concepts in GitHub Actions:
Events: An event is a trigger for workflow.Jobs: Jobs defines the steps to run when a workflow is triggered. A workflow can contain multiple jobs.Runners: Defines where to run the code. By default, github will run the code in it's own servers.Steps: Steps contains actions to run. Each job can contains multiple steps to run.Actions: Actions contains actual commands to run like installing dependencies, testing code, etc.
🥇 First GitHub Action
Let's create the folder using the command:
mkdir .github/workflows
Now let's create a basic workflow file.
name: GitHub Actions Basic Flow
on: [push]
jobs:
Basic-workflow:
runs-on: ubuntu-latest
steps:
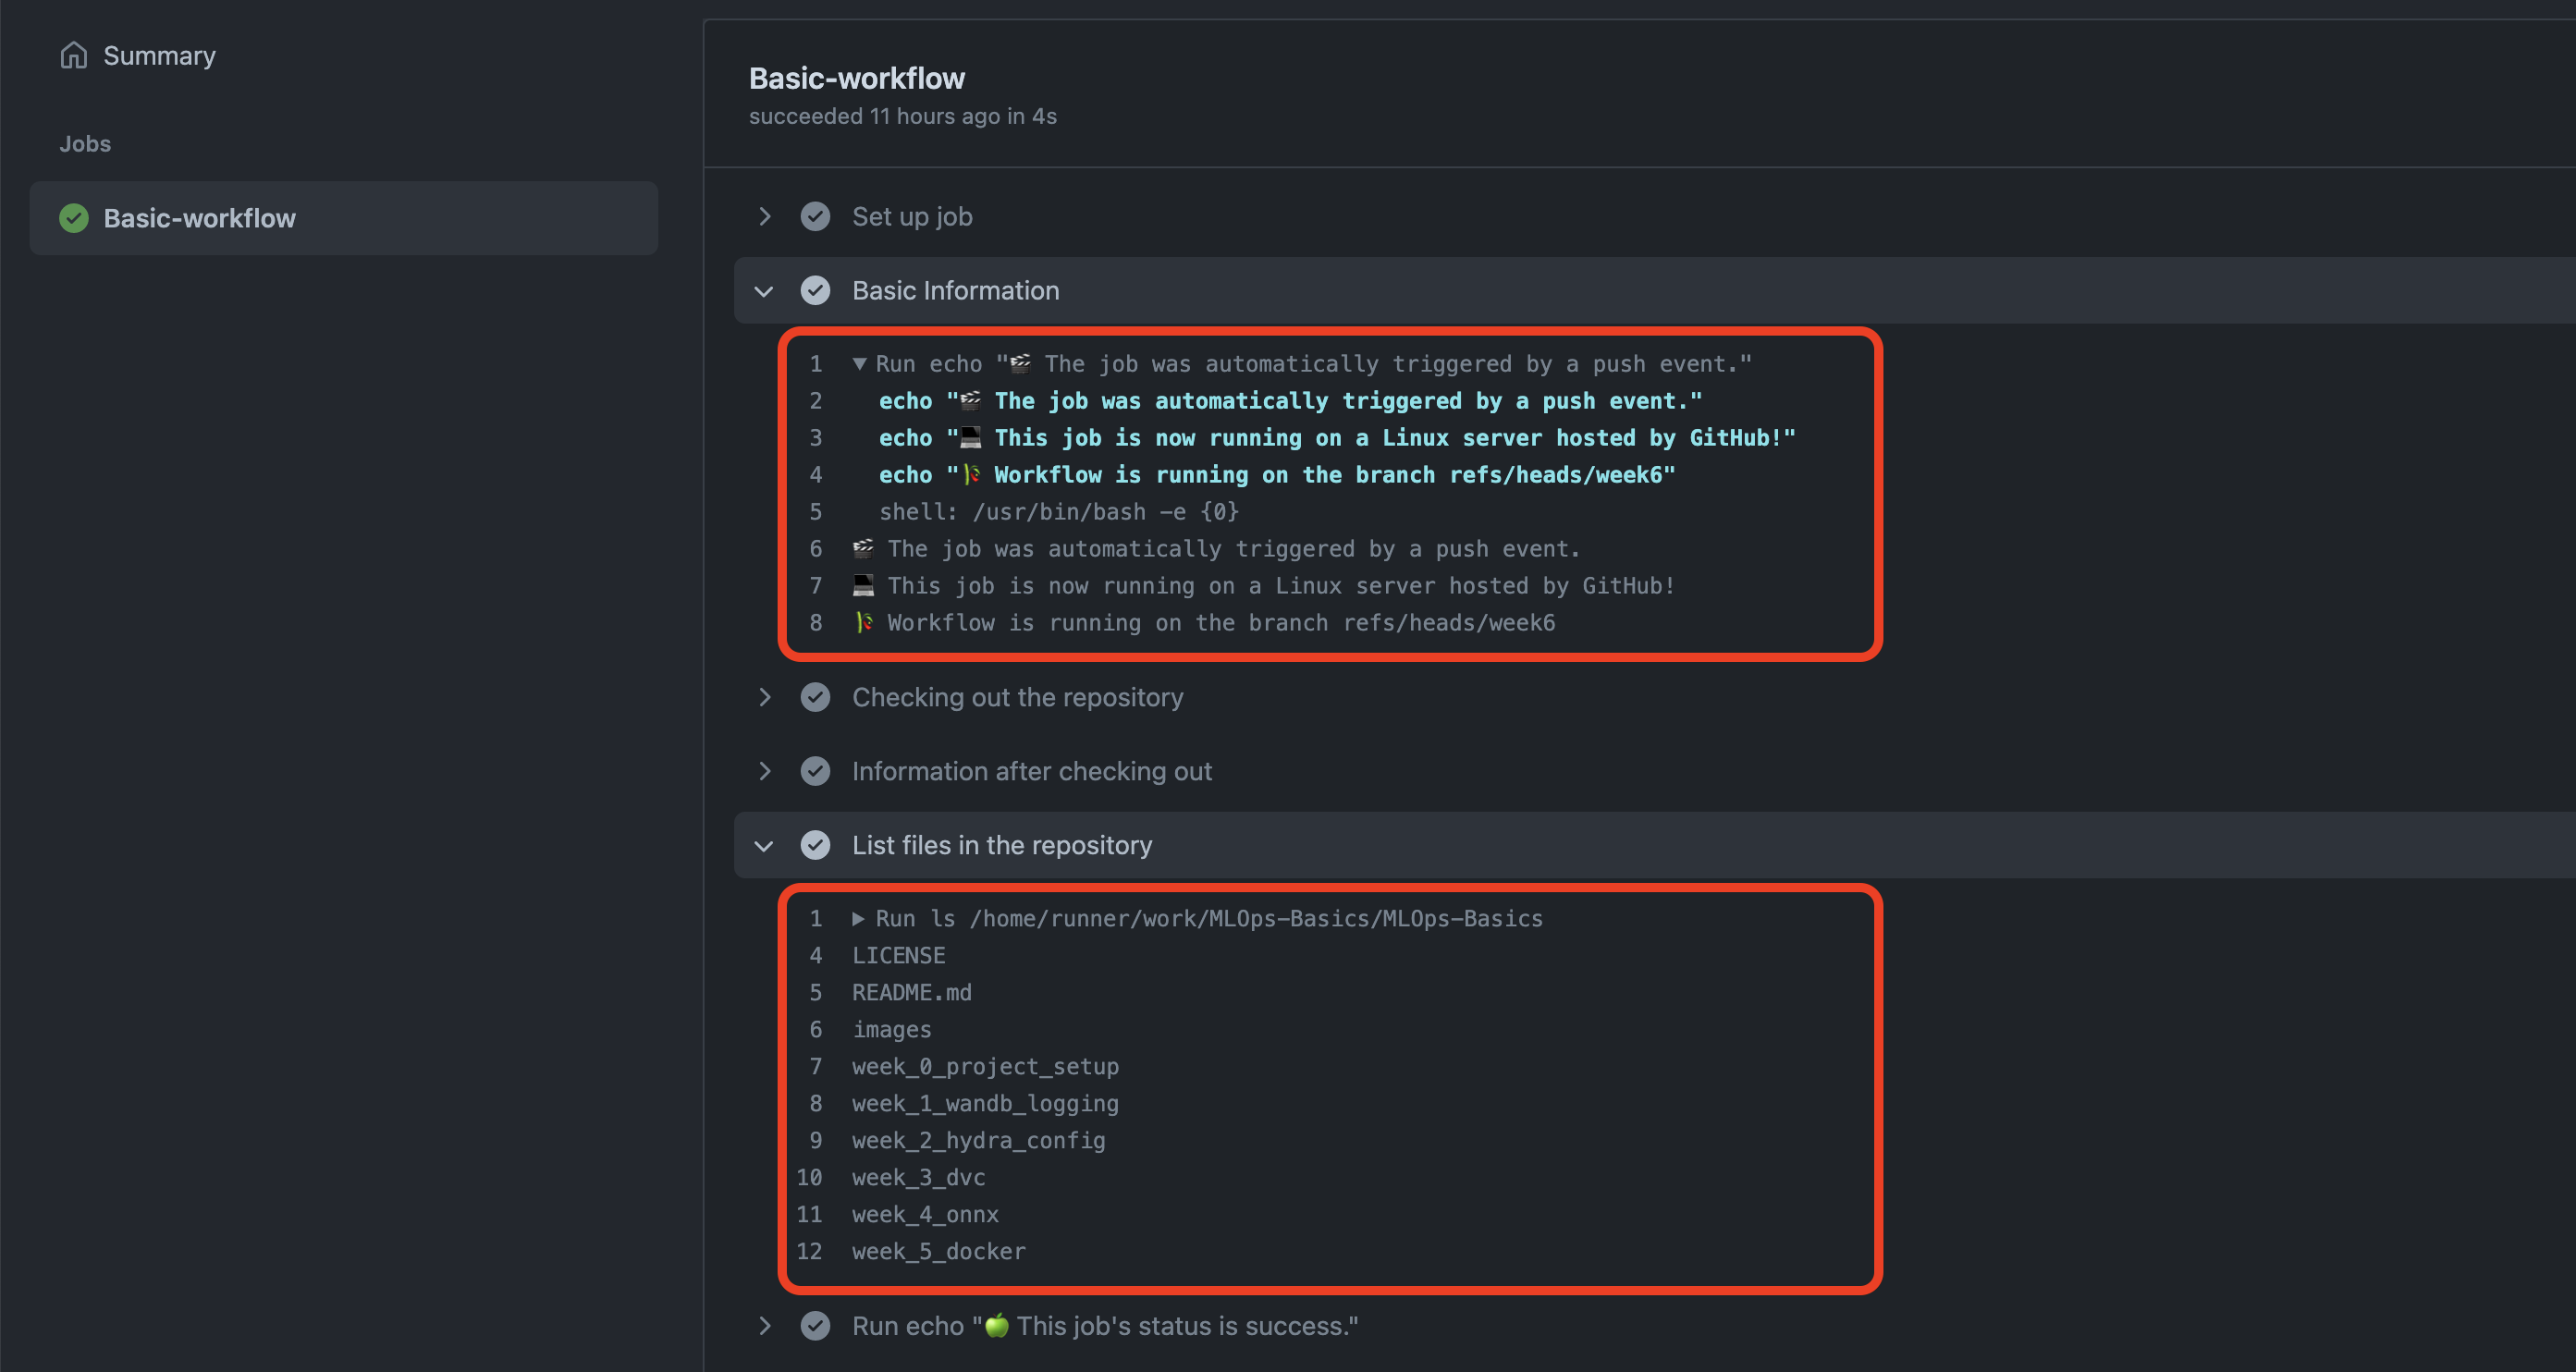
- name: Basic Information
run: |
echo "🎬 The job was automatically triggered by a ${{ github.event_name }} event."
echo "💻 This job is now running on a ${{ runner.os }} server hosted by GitHub!"
echo "🎋 Workflow is running on the branch ${{ github.ref }}"
- name: Checking out the repository
uses: actions/checkout@v2
- name: Information after checking out
run: |
echo "💡 The ${{ github.repository }} repository has been cloned to the runner."
echo "🖥️ The workflow is now ready to test your code on the runner."
- name: List files in the repository
run: |
ls ${{ github.workspace }}
- run: echo "🍏 This job's status is ${{ job.status }}."
Let's understand what's happening here:
Created a CICD workflow with name
GitHub Actions Basic Flowonis calledEventwhich triggers the workflow. Here it ispushevent. Whenever a push is happened on the repository, workflow will be triggered. There are 30+ ways of triggering the workflow. Refer to the documentation for more informationWorkflow contains a single job called
Basic-workflowrunning onubuntu-latestBasic-workflowjob contains multiple steps (Basic Information, Checking out the repository, Information after checking out, List files in the repository)Basic Informationstep contains the actions to do some echoing.Checking out the repositorystep contains the action to checkout the repository. Here we are usingactions/checkoutv2which is a open source action. Check for other available actions hereInformation after checking outstep contains the action to echo some information about repository and runner.List files in the repositorystep contains the action to list the contents of the repository.
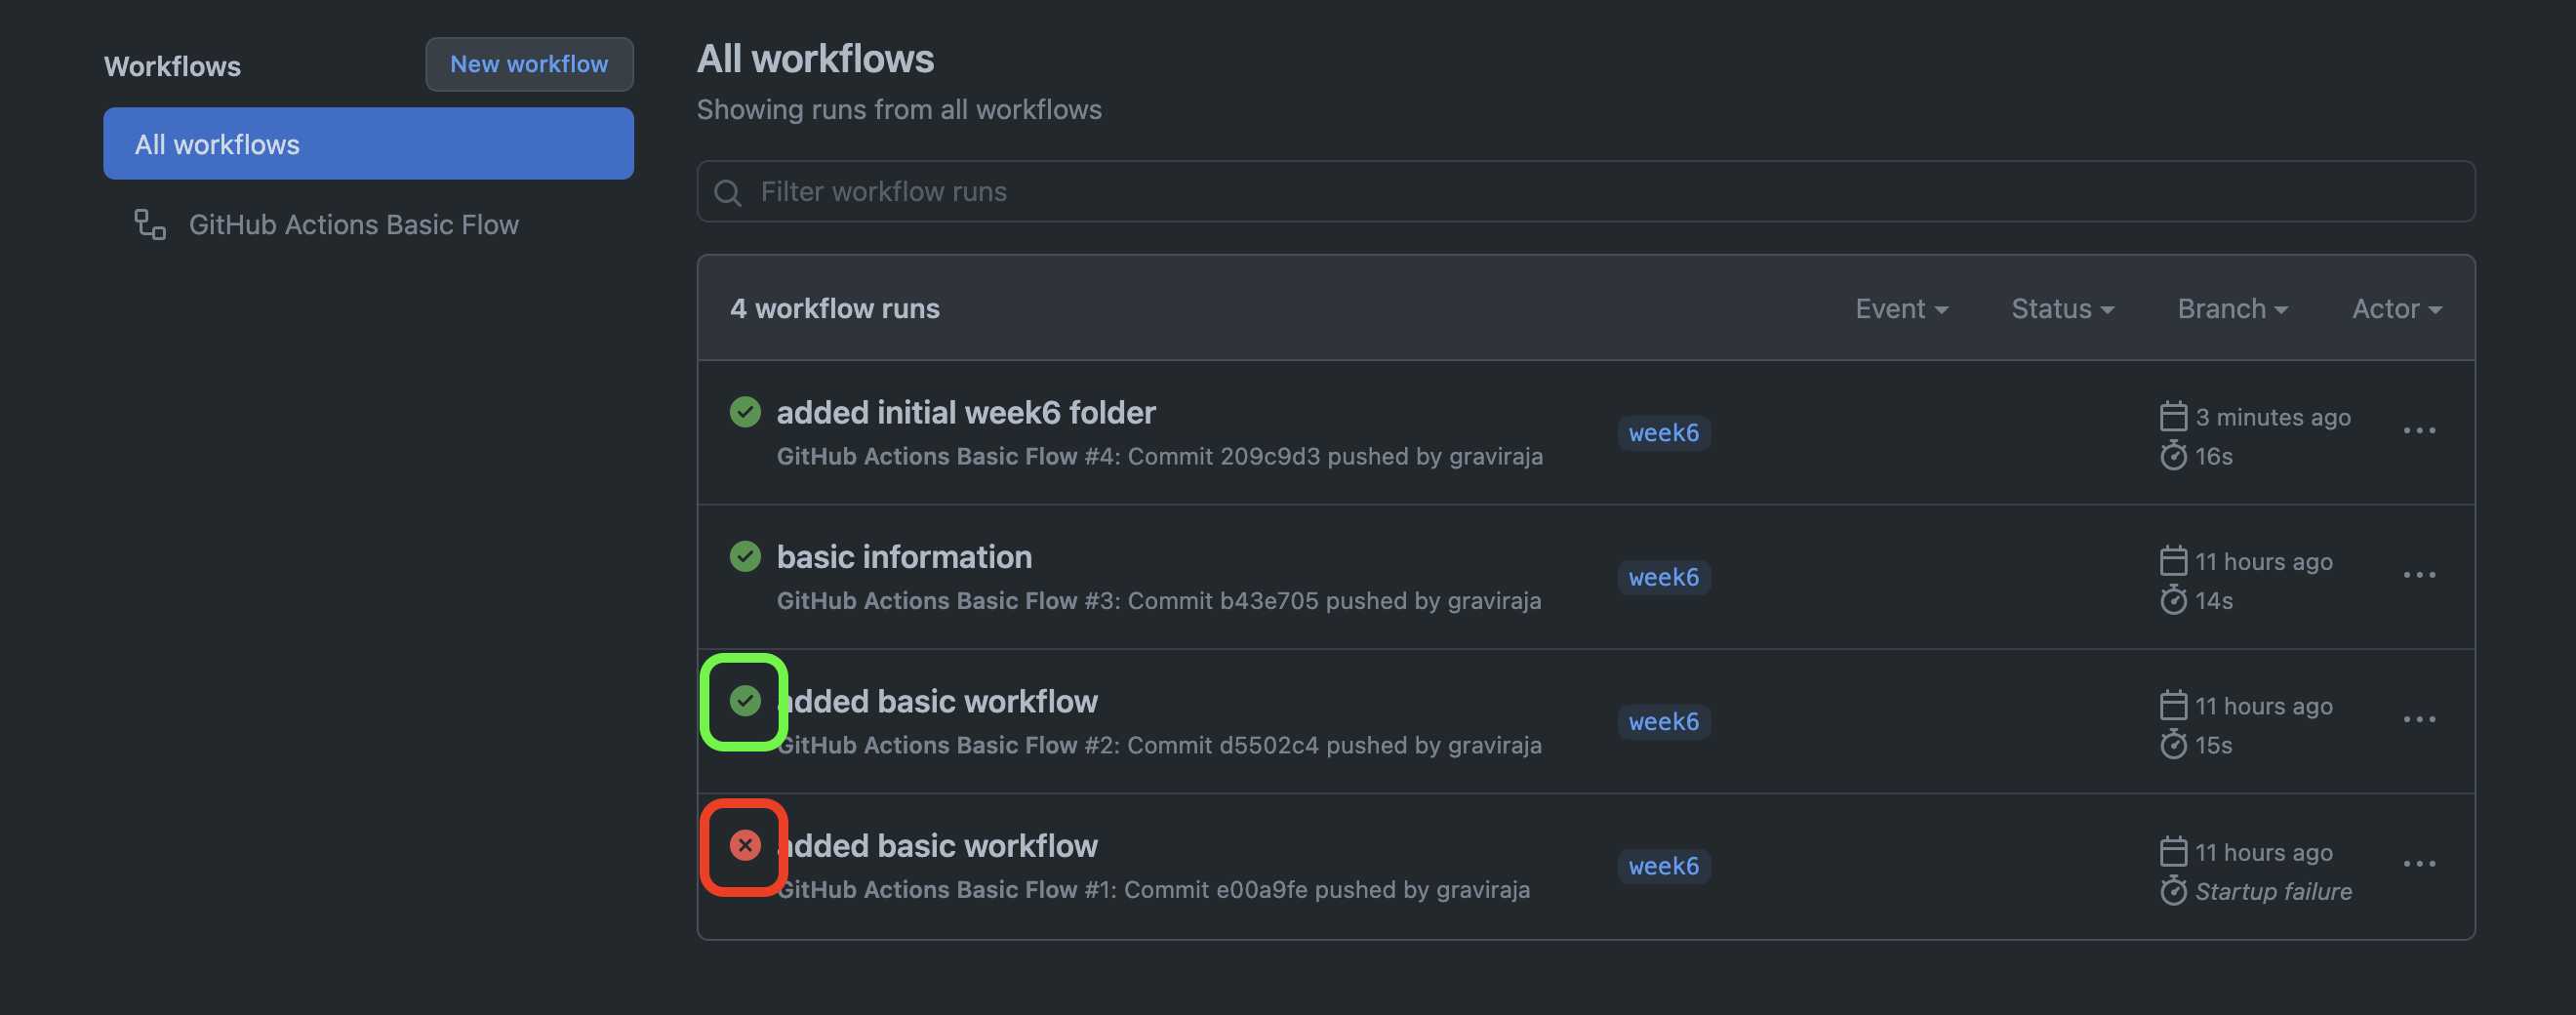
Commit the file. Let's see how does it look in github.
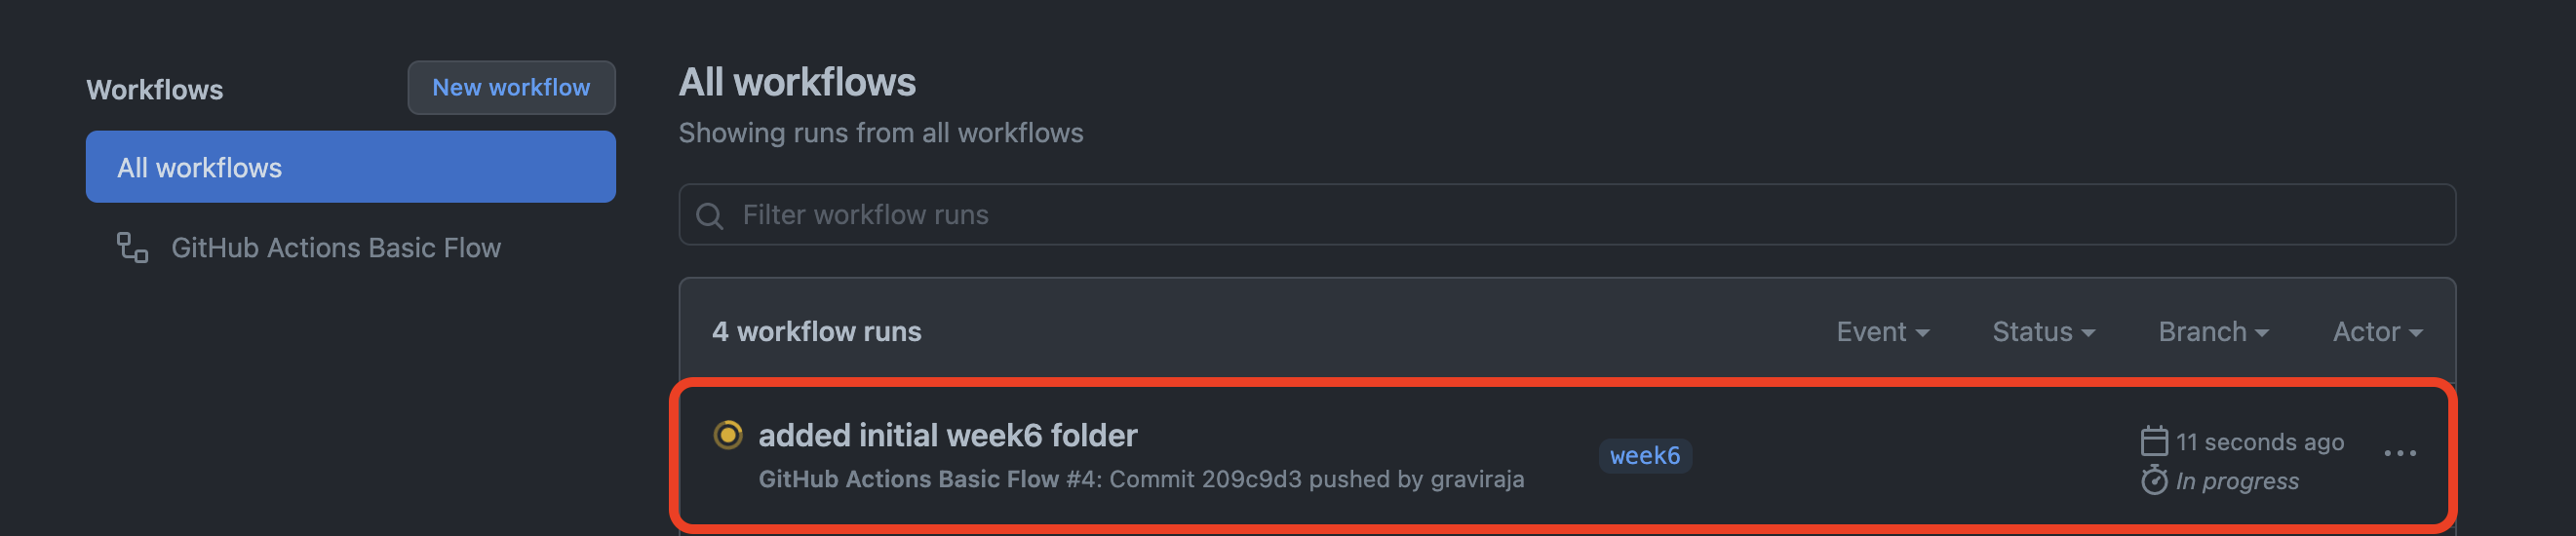
On GitHub, navigate to the main page of the repository.
Under your repository name, click Actions.


- In the left sidebar, you can see the workflows.

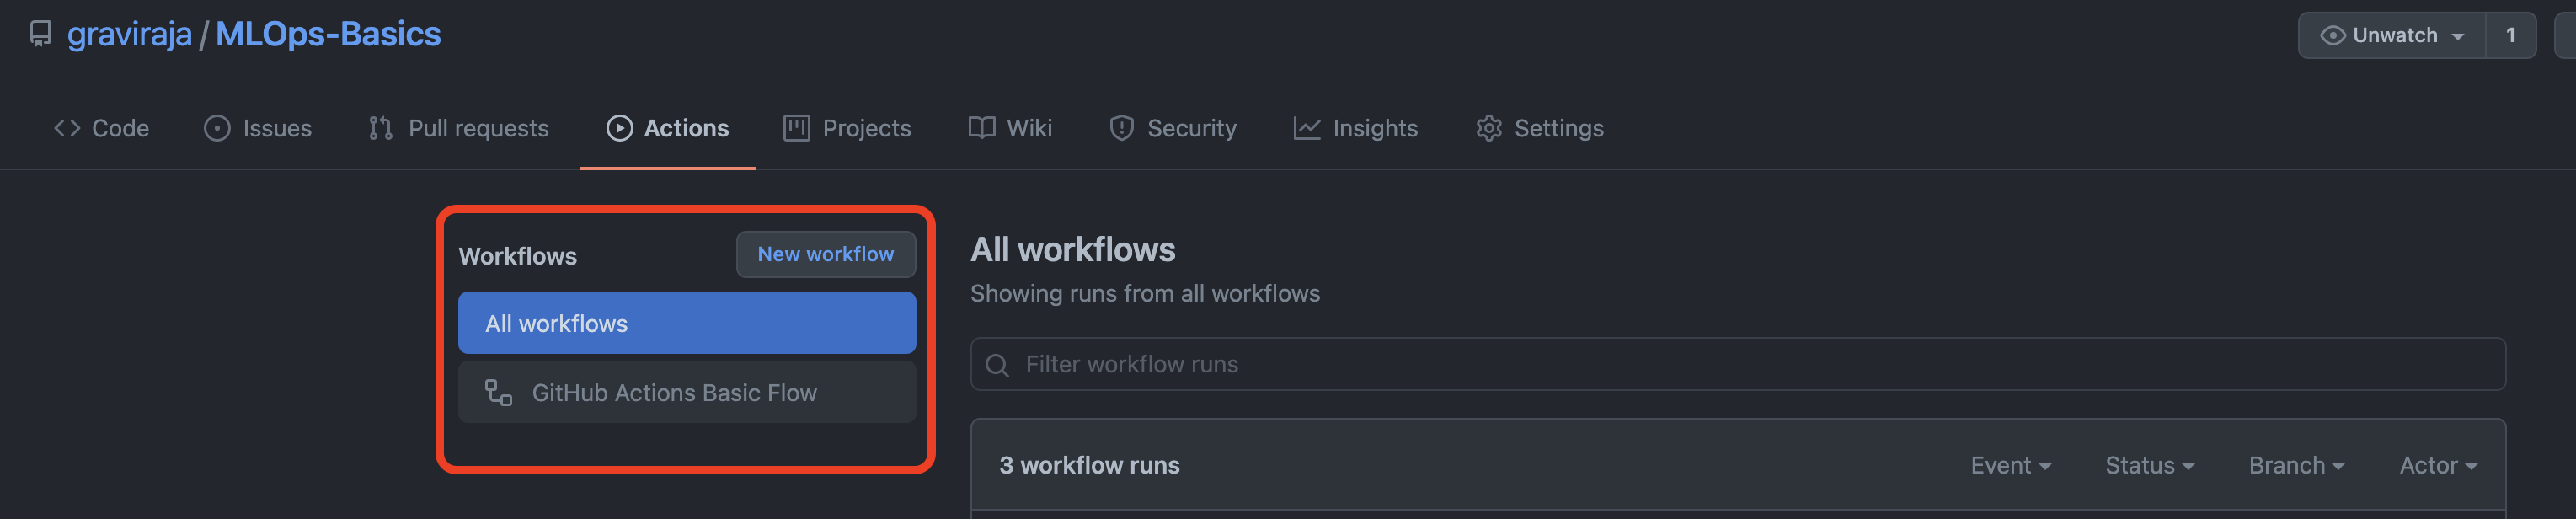
- You can see a workflow is trigged.

- Select the latest run of the required workflow.

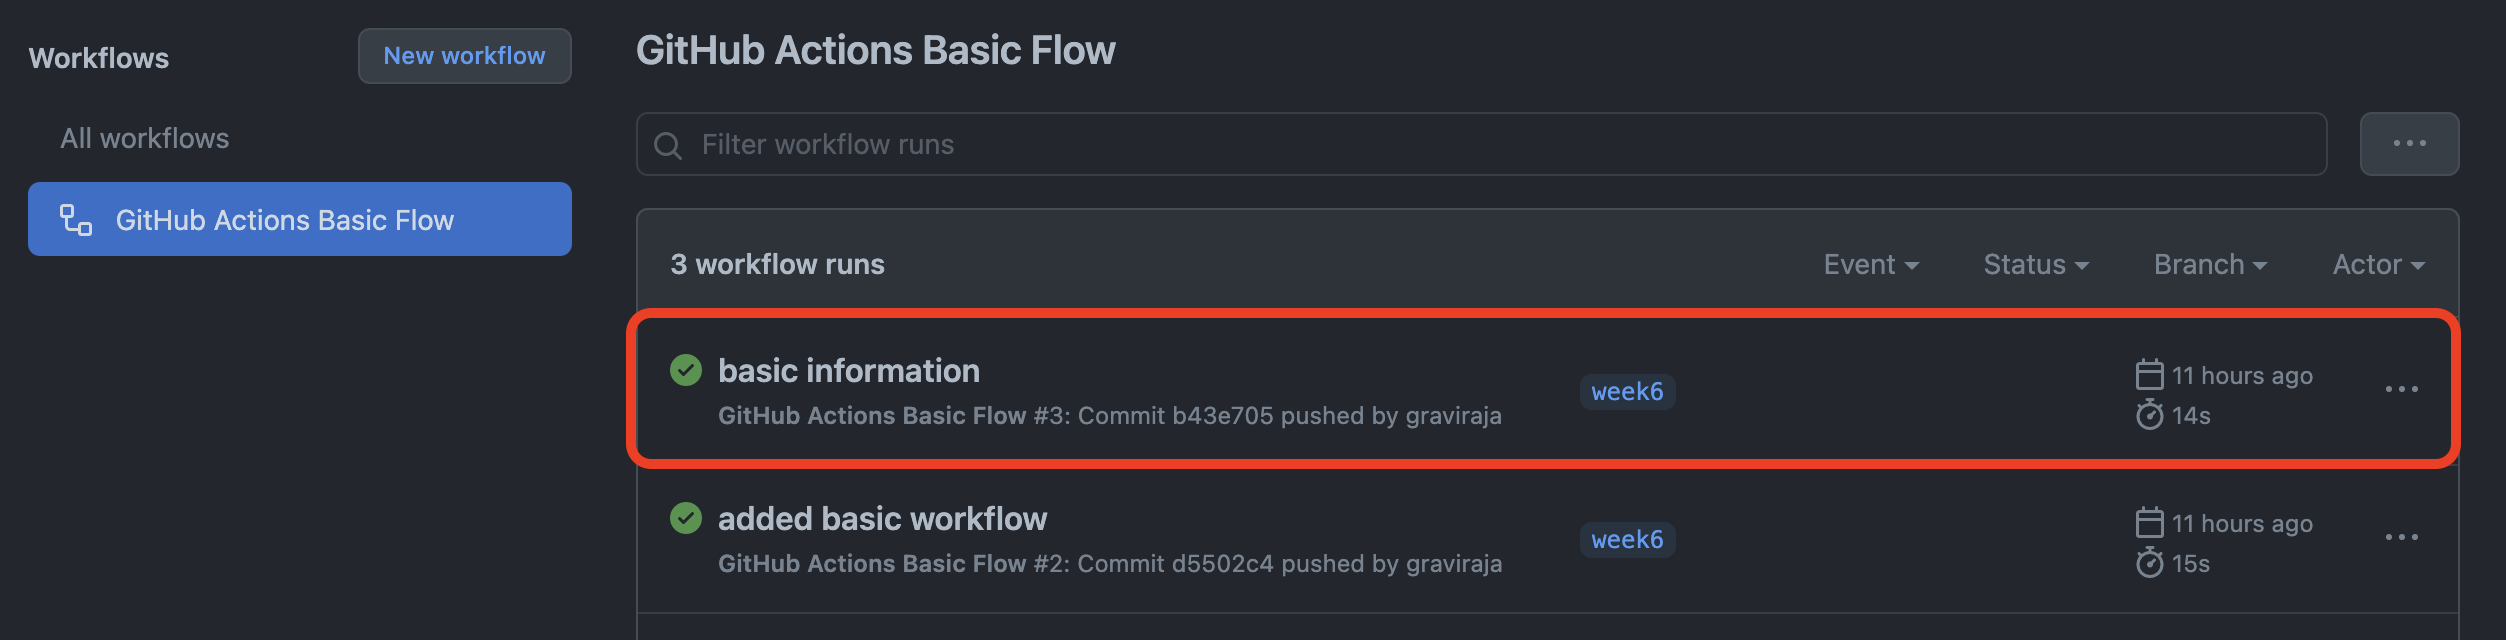
- Select the job

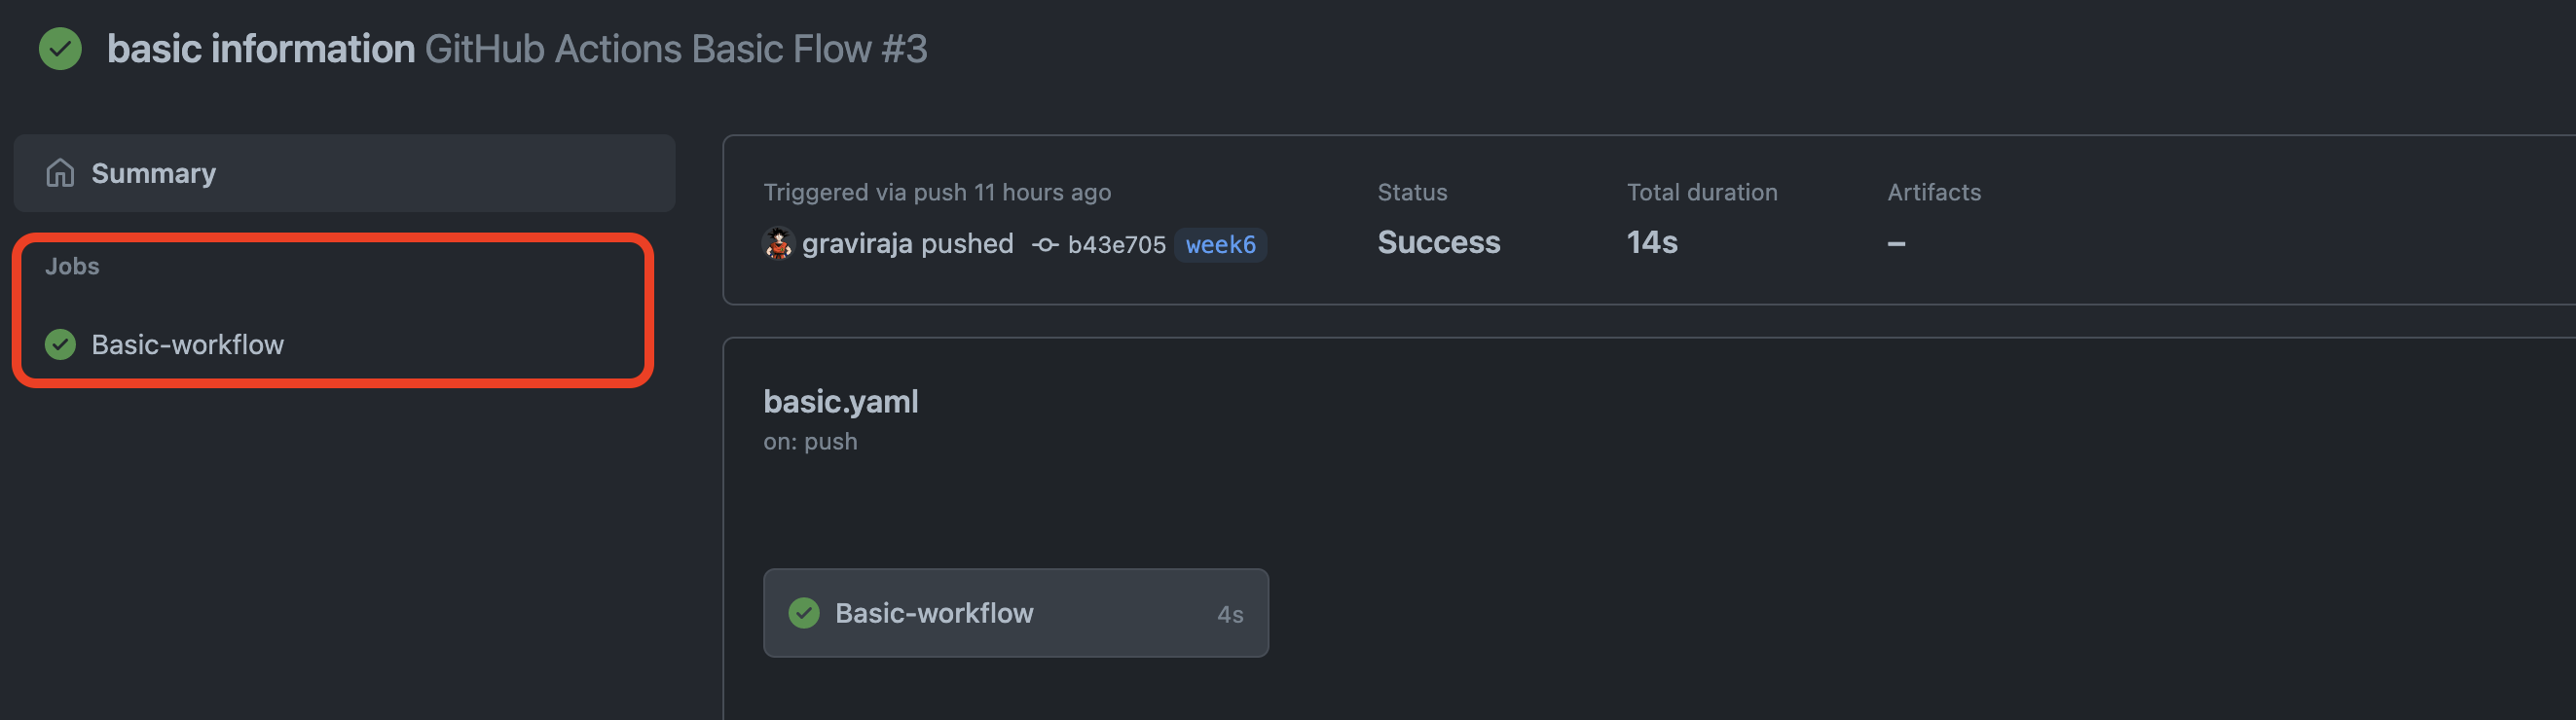
- Job contains all the steps it ran

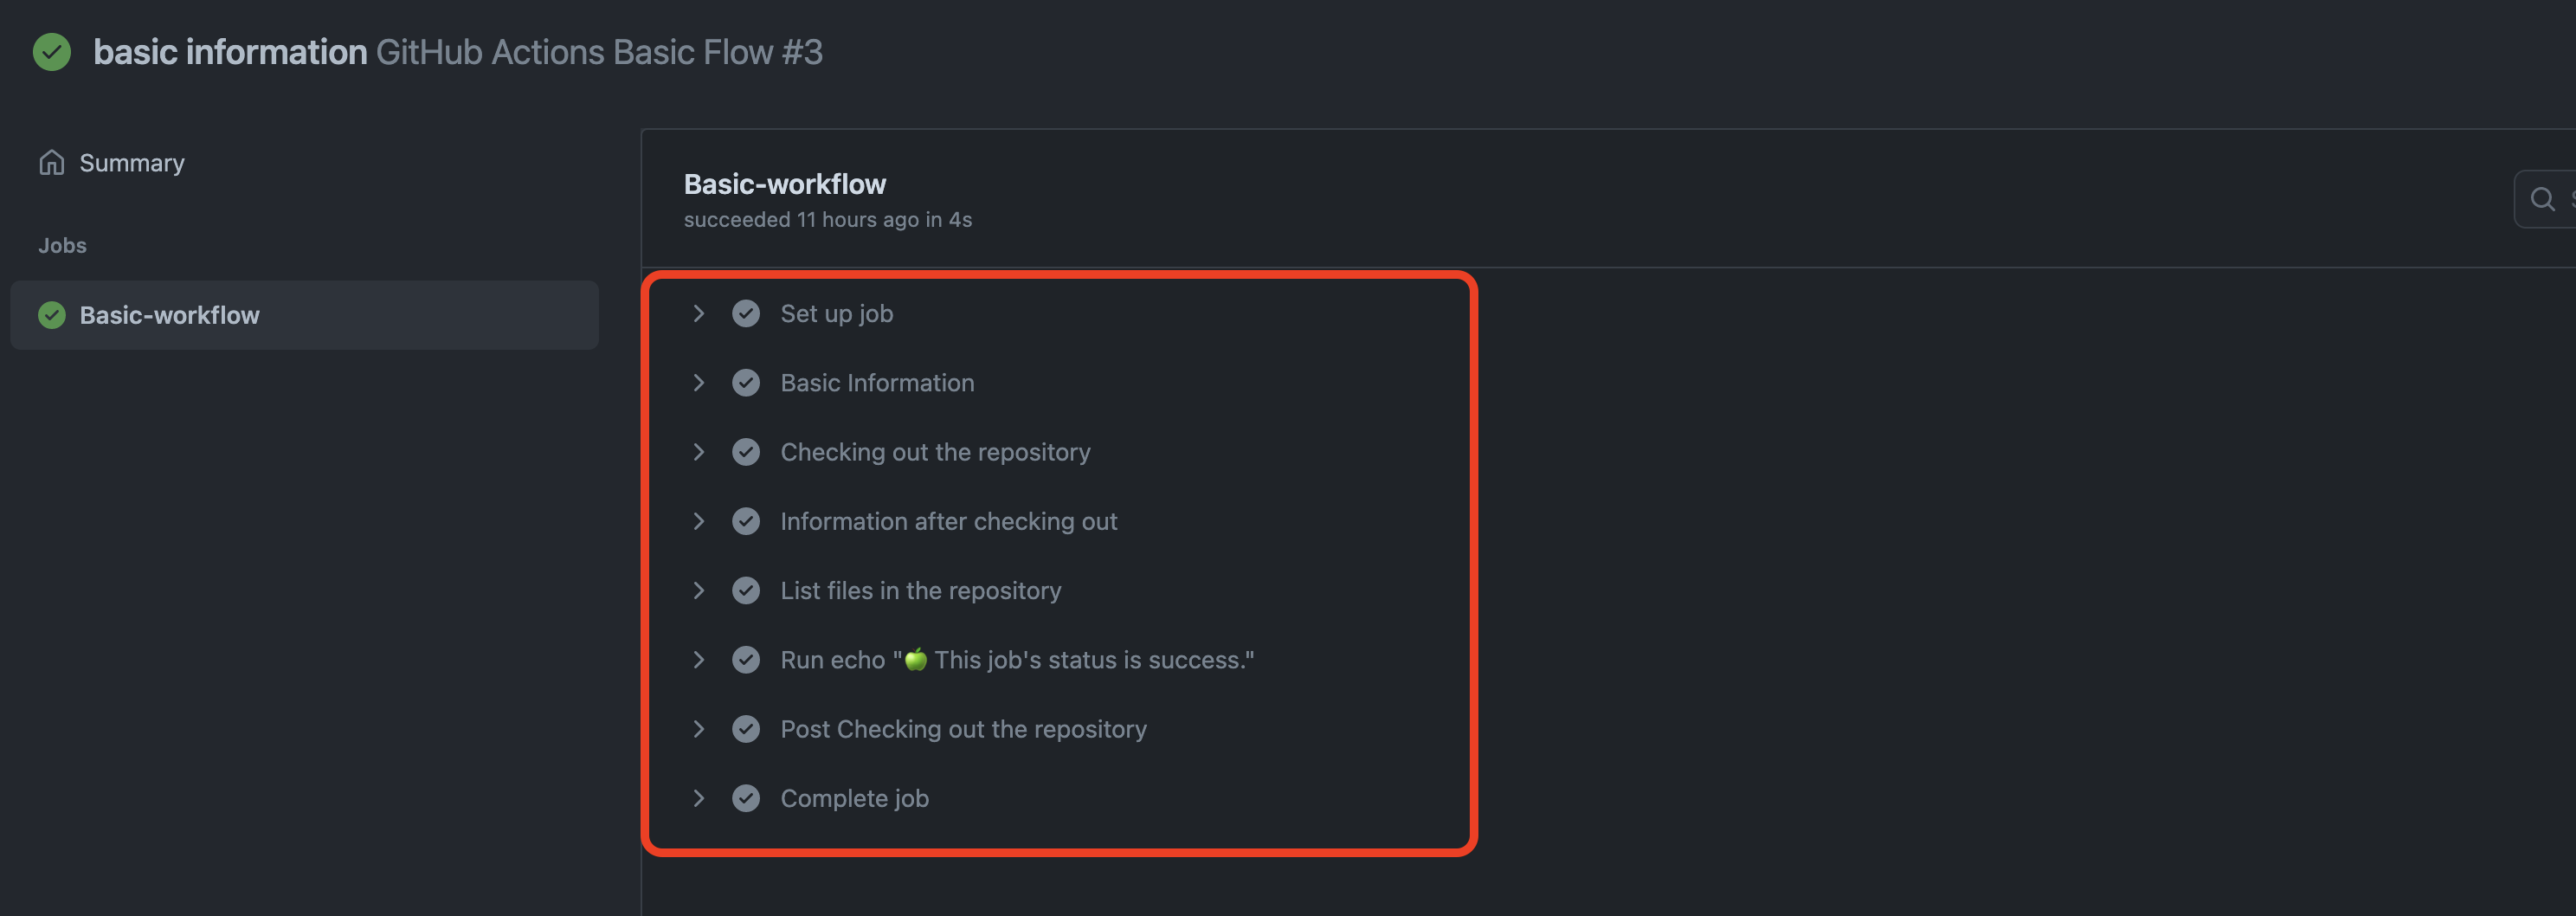
- The logs shows the execution of steps present in the job.

- The icon indicates whether the workflow ran sucessfully or not.

Now that we understand how to configure a basic workflow, let's configure workflow for the project.
In the previous posts, we have seen how to push the model to dvc, pull the model from dvc, create docker container and test it locally. Let's see how to do it using GitHub Actions.
⚙️ Creating Google Service Account
I have used Google Drive as the remote server for storing the trained model. In order to pull the model from Google Drive we need authentication. Ideally a link will be prompted (for the first time) when we attempt to push / pull the model from remote server and copy&paste the password prompted.
But it will be difficult to do this automatically. Inorder to be able to download the model and test it automatically in CICD, service account can be used.
What are service accounts?
A service account is a Google account associated with your GCP project, and not a specific user. They are intended for scenarios where your code needs to access data on its own, e.g. running inside a Compute Engine, automatic CI/CD, etc. No interactive user OAuth authentication is needed.
Go to GCP consle and create a project.
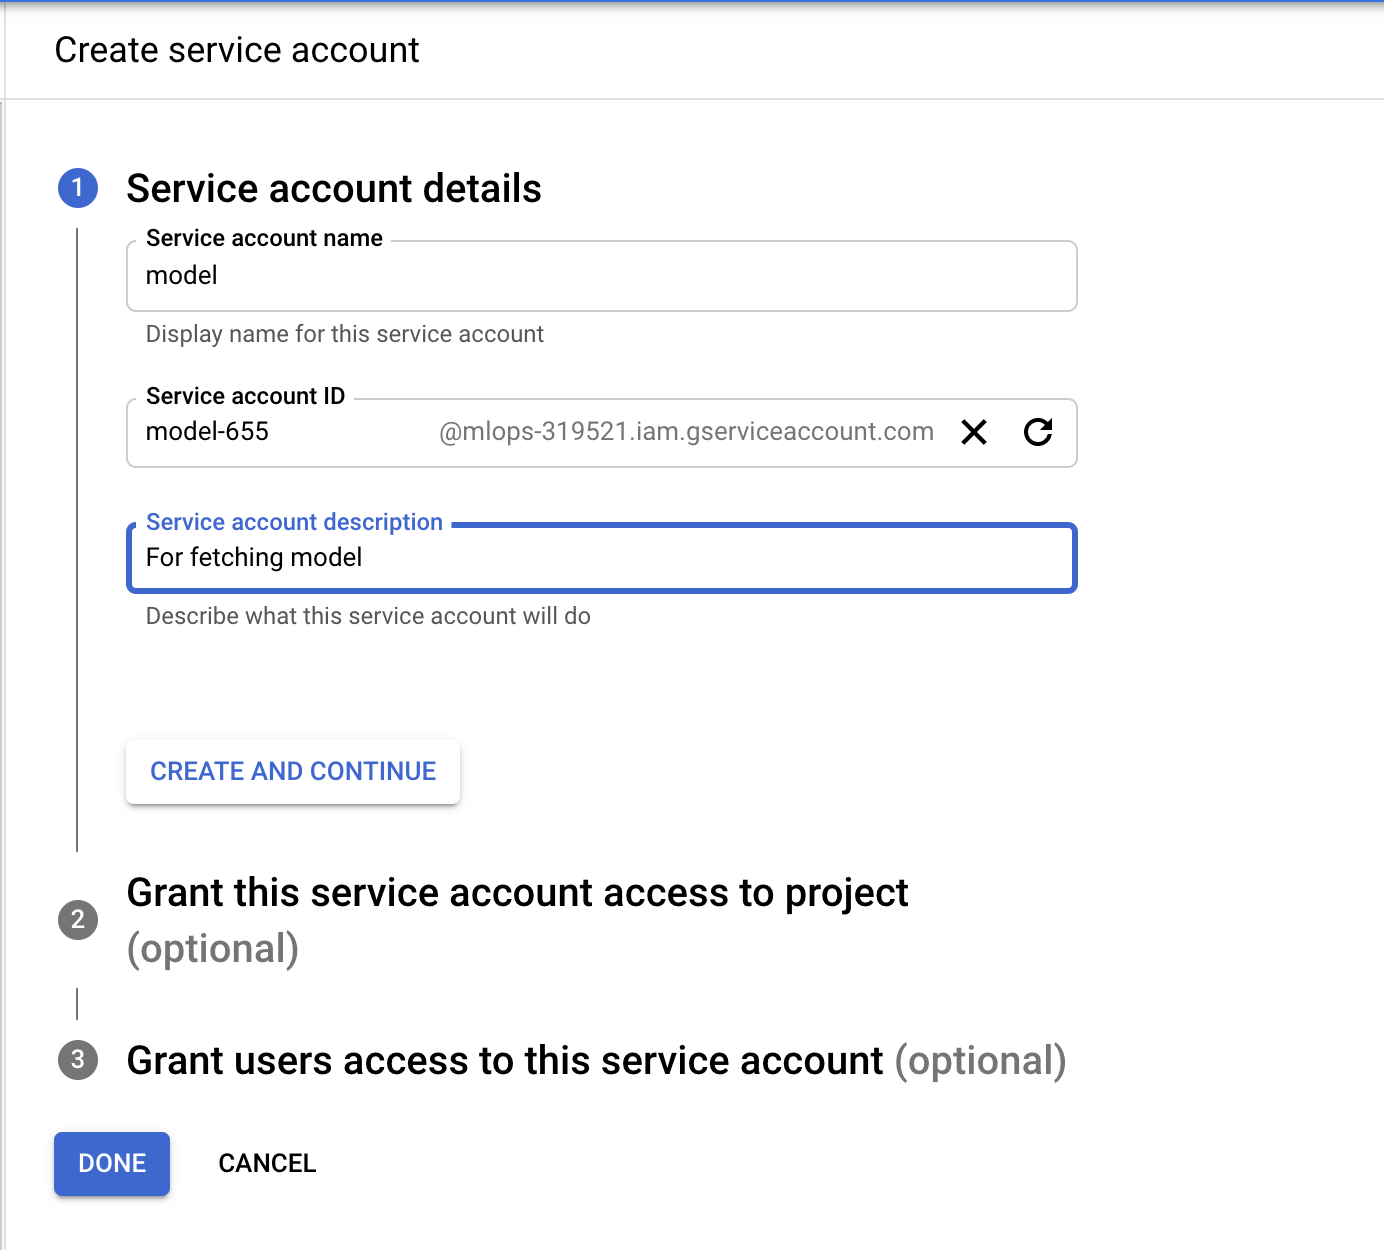
To create a service account, navigate to
IAM & Adminin the left sidebar, and selectService Accounts. Click+ CREATE SERVICE ACCOUNT, on the next screen, enter Service account name e.g. "MLOps", and click Create.

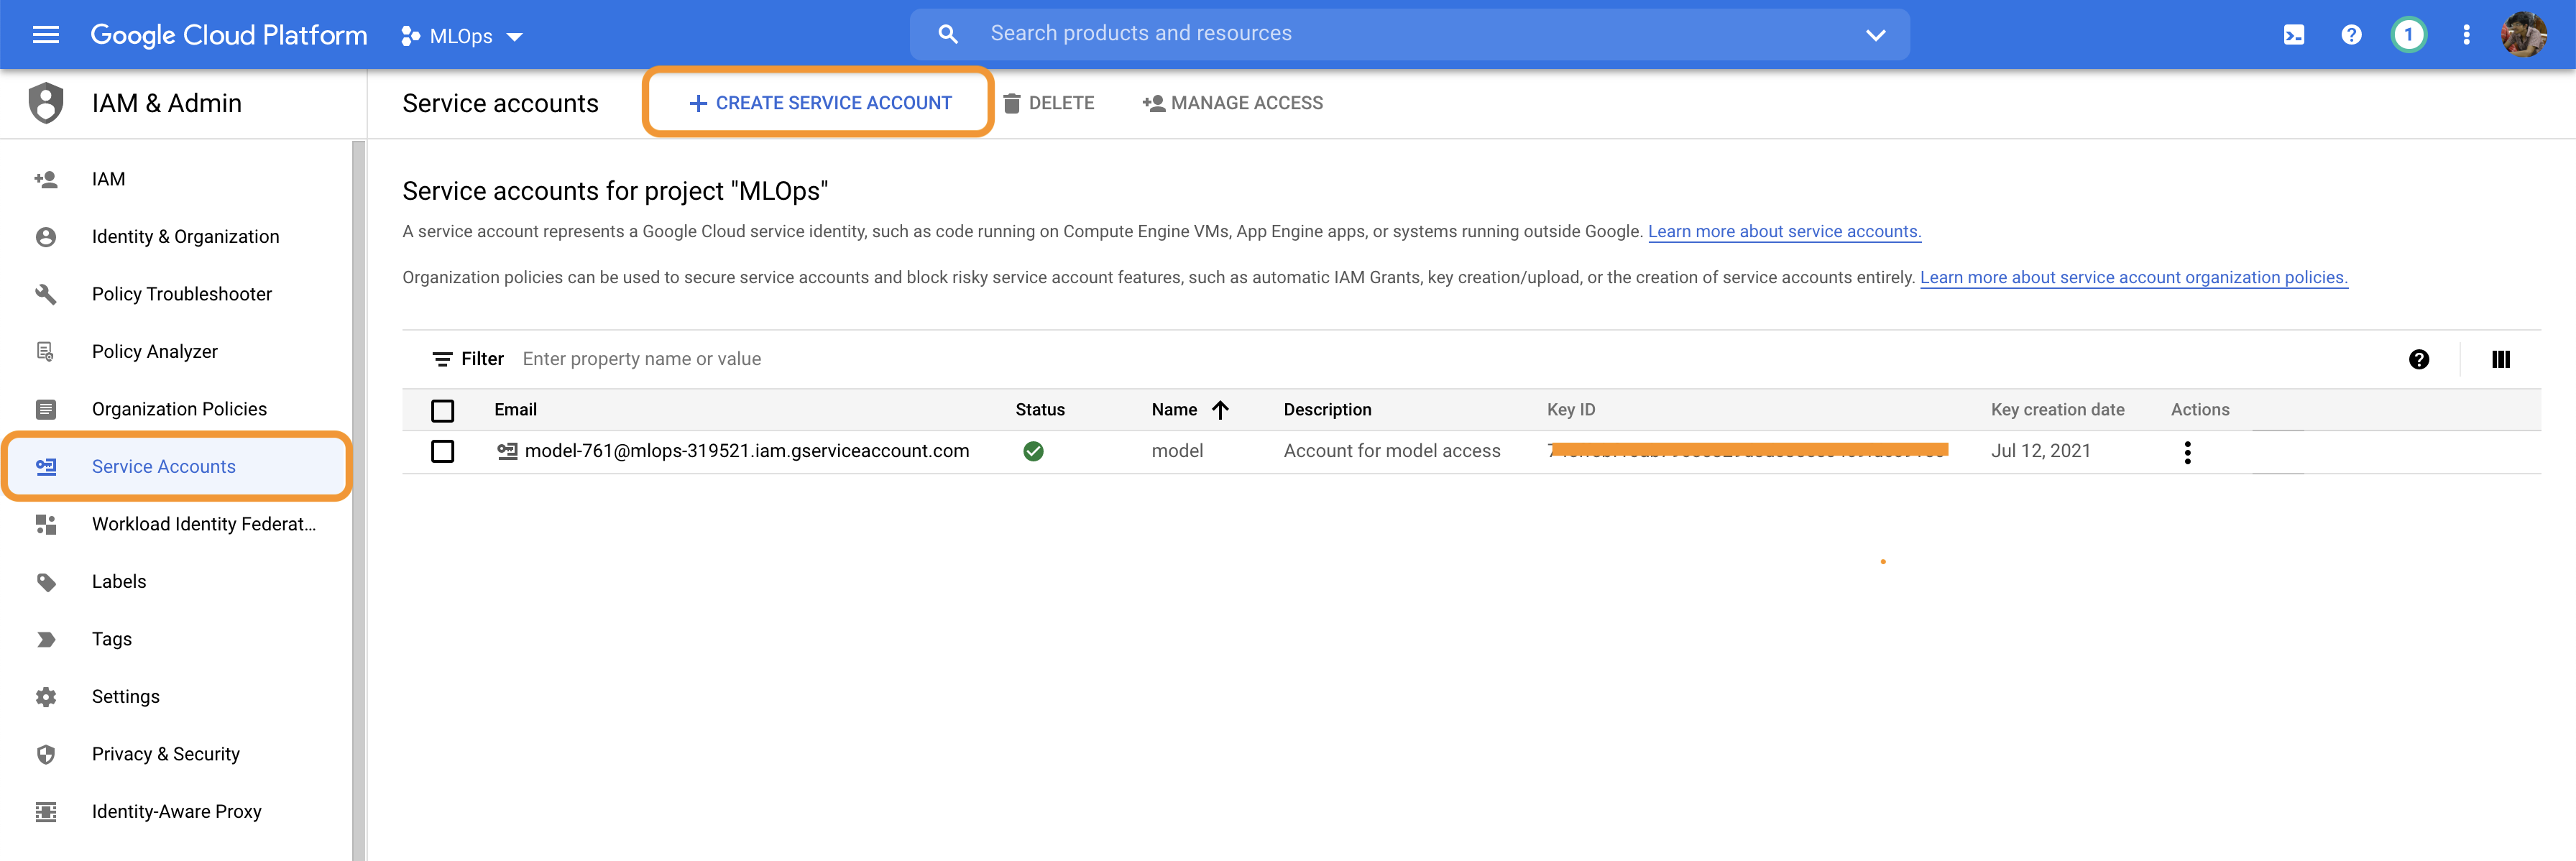
- Provide a name to service account like
modeland clickDone

- Go the
keystab and create a new key. When prompted choose the key type as json.

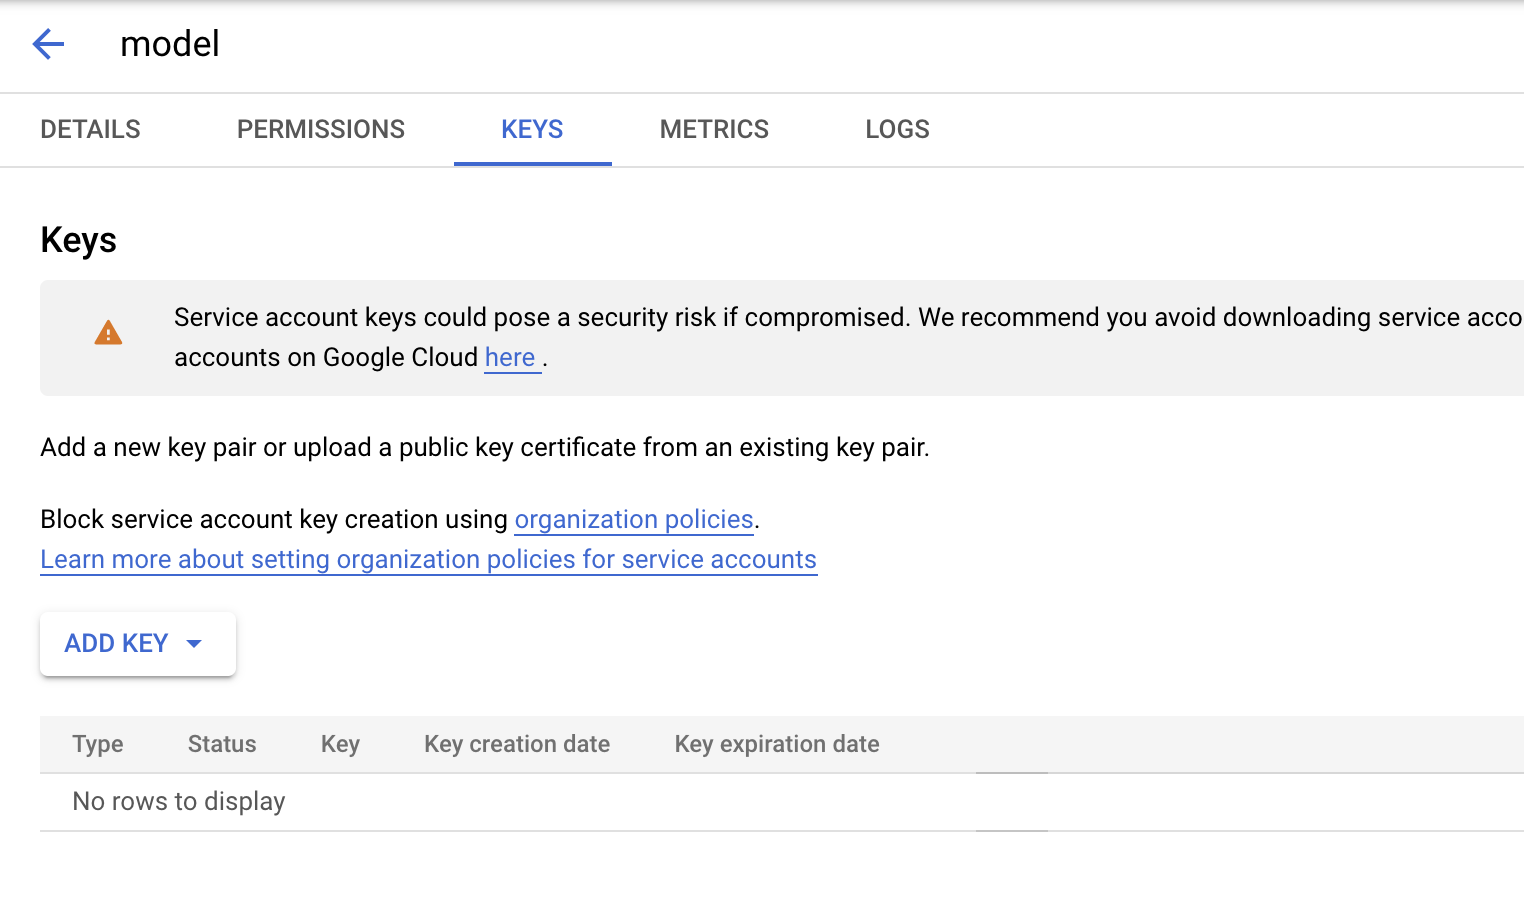
A json file will be downloaded
⚠️ Be careful about sharing the key file with others.
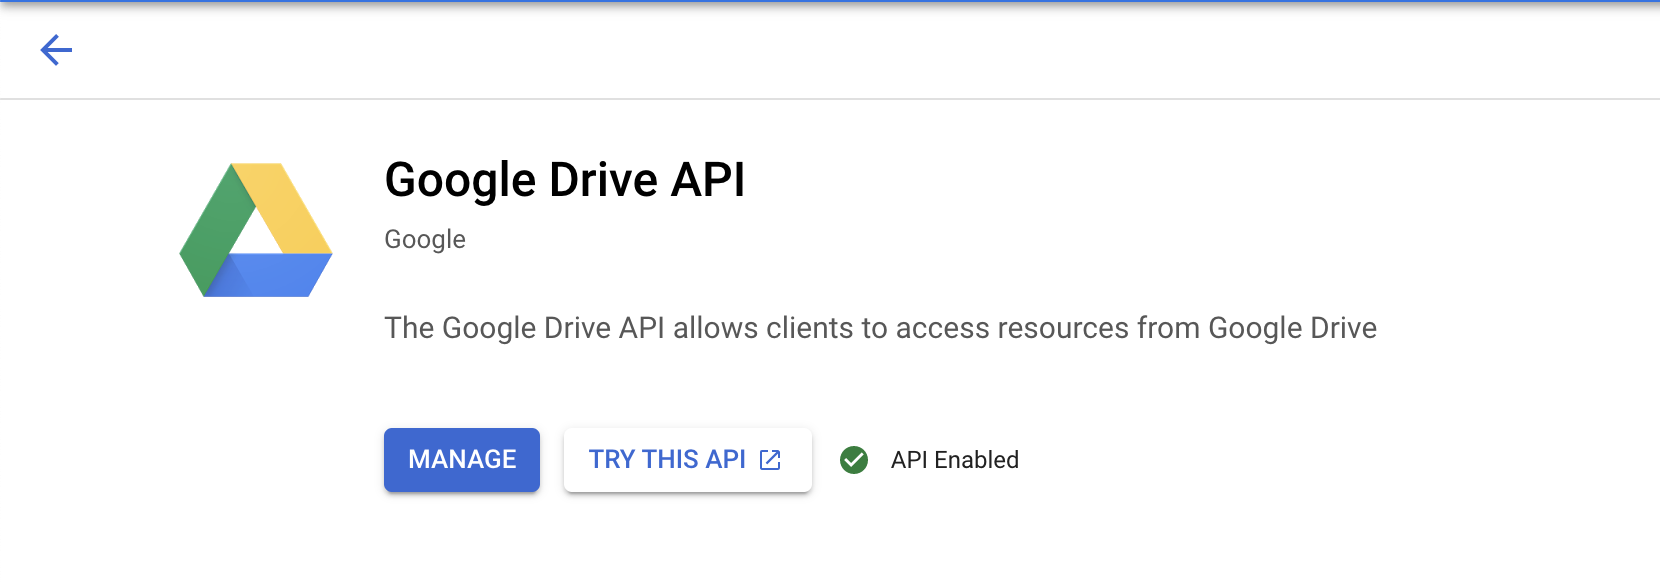
- Enable Google Drive API for the project. Search for Google Drive API in the search bar and enable it for the project


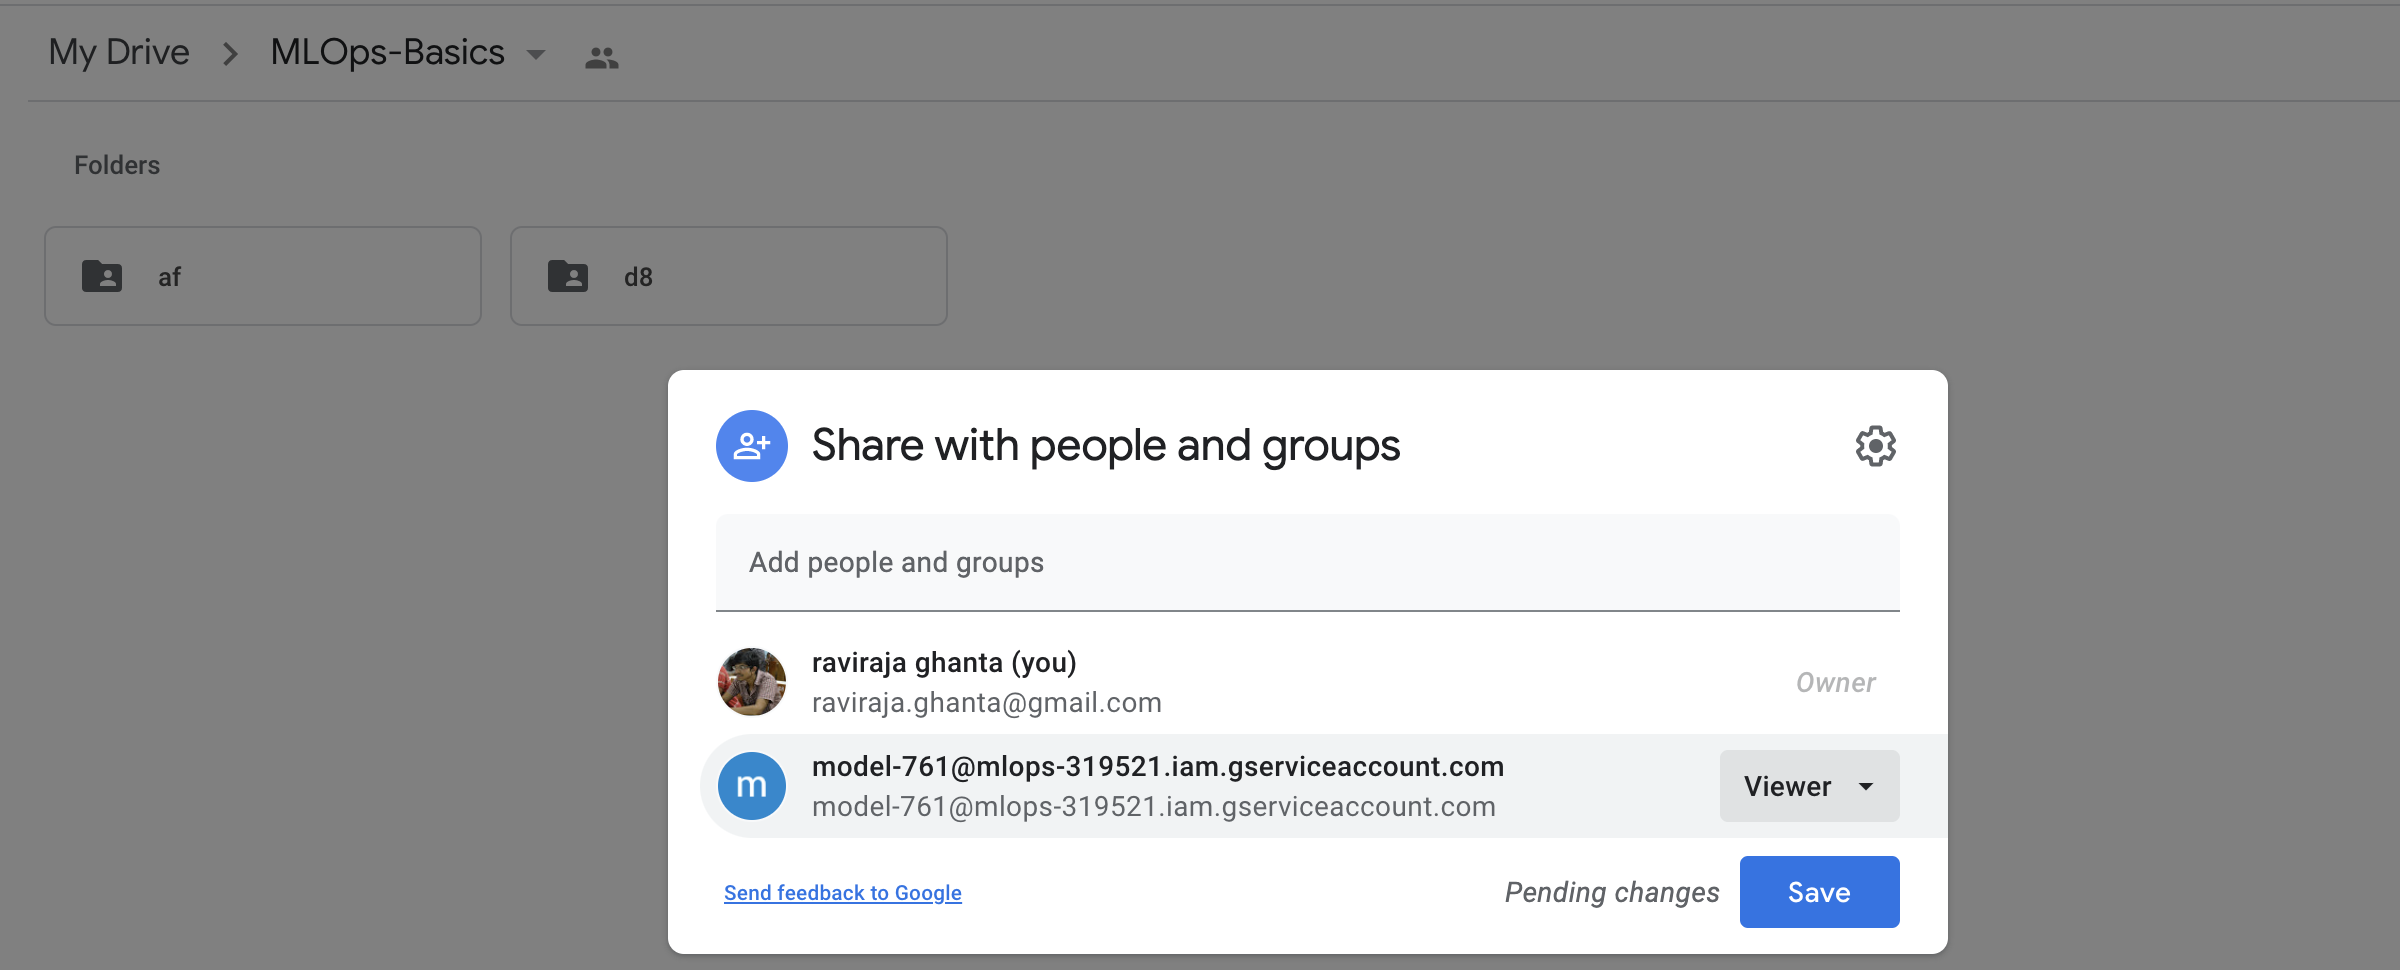
🤝 Giving access to service account
Now that service account is created, add this to the remote server (google drive).
Go to the google drive and navigate to the remote storage folder (MLOps) and this service account email in the sharing permissions.

⚙️ Configuring DVC to use Google Service account
Now let's modify the dvc to use service account instead of acutal google account.
This can be done via
dvc remote add -d storage gdrive://19JK5AFbqOBlrFVwDHjTrf9uvQFtS0954
dvc remote modify storage gdrive_use_service_account true
dvc remote modify storage gdrive_service_account_json_file_path creds.json
Let's understand the commands here:
We are creating a default remote storage with name
storageand linkgdrive://19JK5AFbqOBlrFVwDHjTrf9uvQFtS0954Configuring the remote storage to use service account
Providing the credentials (json file which is created)
We can test it by trying to pull the model using the command:
cd dvcfiles
dvc pull trained_model.dvc
Configuring GitHub Action
Before creating new a workflow, let's modify the dockerfile to accomodate all the changes.
FROM huggingface/transformers-pytorch-cpu:latest

COPY ./ /app
WORKDIR /app

# install requirements
RUN pip install "dvc[gdrive]"
RUN pip install -r requirements_inference.txt

# initialise dvc
RUN dvc init --no-scm
# configuring remote server in dvc
RUN dvc remote add -d storage gdrive://19JK5AFbqOBlrFVwDHjTrf9uvQFtS0954
RUN dvc remote modify storage gdrive_use_service_account true
RUN dvc remote modify storage gdrive_service_account_json_file_path creds.json

# pulling the trained model
RUN dvc pull dvcfiles/trained_model.dvc

ENV LC_ALL=C.UTF-8
ENV LANG=C.UTF-8

# running the application
EXPOSE 8000
CMD ["uvicorn", "app:app", "--host", "0.0.0.0", "--port", "8000"]
NOTE: Do not share the credentials json file publicly.
Now let's create a new github action file in .github/worflows folder as build_docker_image.yaml
name: Create Docker Container

on: [push]

jobs:
  mlops-container:
    runs-on: ubuntu-latest
    defaults:
      run:
        working-directory: ./week_6_github_actions
    steps:
      - name: Checkout
        uses: actions/checkout@v2
        with:
          ref: ${{ github.ref }}
      - name: Build container
        run: |
          docker network create data
          docker build --tag inference:latest .
          docker run -d -p 8000:8000 --network data --name inference_container inference:latest
The file pretty self explanatory.
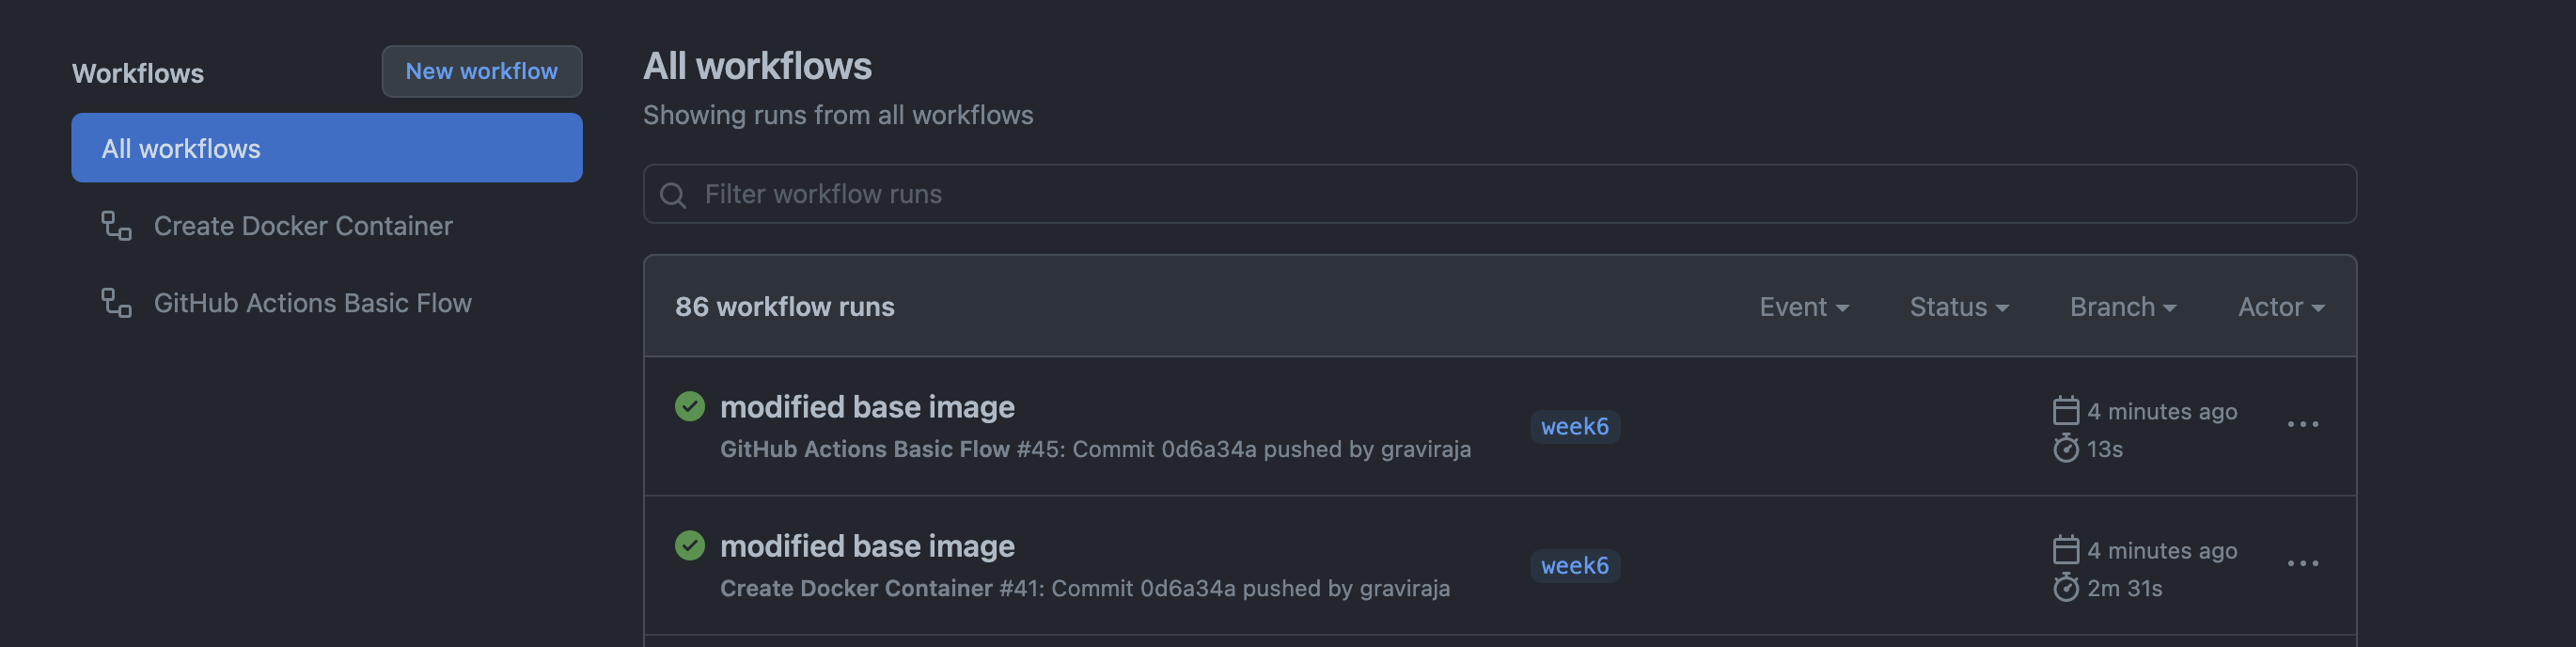
In Github, this will look this:

🔚
This concludes the post. We have seen how to automatically create a docker image using GitHub Actions. But the problem here is it is not accessible. Also json way of configuring credentials is not a good practice. In the next post, I will explore into AWS S3 as the remote storage, AWS ECR for storing the docker images.
Complete code for this post can also be found here: Github