- Published on
MLOps Basics [Week 8]: Serverless Deployment - AWS Lambda
- Authors

- Name
- Raviraja Ganta
- @raviraja_ganta


How to deploy Docker Image in ECR?
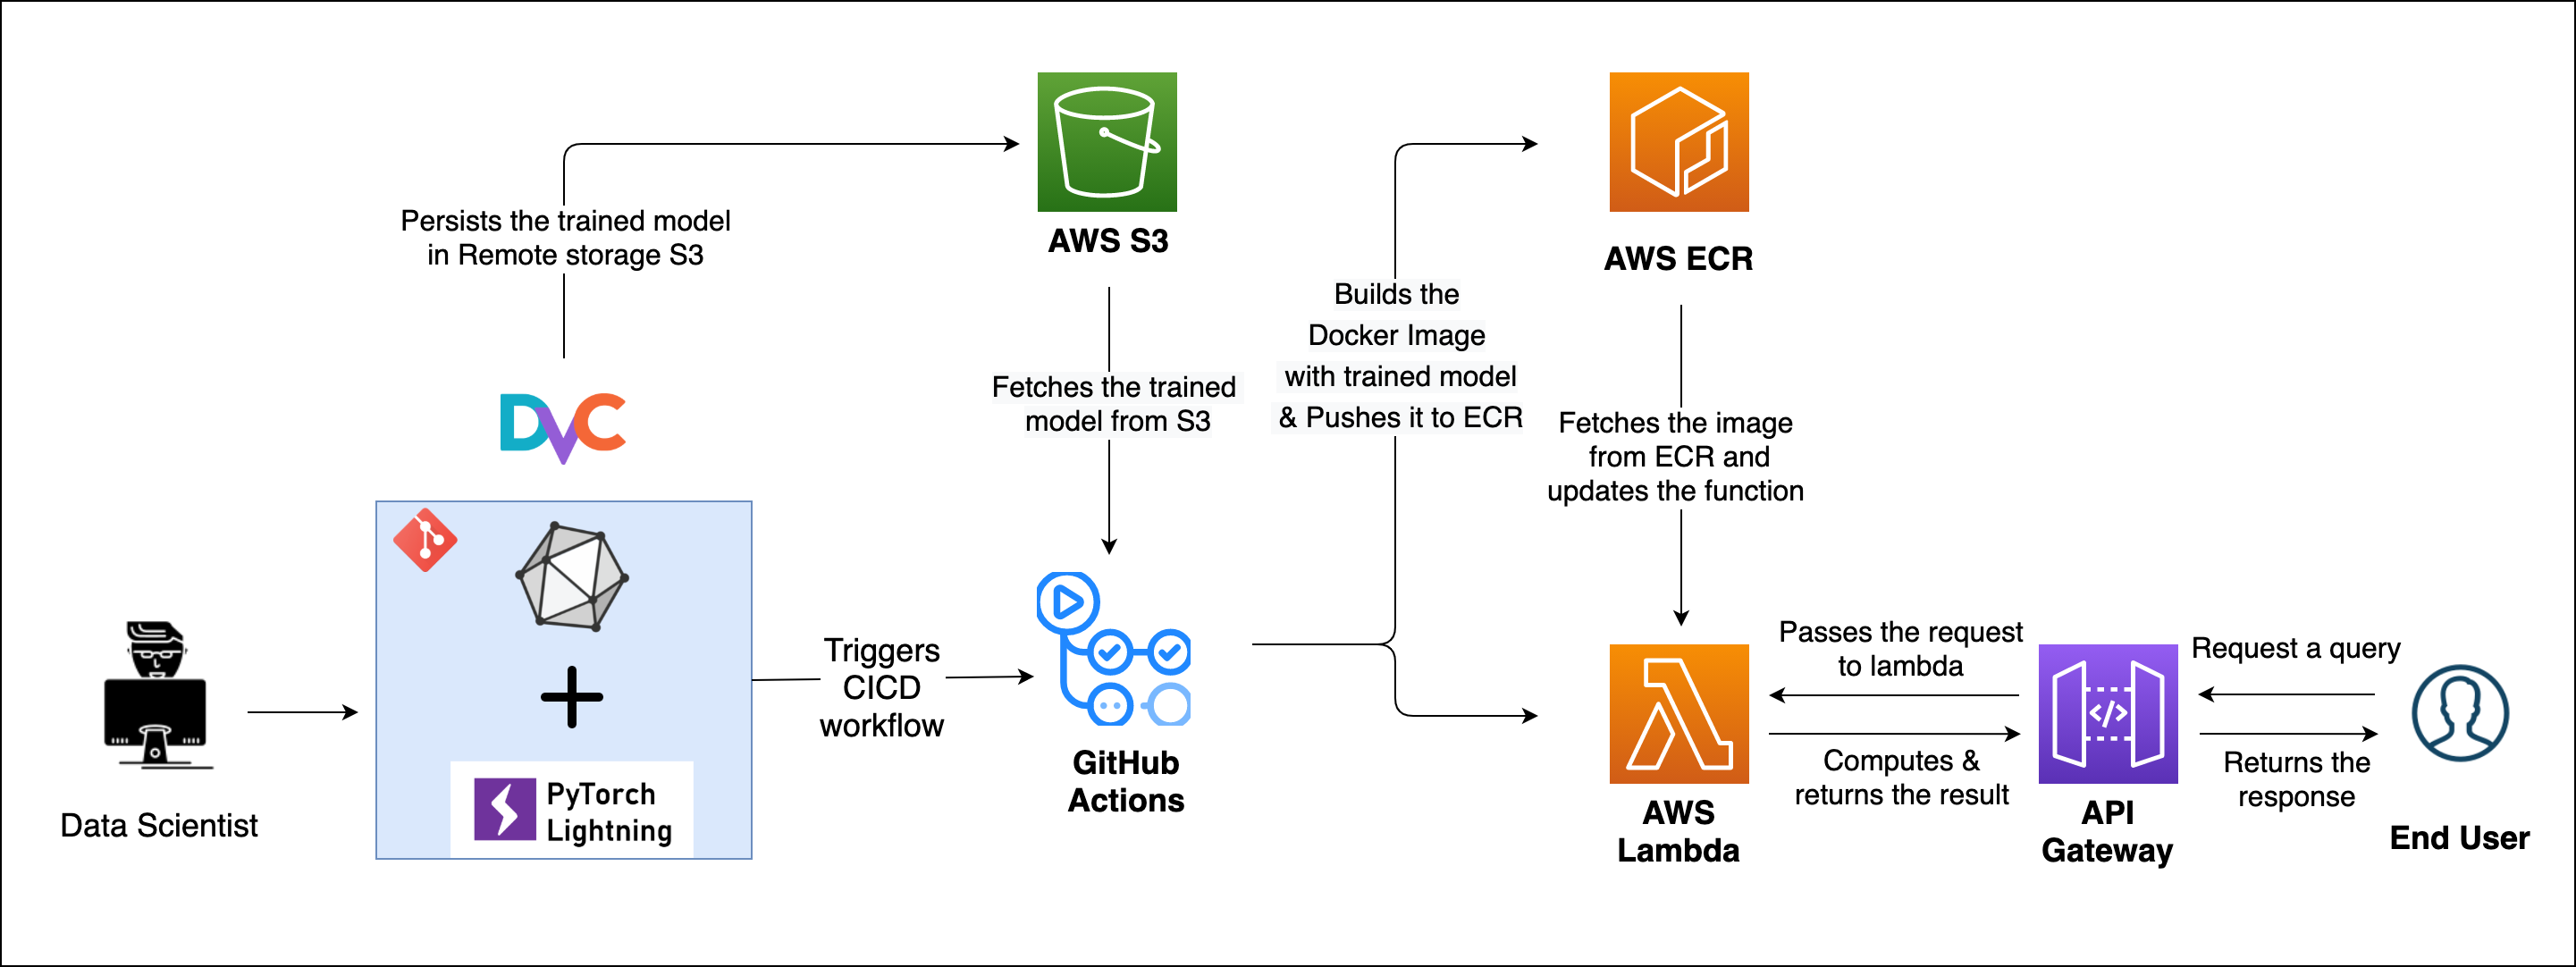
In the previous post we have seen how to build a docker image and persist it in ECR. In the post, I will explore how to deploy that image.
There are many ways to deploy the docker image in cloud.


Since there are different ways to deploy the image, I will explore deployment using Serverless - Lambda.
Some of the other serverless architecture deployment providers are:
In this post, I will be going through the following topics:
Basics of ServerlessBasics of AWS LambdaTriggering Lambda with API GatewayDeploying Container using LambdaAutomating deployment to Lambda using Github Actions
Basics of Serverless
Typical model deployment looks like:
Need to setup and maintain the servers (ec2 instances) in which models are deployed
Need to manage scaling: How many servers are required?
Need to manage time to deploy models
How can a single developer manage a complex service?
This is where the serverless architecture comes into picture.
What is Serverless Architecture?
A serverless architecture is a way to build and run applications and services without having to manage infrastructure. The application still runs on servers, but all the server management is done by third party service (AWS). We no longer have to provision, scale, and maintain servers to run the applications, databases, and storage systems.
Why use serverless architectures?
By using a serverless architecture, developers can focus on their core product instead of worrying about managing and operating servers or runtimes, either in the cloud or on-premises. This reduced overhead lets developers reclaim time and energy that can be spent on developing great products.
The advantages of using a serverless architecture are:
It abstracts away the server details and lets you serve your code or model with few lines of code
It will handle the provising of servers
It will scale the machines up and down depending on usage
Does the load balancing
No cost when the code is not running
There are some downsides also to serverless architecture.
Response latency: Since the code is not running readily and will only run once it is called, there will be latency till the code is up and running (loading a model in case of ML).Not useful for long running processes: Serverless providers charge for the amount of time code is running, it may cost more to run an application with long-running processes in a serverless infrastructure compared to a traditional one.Difficult to debug: Debugging is difficult since the developer cannot have the access(ssh) to the machine where the code is running.Vendor limitations: Setting up a serverless architecture with one vendor can make it difficult to switch vendors if necessary, especially since each vendor offers slightly different features and workflows.
Basics of AWS Lambda
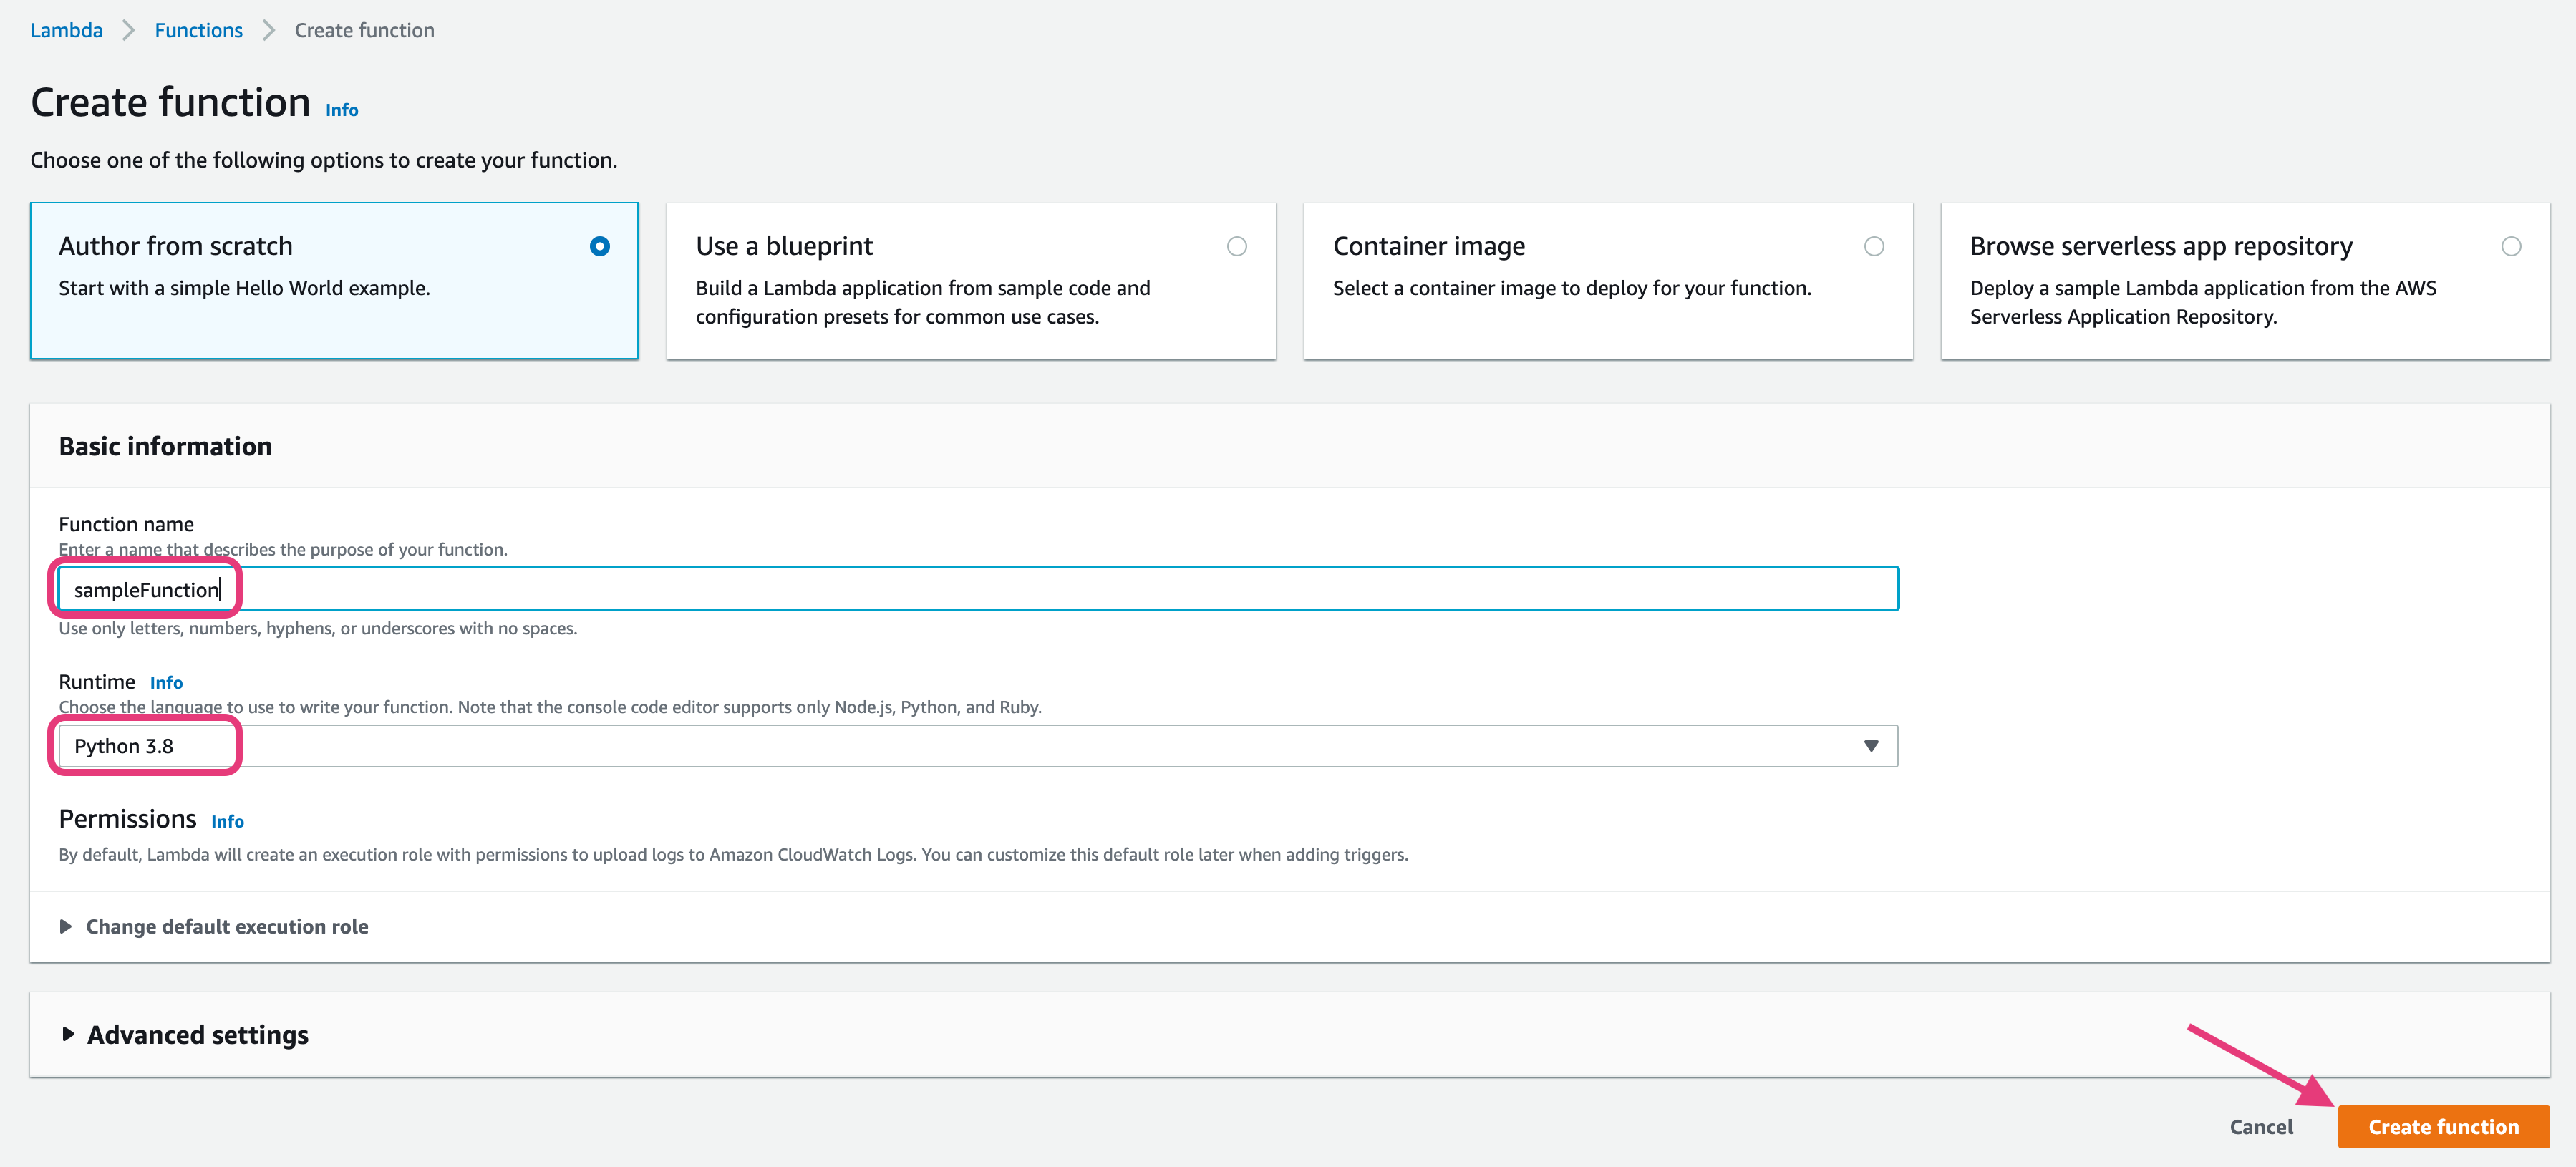
Let's create a basic function.
Sign in to the AWS Management Console and open the Amazon Lambda console at https://console.aws.amazon.com/lambda/home
Click on
Create Function


- Provide some name to the function and choose python as the runtime.

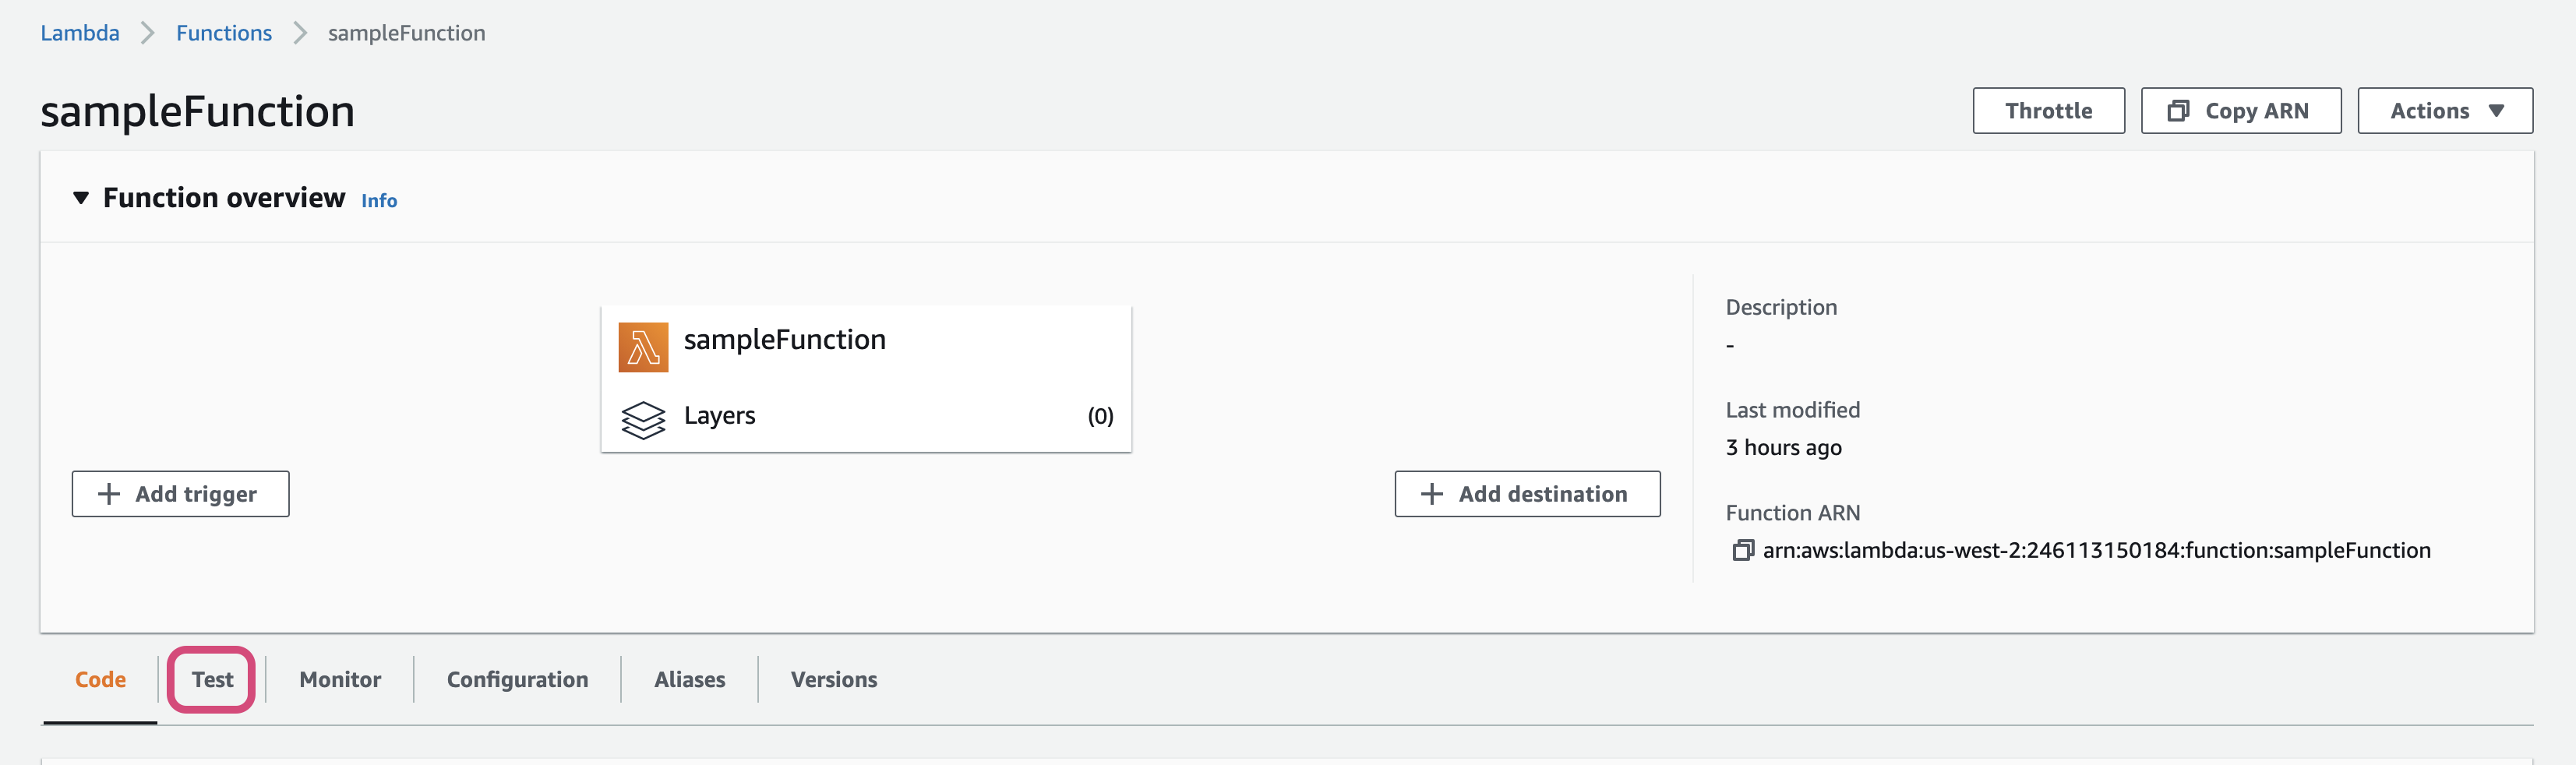
- Go to the
Testsection and click onTestbutton

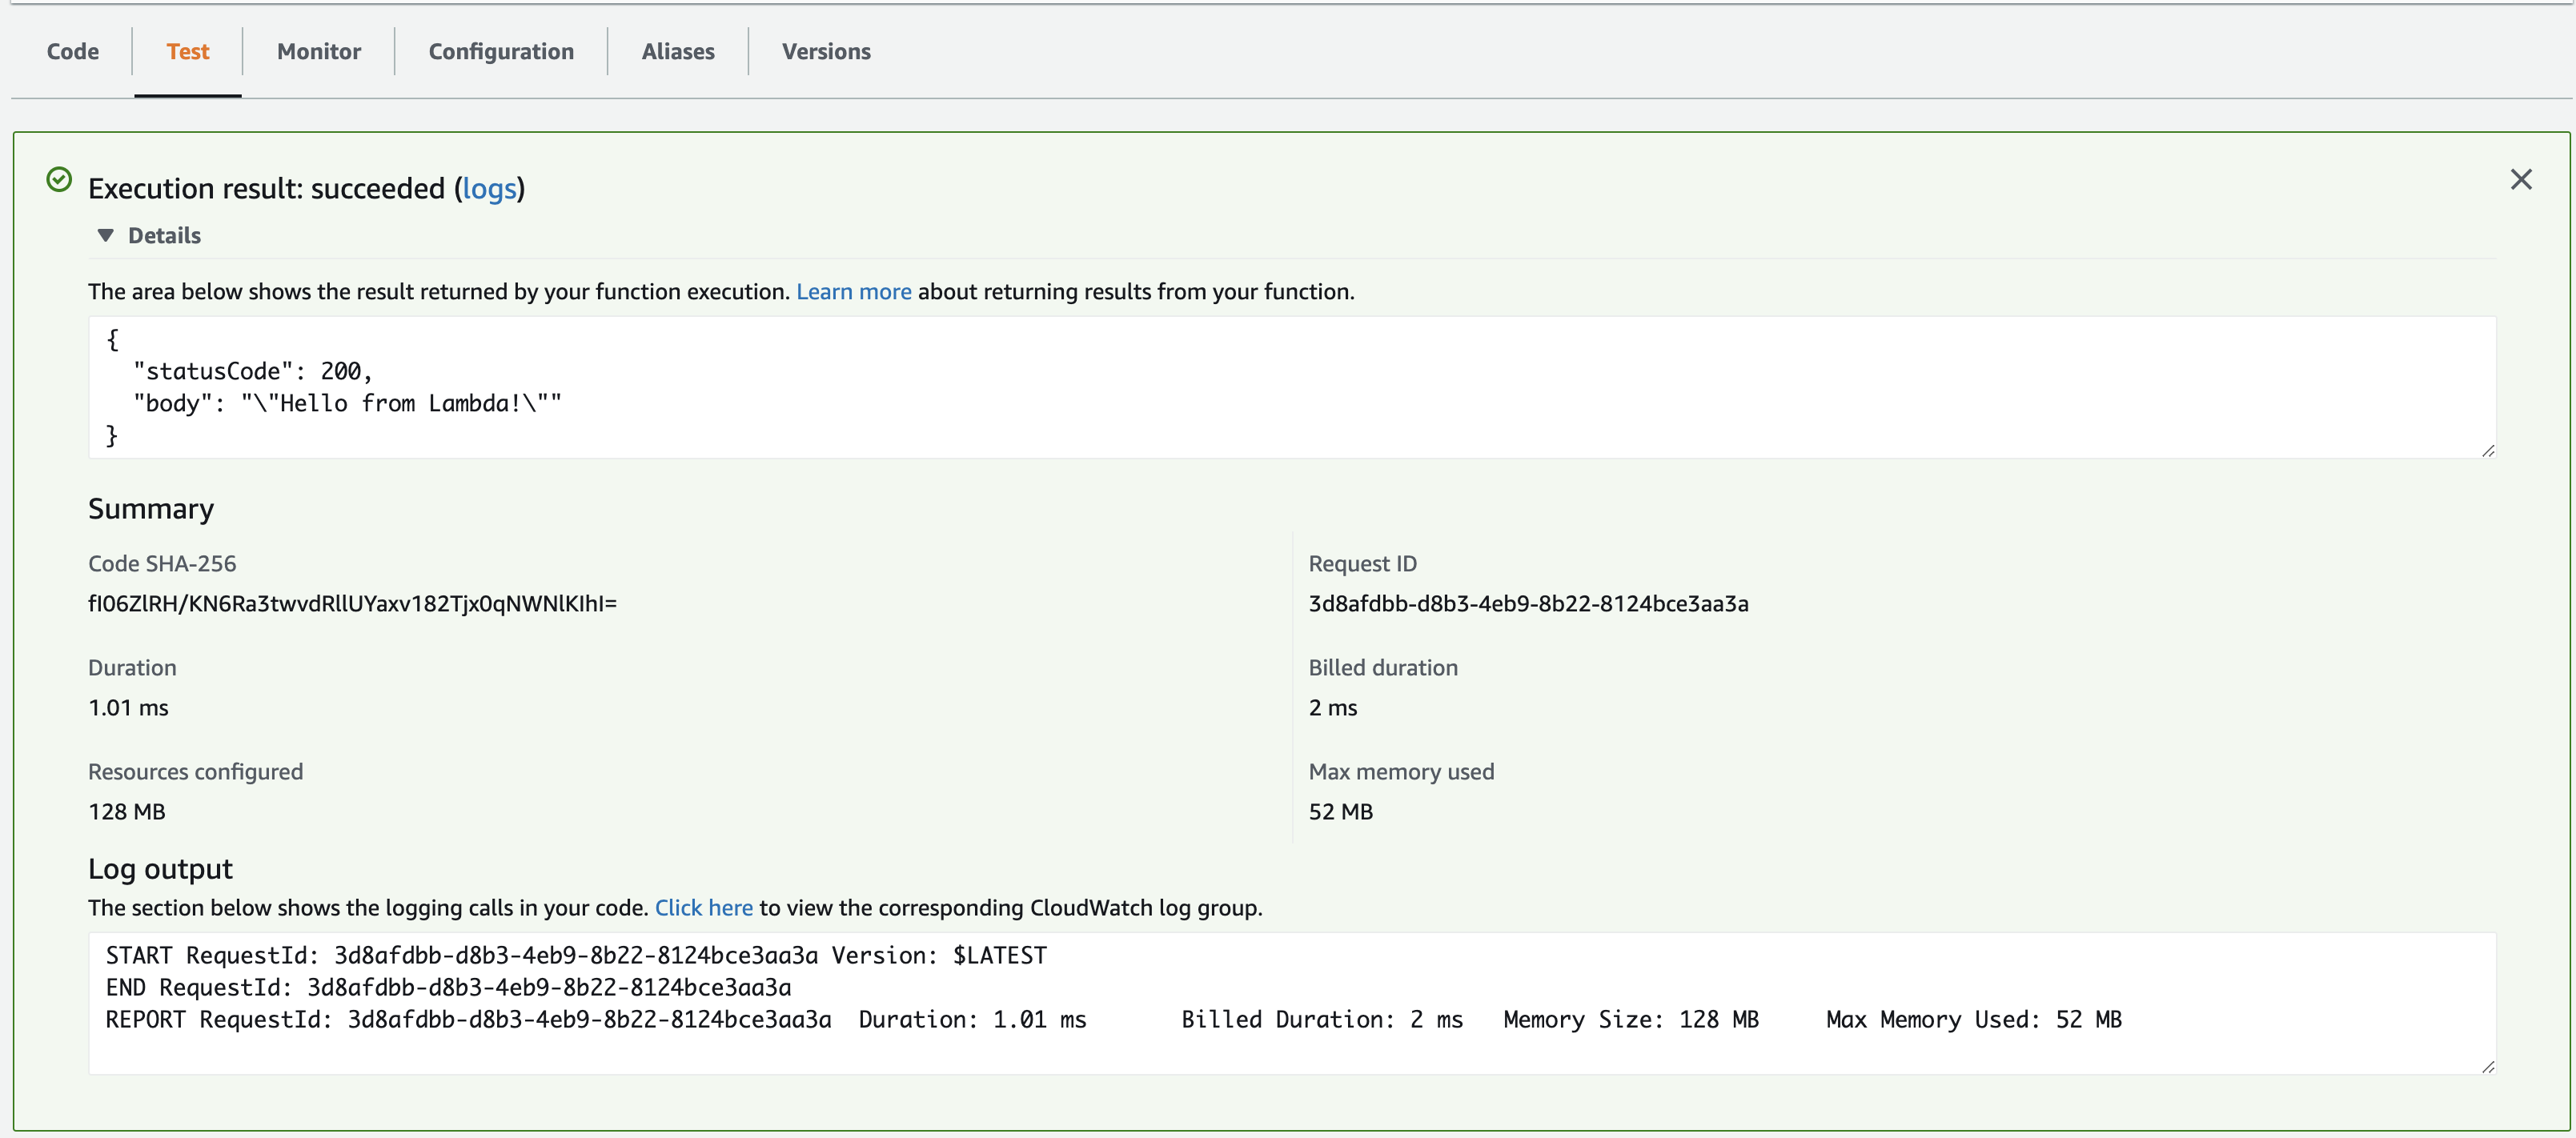
- Test logs

Note: The lambda handler function expects two variables: event, context
Triggering Lambda with API Gateway
Now that we have created a basic function, we need a way to call / trigger it. There are different ways to trigger the lambda. Let's see how to do it using API Gateway.
API Gateway handles all the tasks involved in accepting and processing up to hundreds of thousands of concurrent API calls, including traffic management, CORS support, authorization and access control, throttling, monitoring, and API version management.
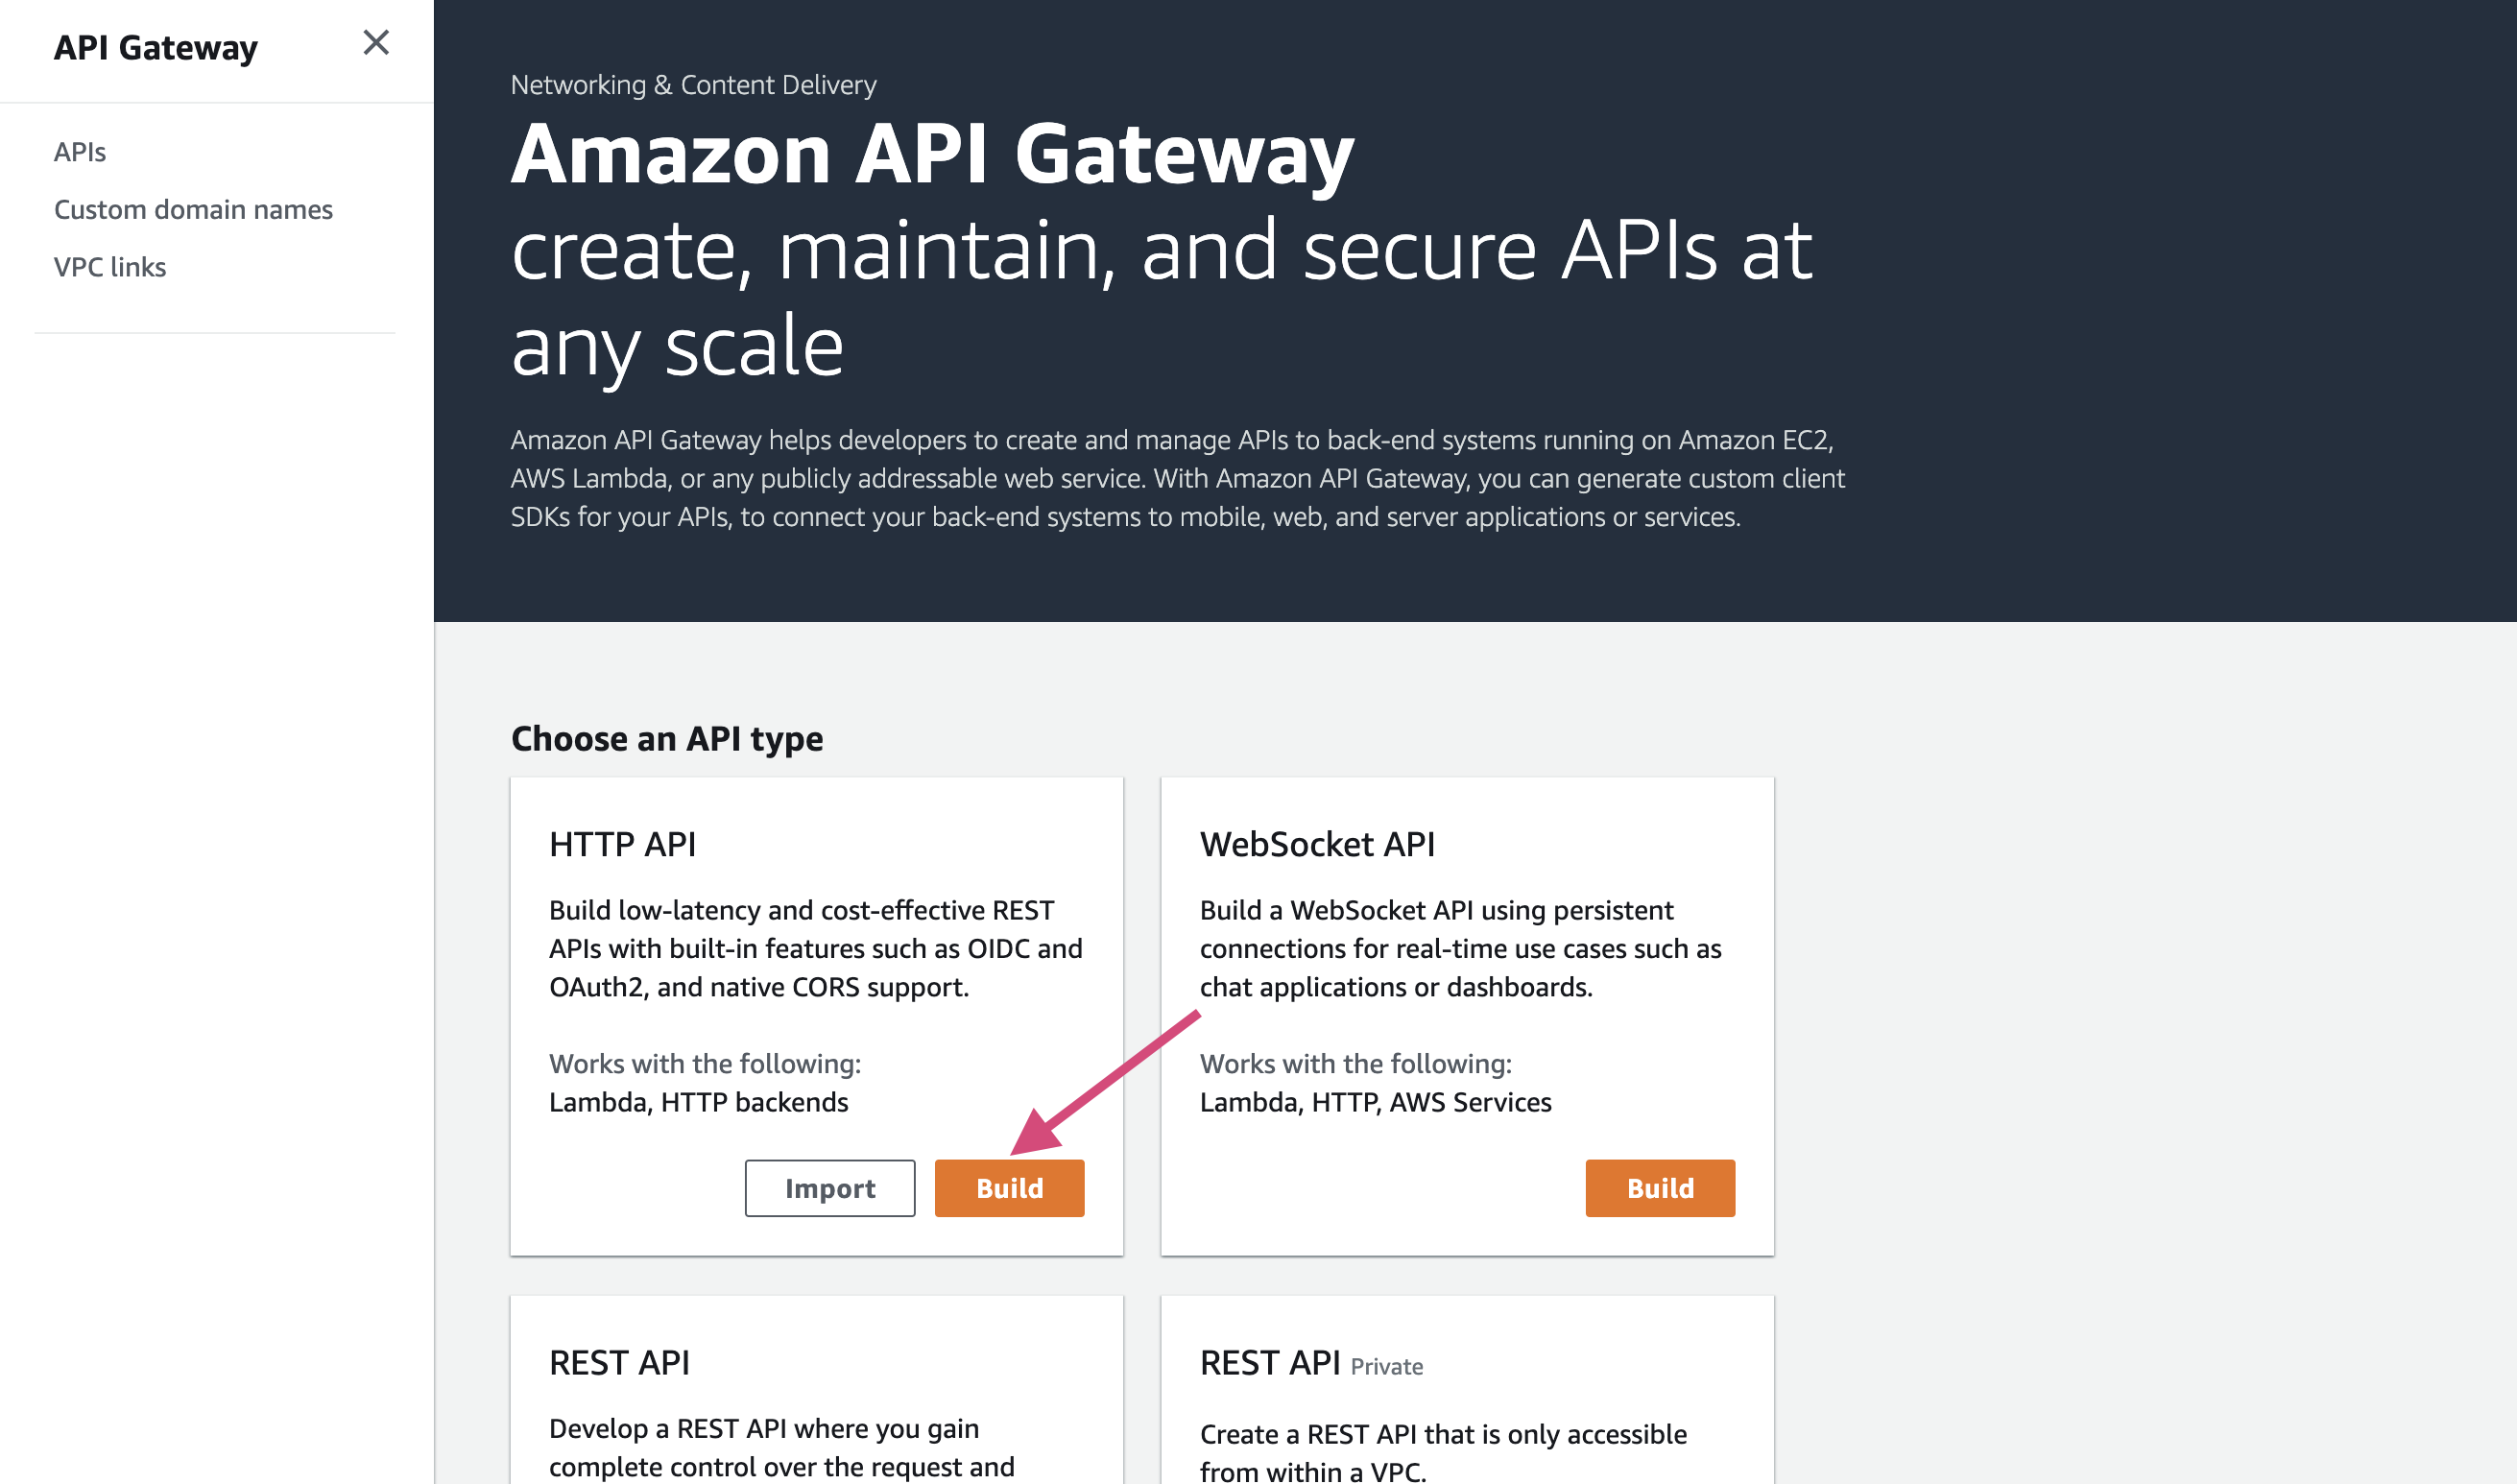
Let's a create a simple API.
Sign in to the AWS Management Console and open the Amazon API Gateway console at https://us-west-2.console.aws.amazon.com/apigateway
Click on
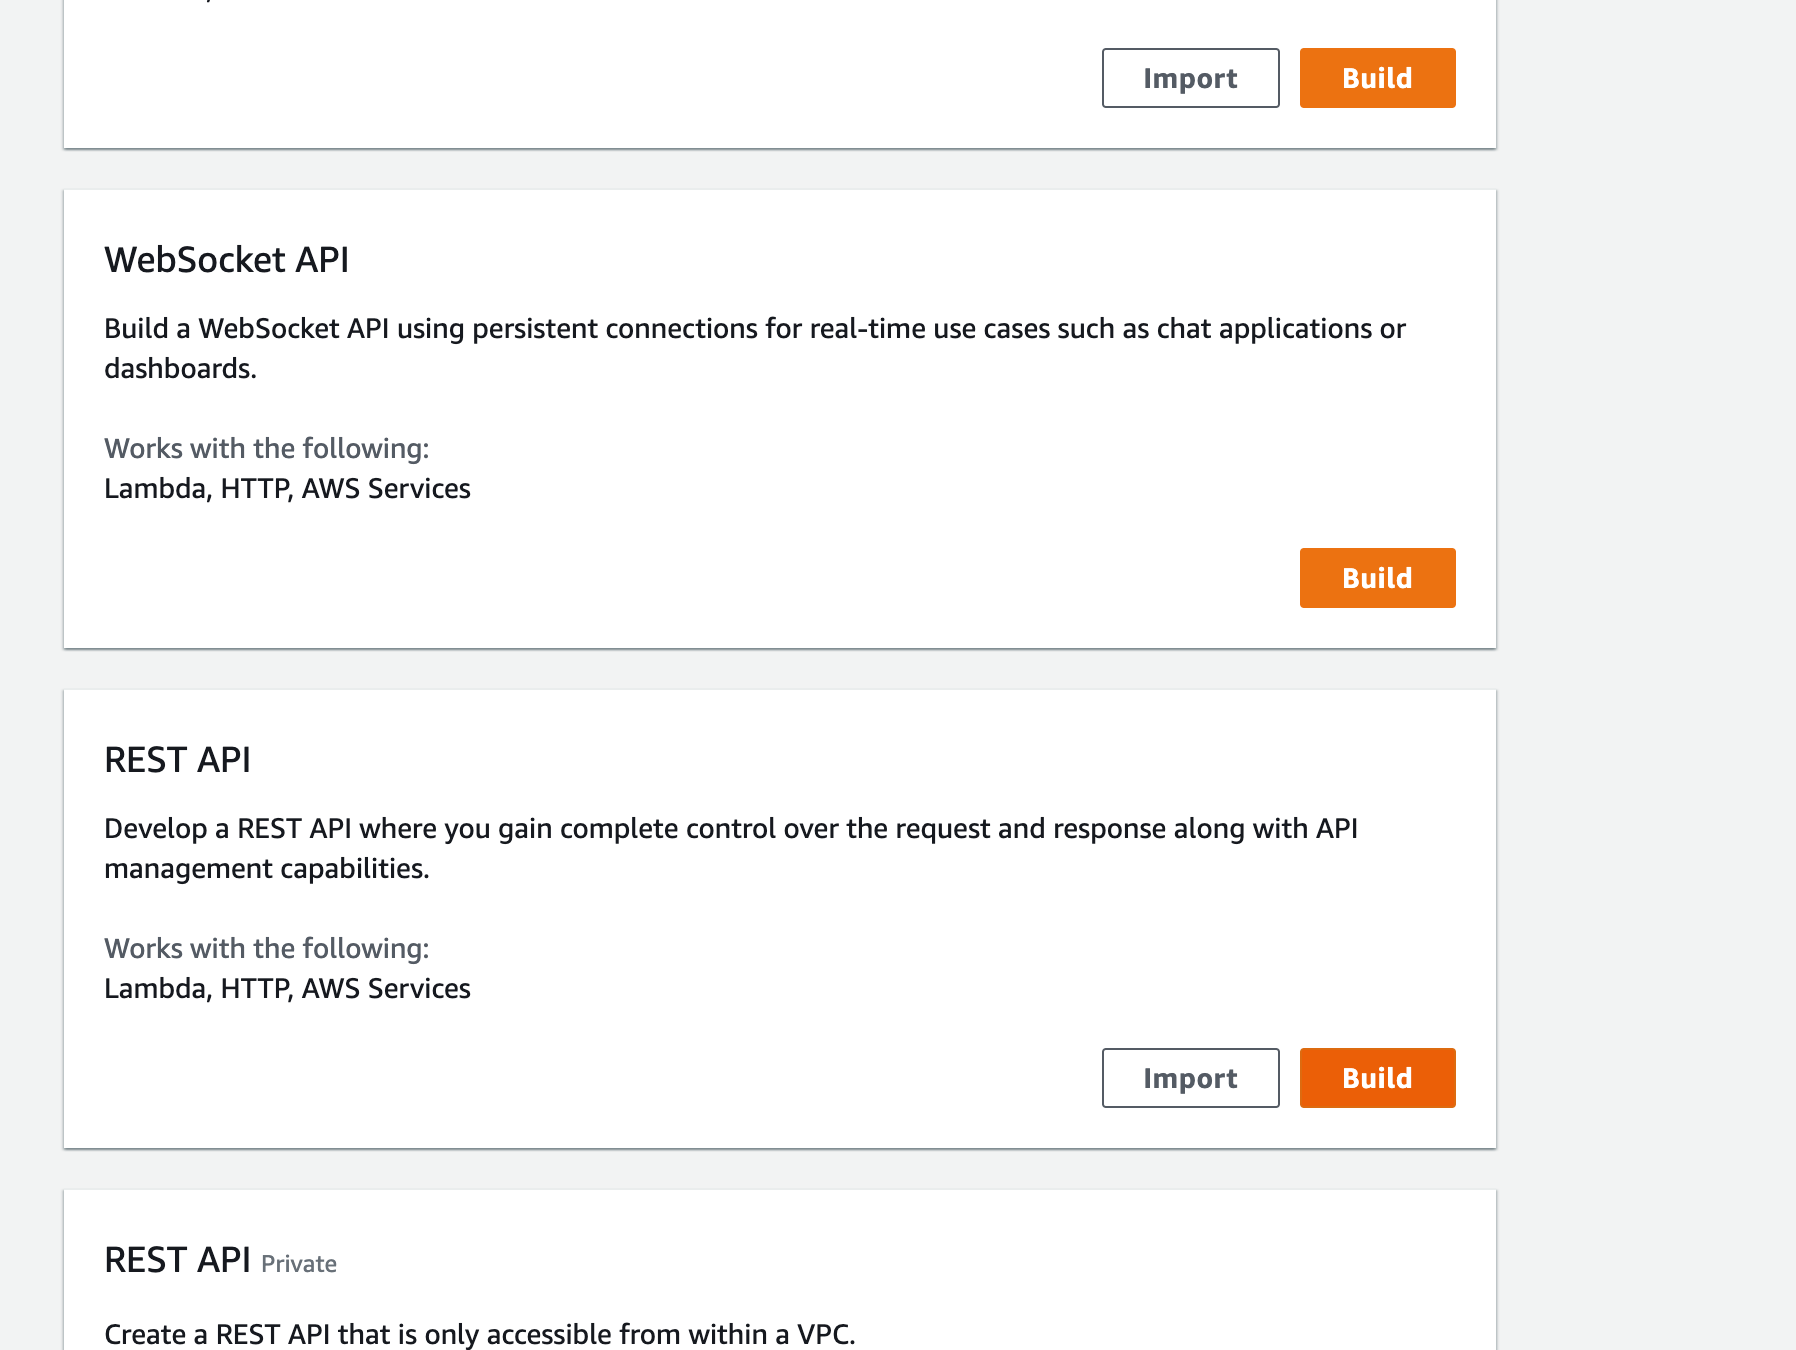
Buildbutton under HTTP API

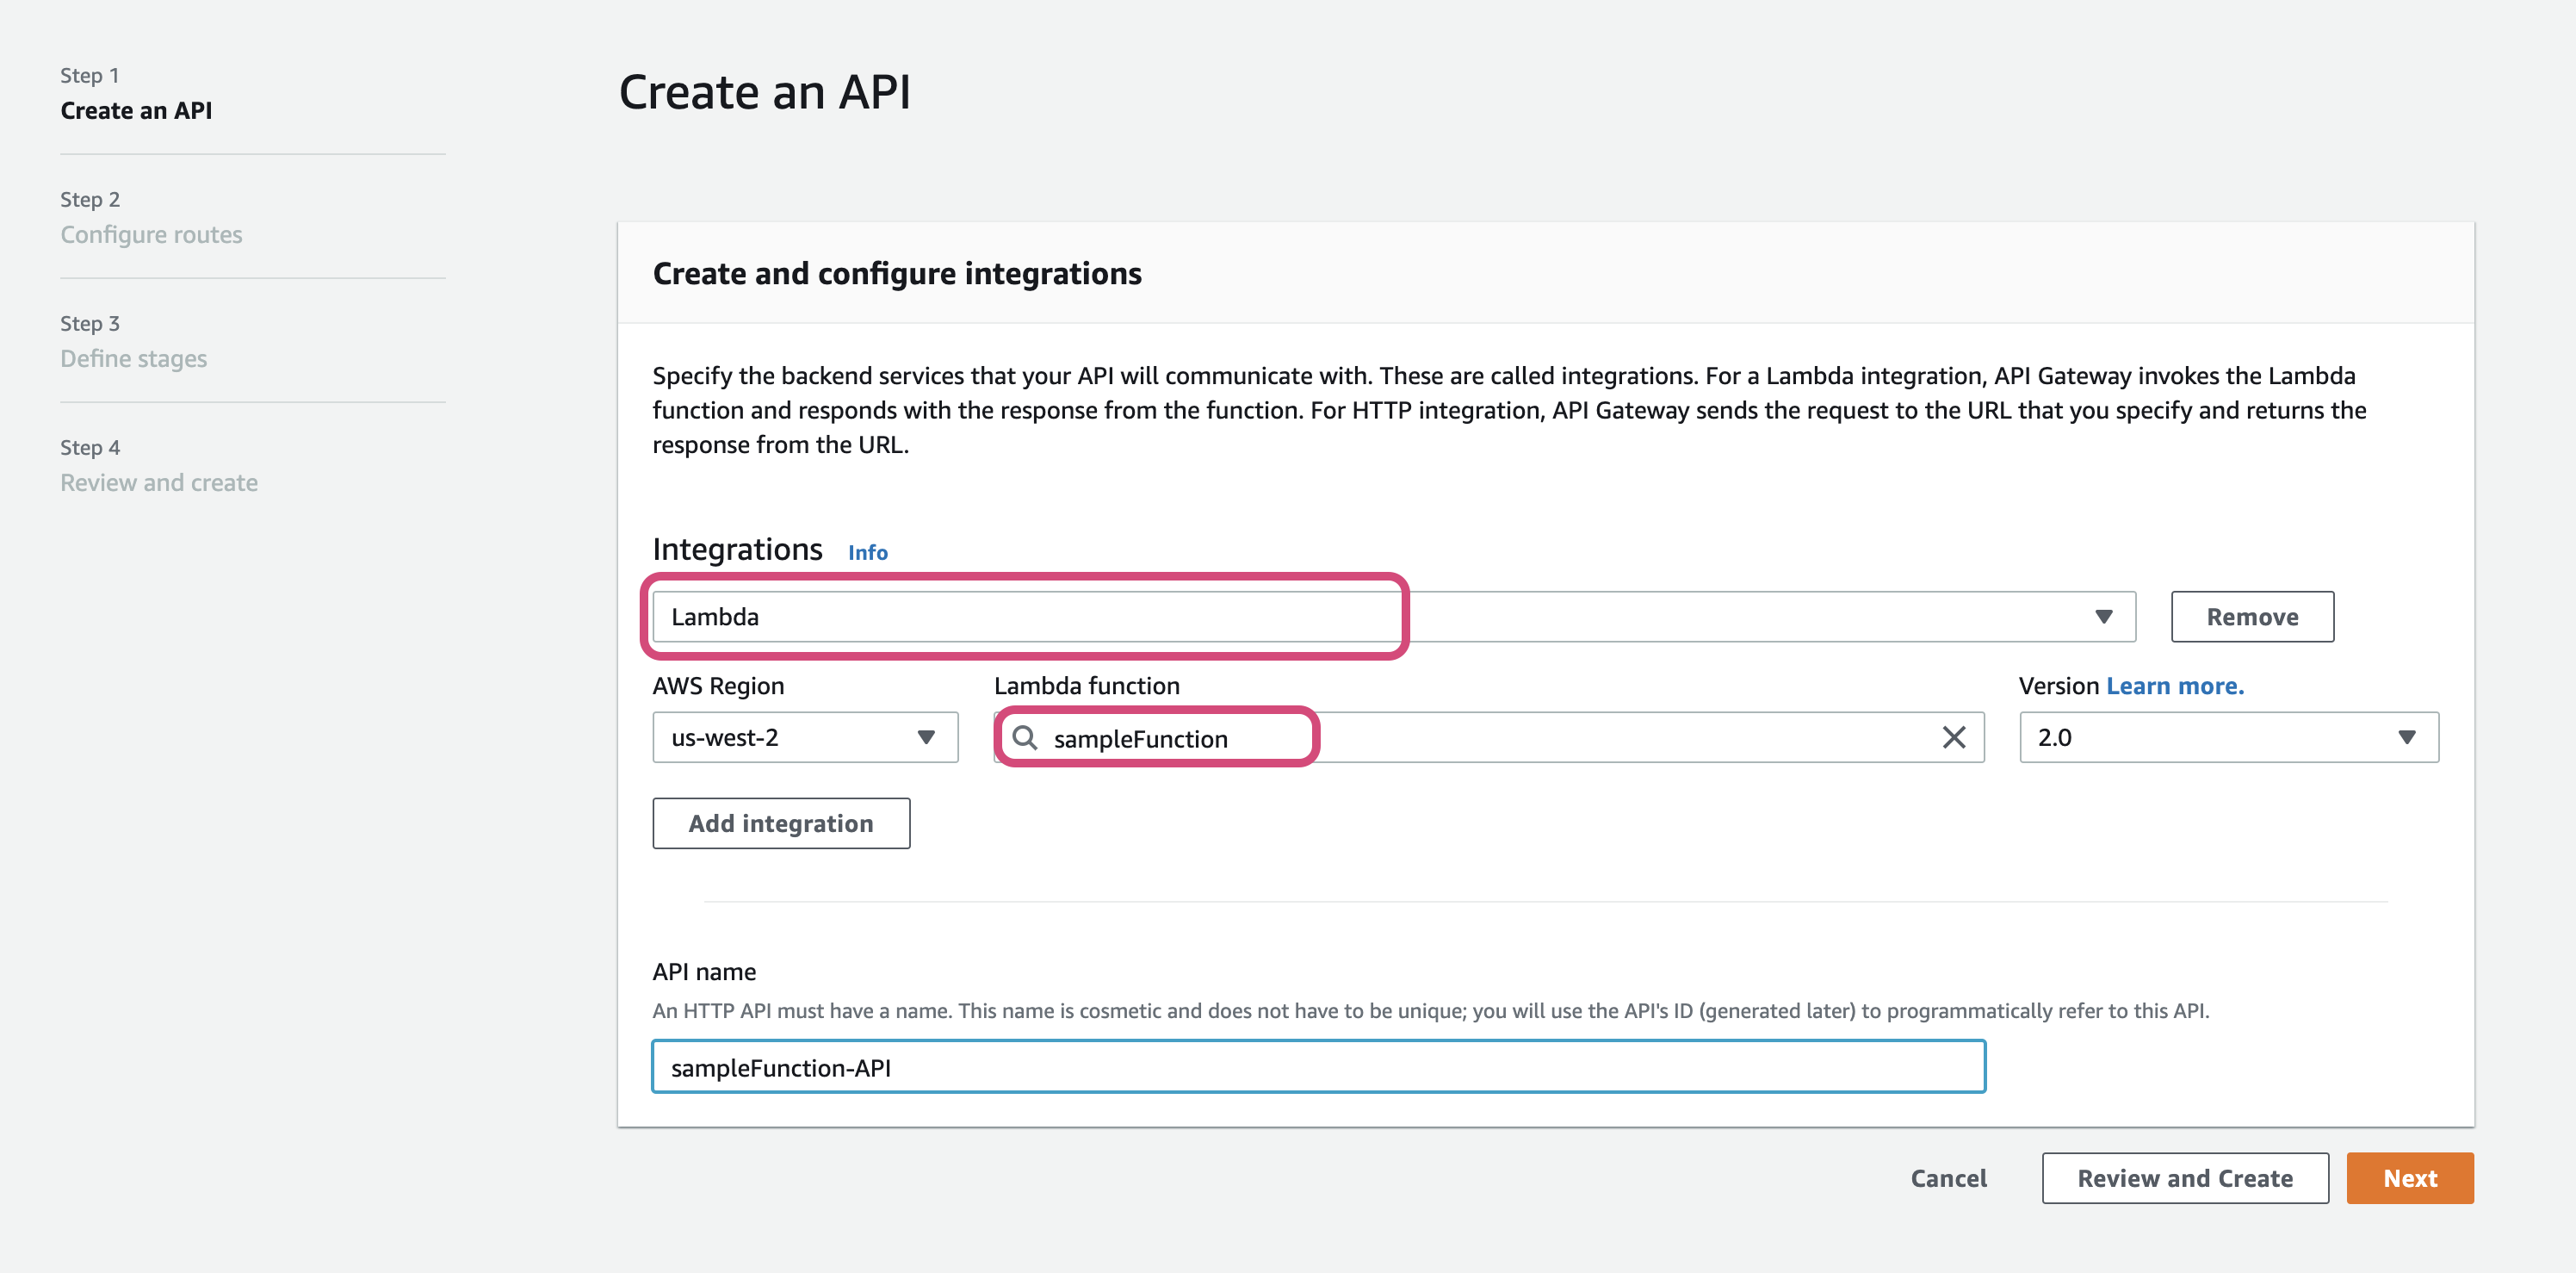
- Add
Integrationto the API. Select the Integration type asLambdaand select the lambda we have created

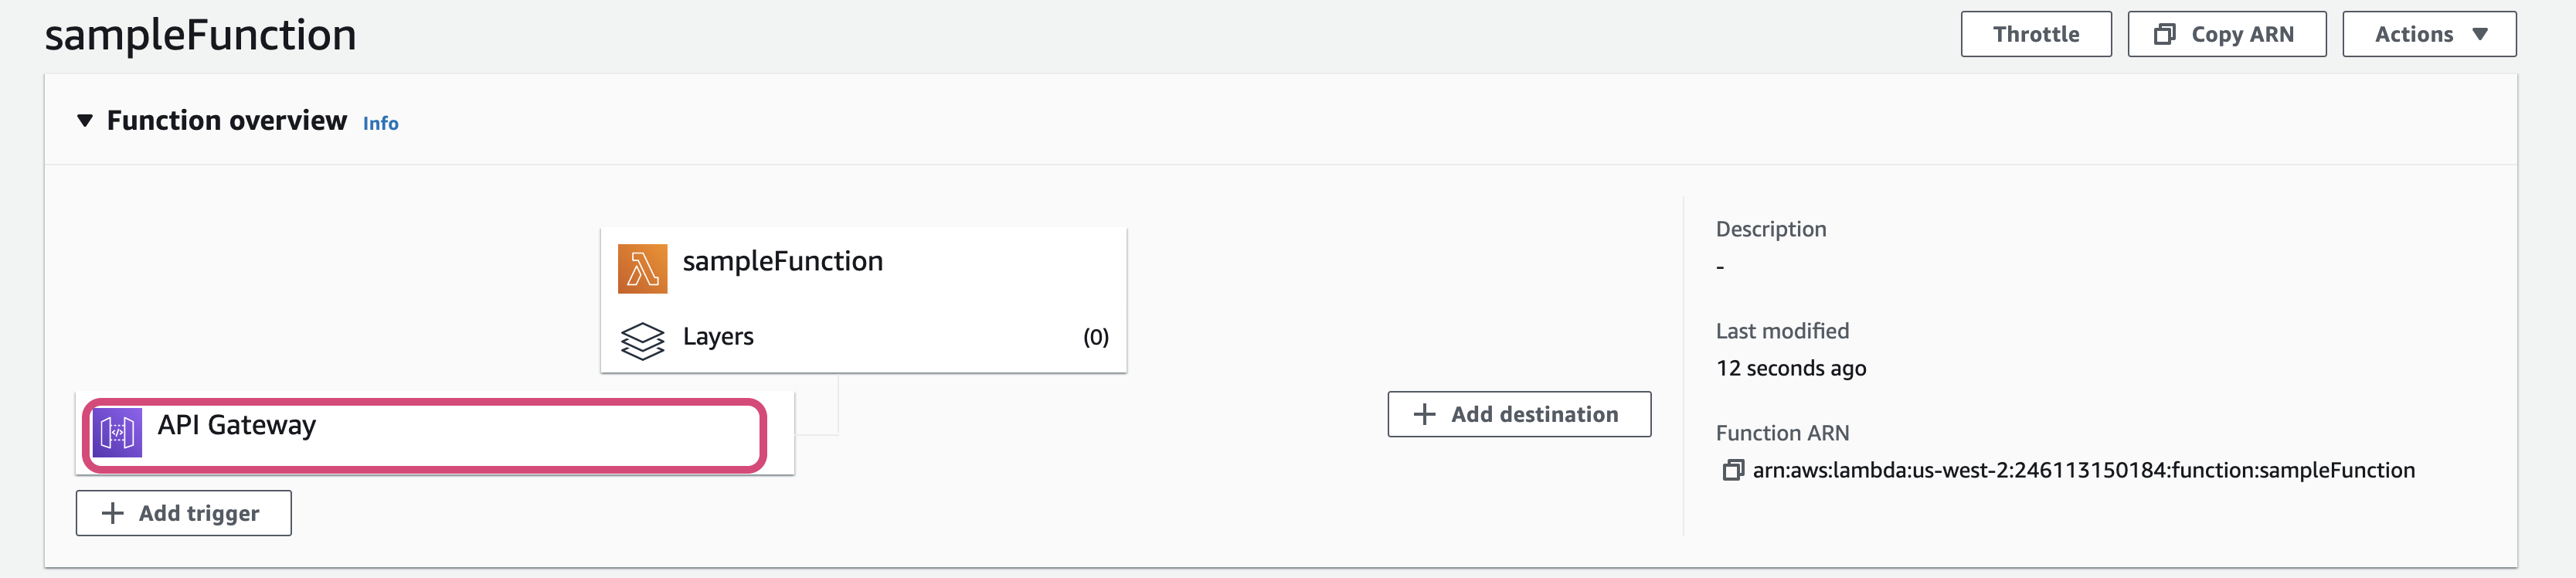
- Once the API is created, refersh the Lambda page. You will see
API Gatewayunder the triggers of lambda

- Go to configuration section and API Gateway details, there will be a
API endpoint. Open that link in new tab

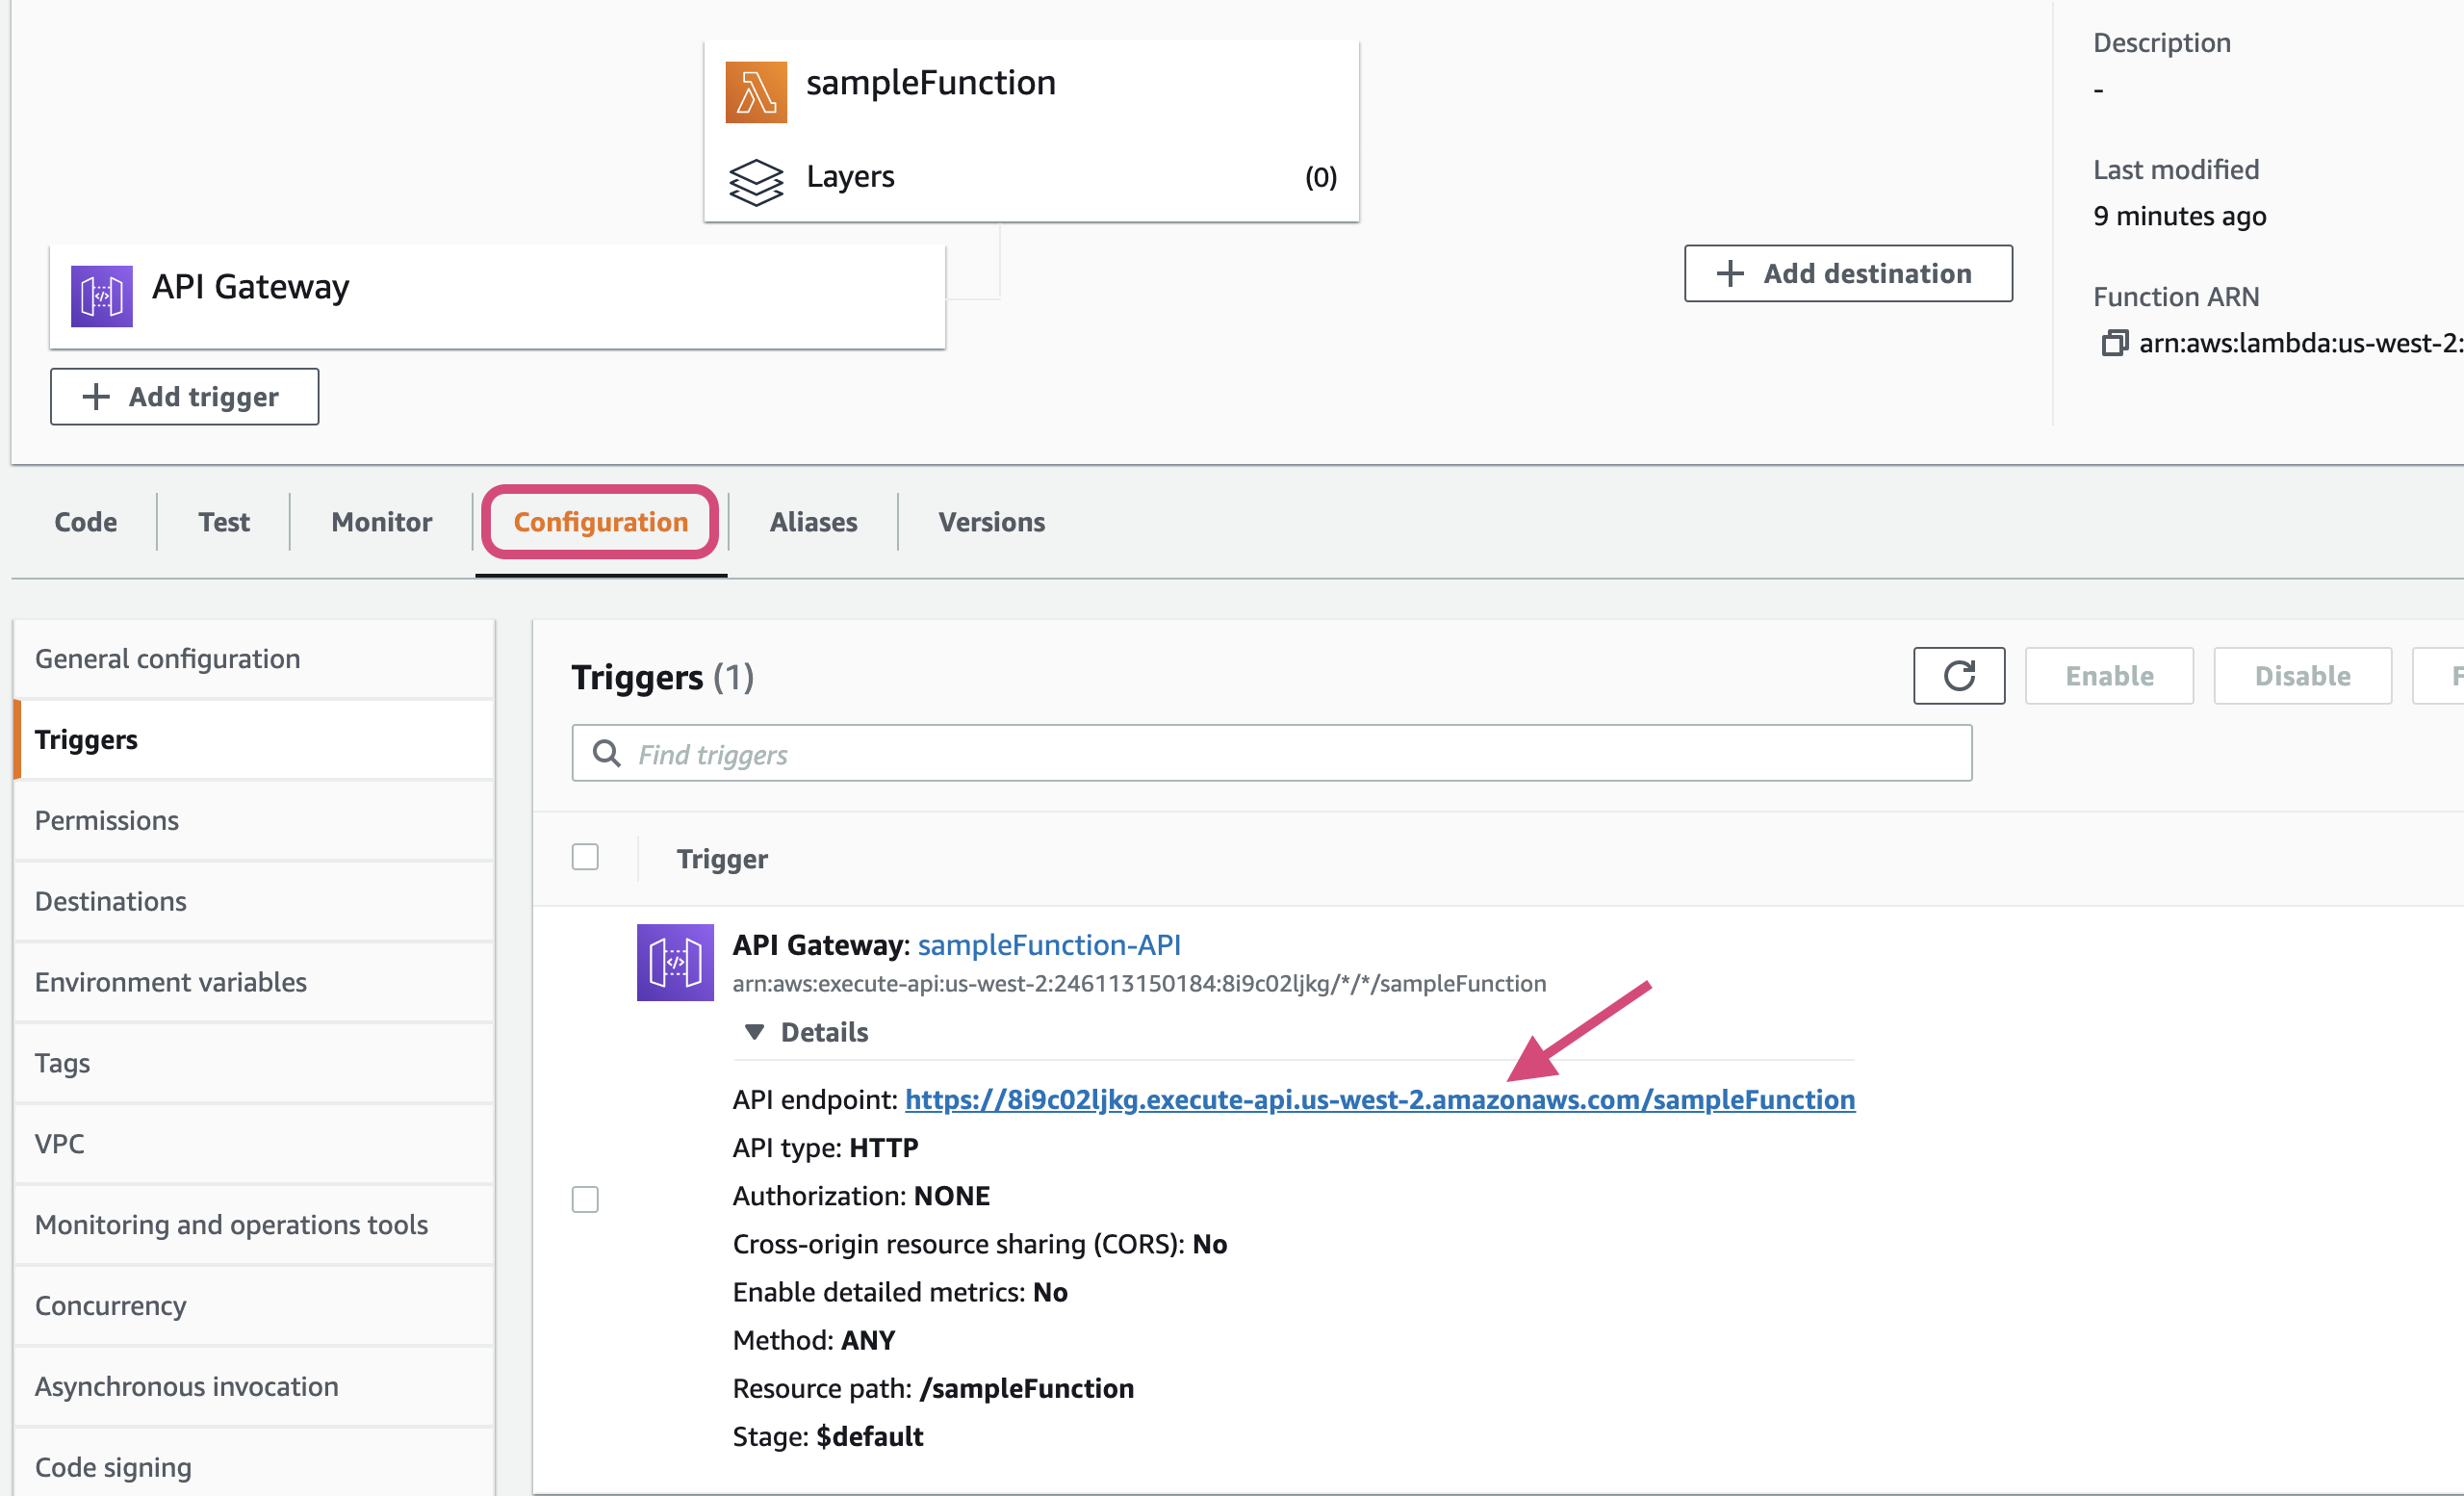
- You will see the response returned by lambda in the browser


Deploying Container using Lambda
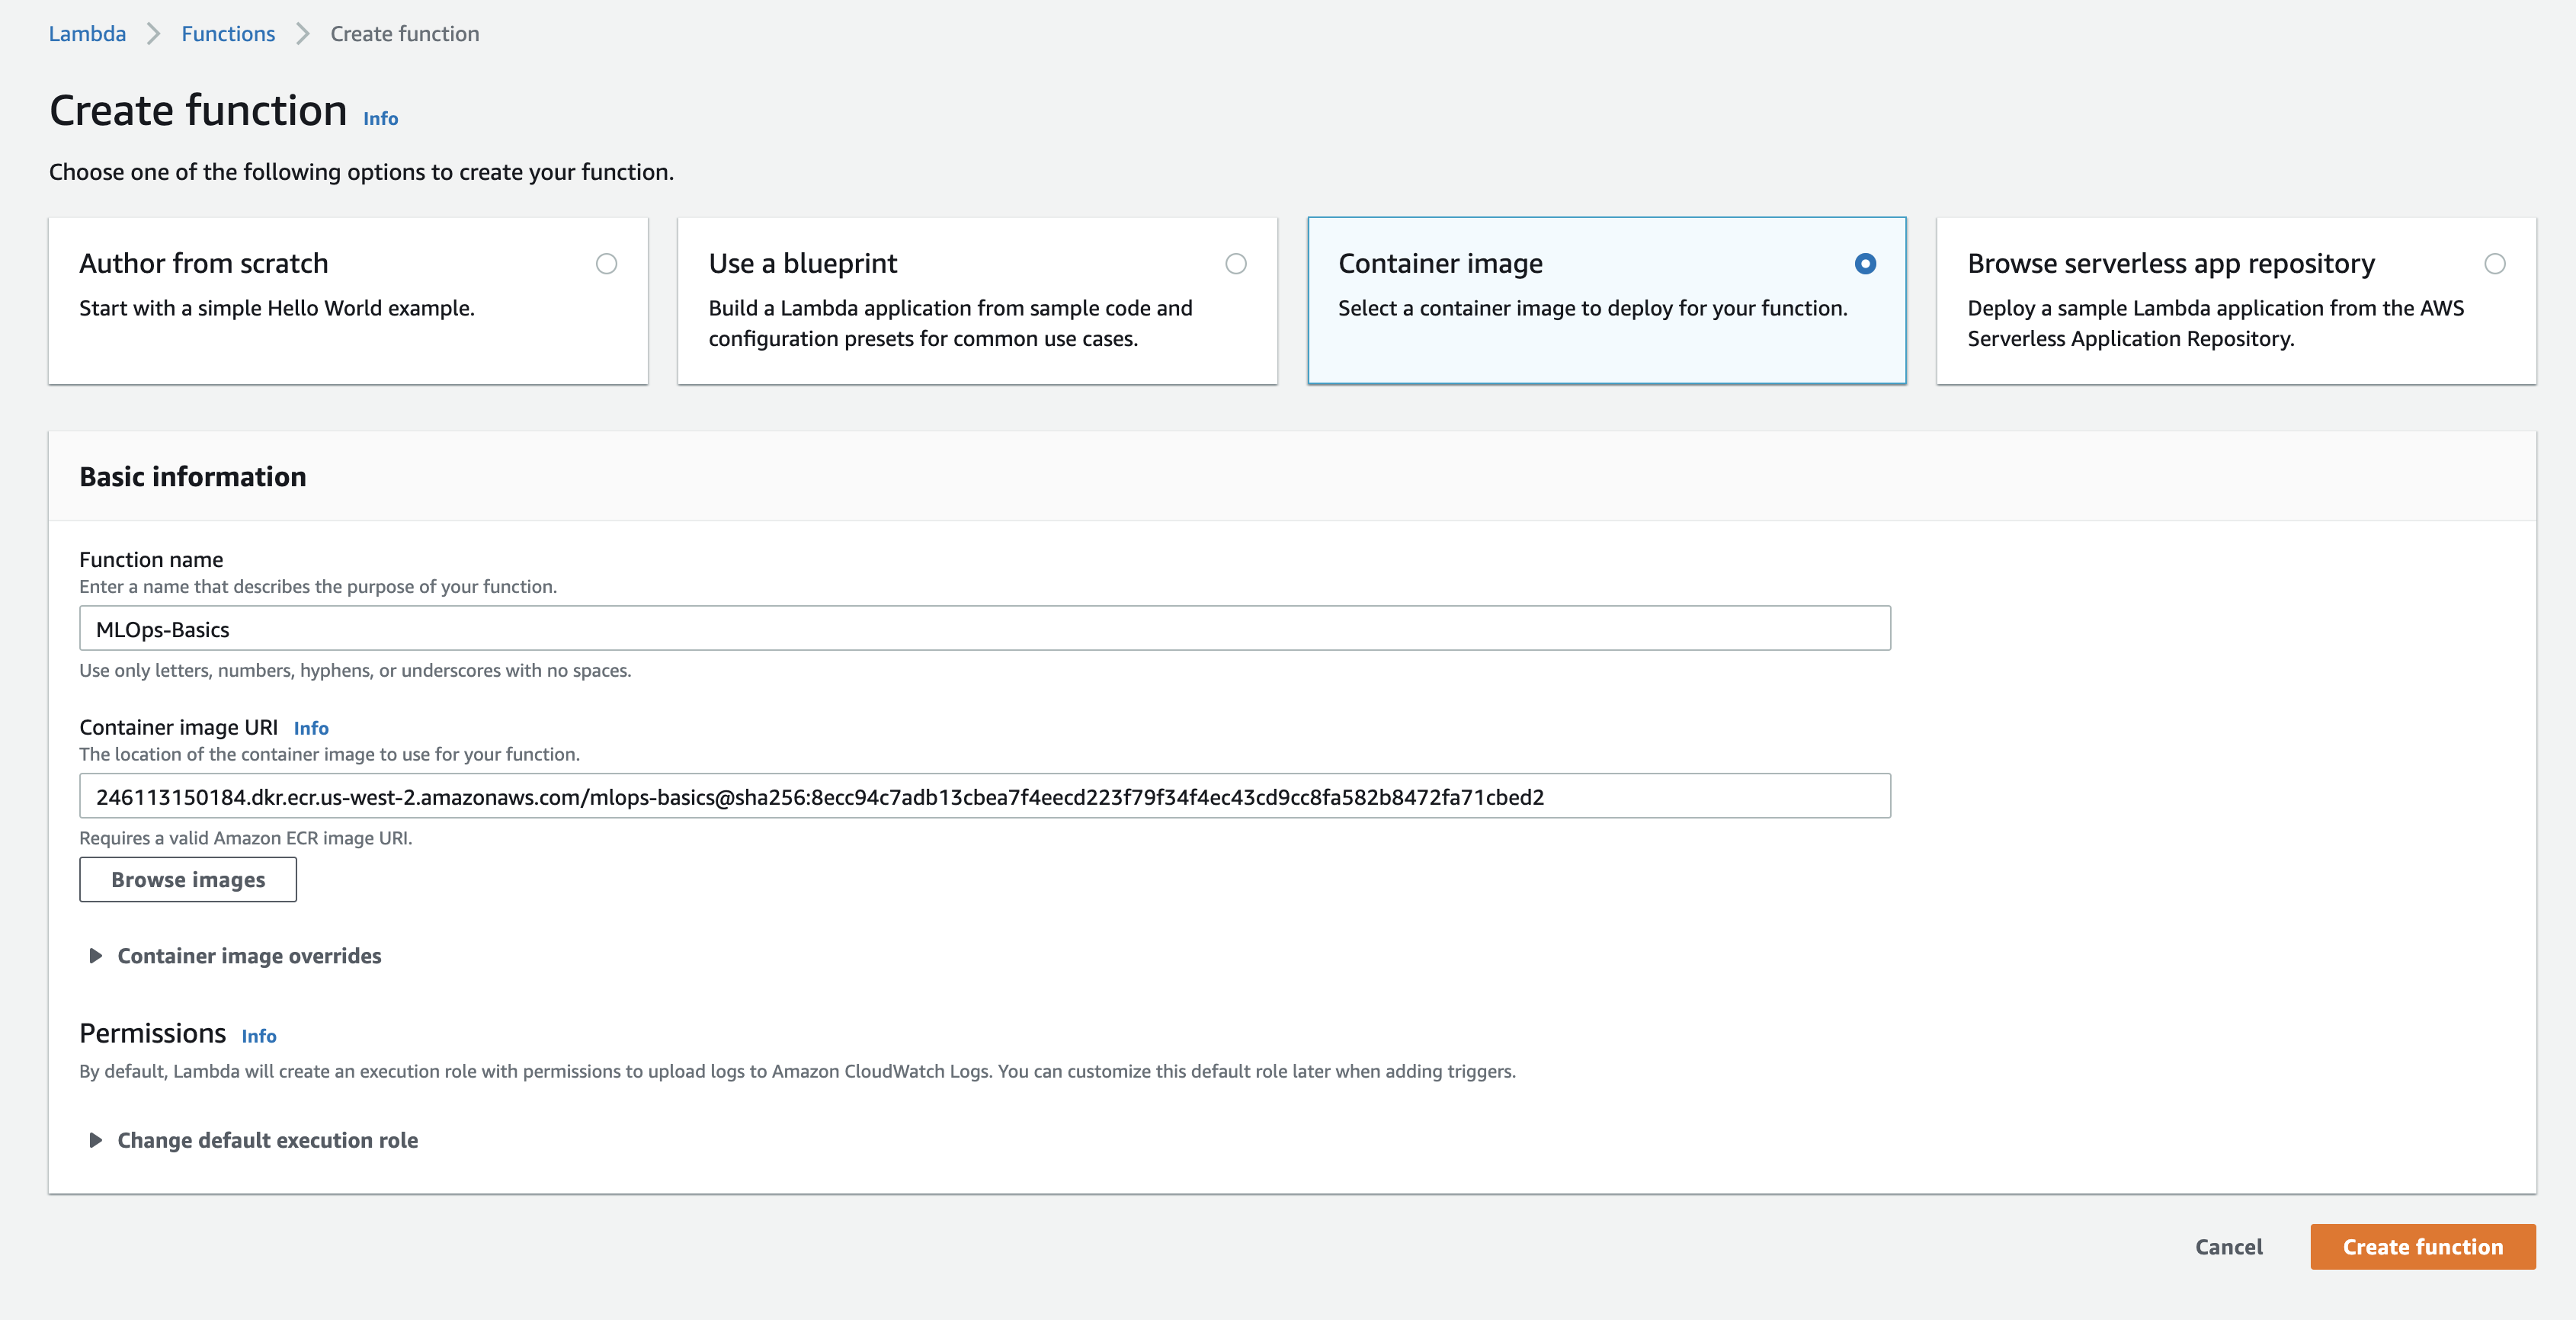
We have created a docker image and persisted it in ECR in the last post. Let's see how to use that image and run it using Lambda.
- Create a new lambda function with name
MLOps-Basicsand choose the type asContainer Image

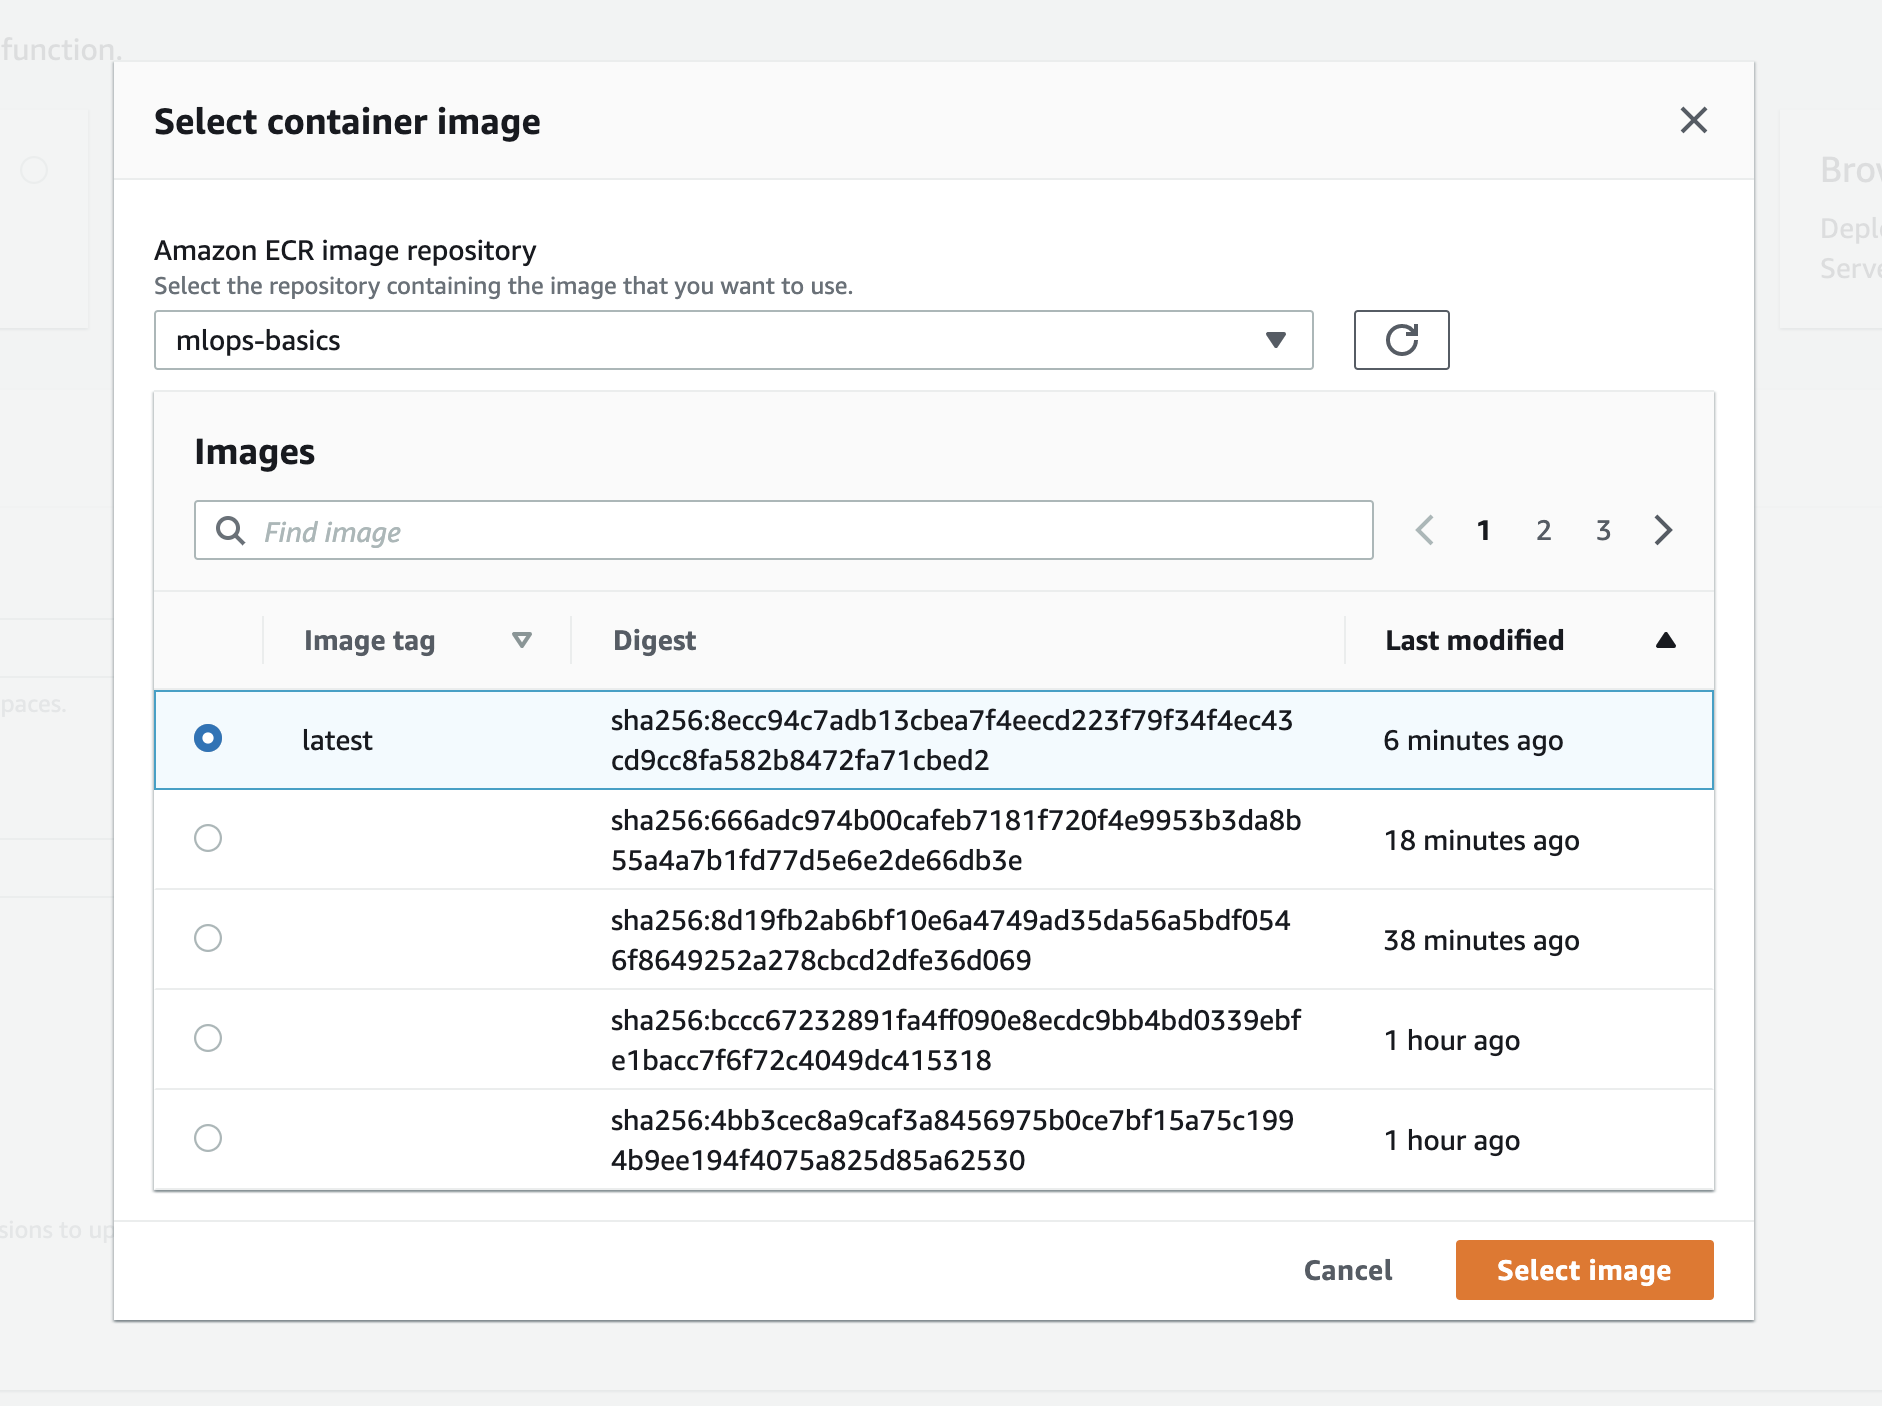
- Select the corresponding image and tag from
ECRafter clicking onBrowse Imagesoption

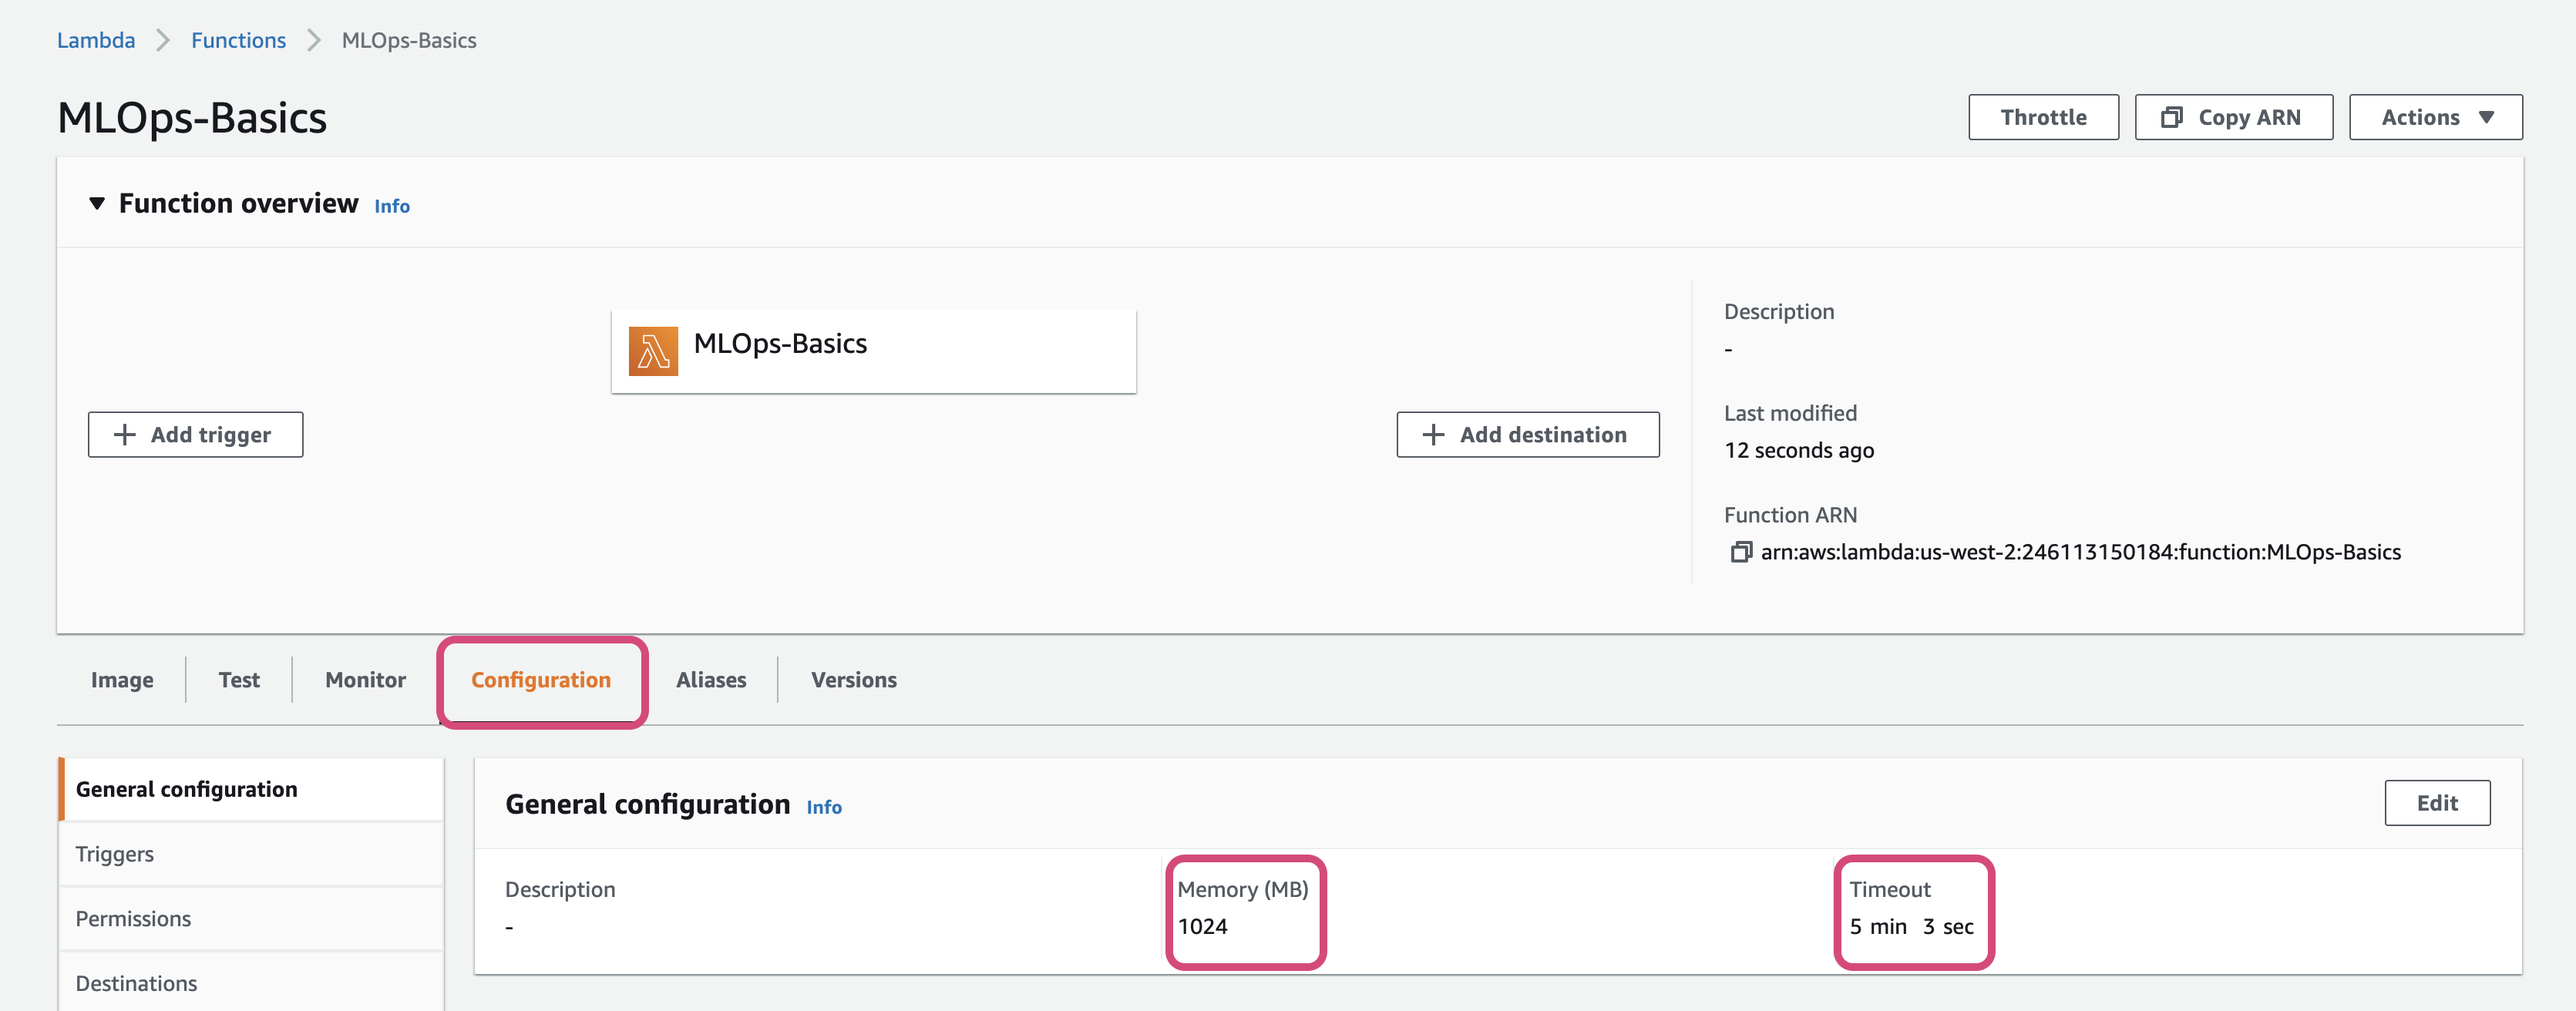
- Since the model size is more than 100MB and it will take some time to load, go the
Configurationsection and update the memory size and timeout

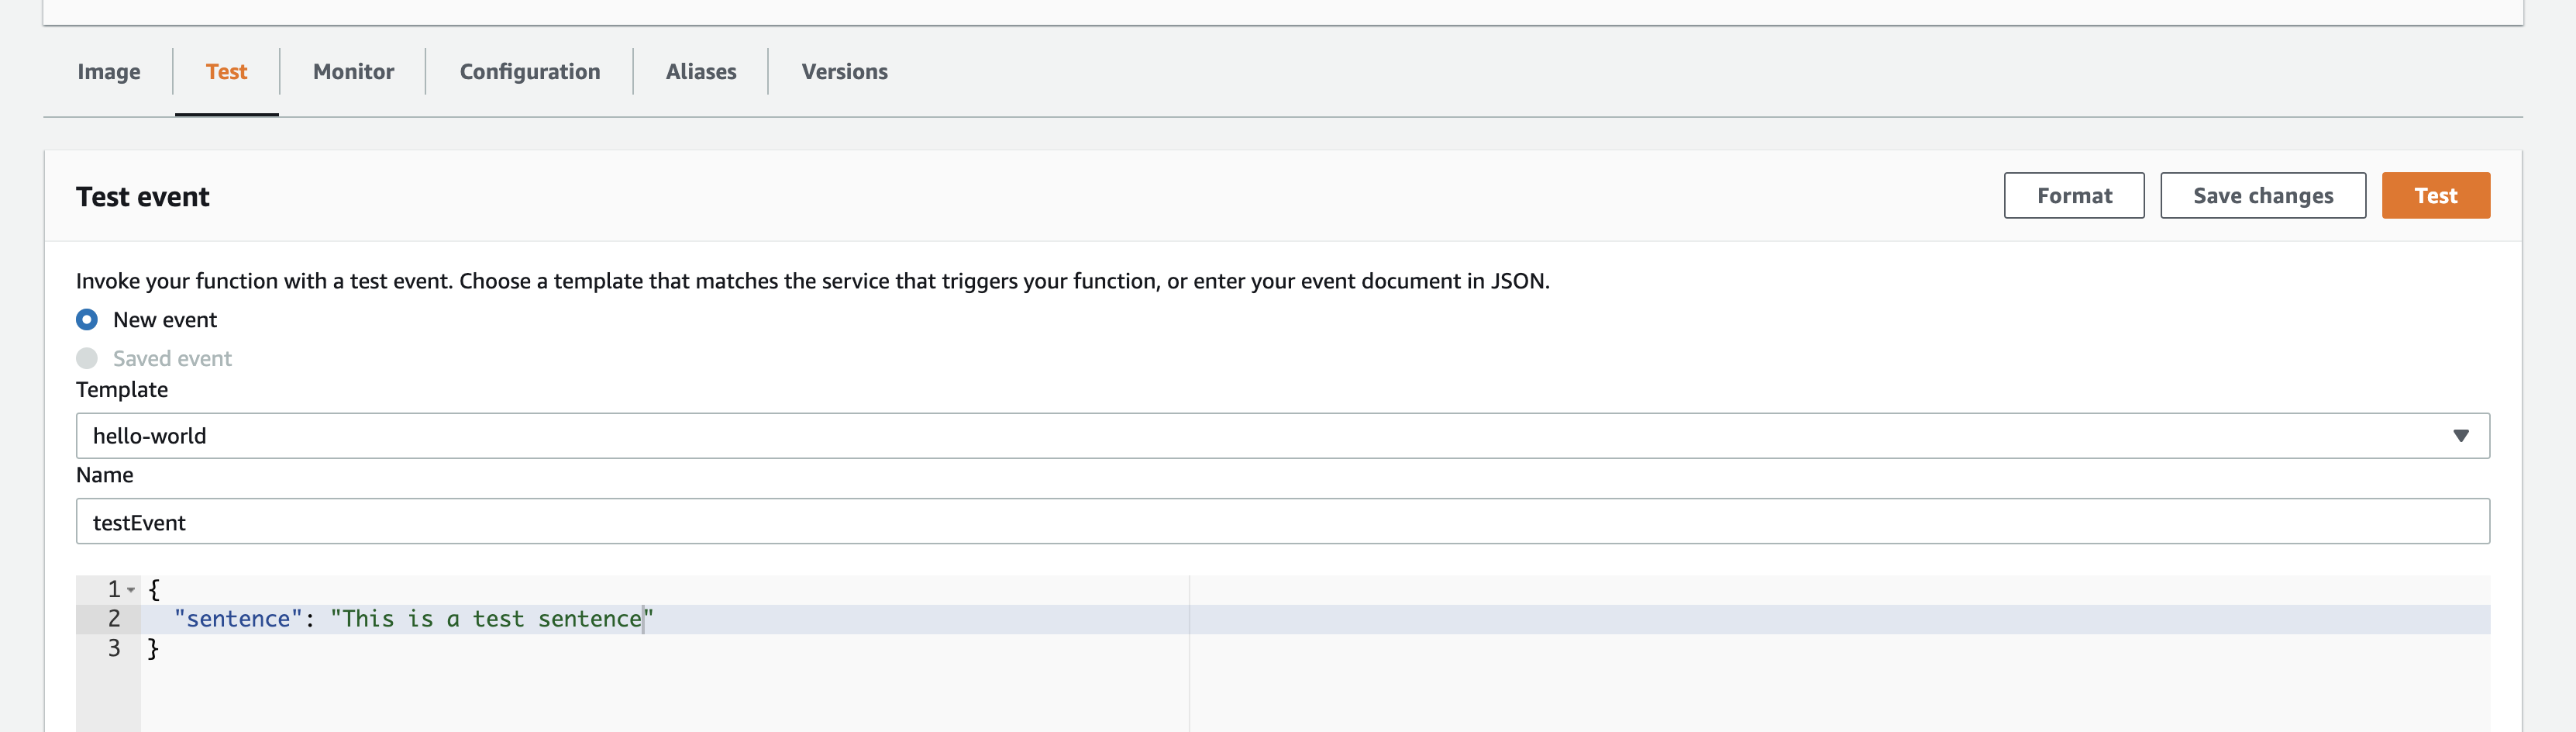
- Now let's configure the
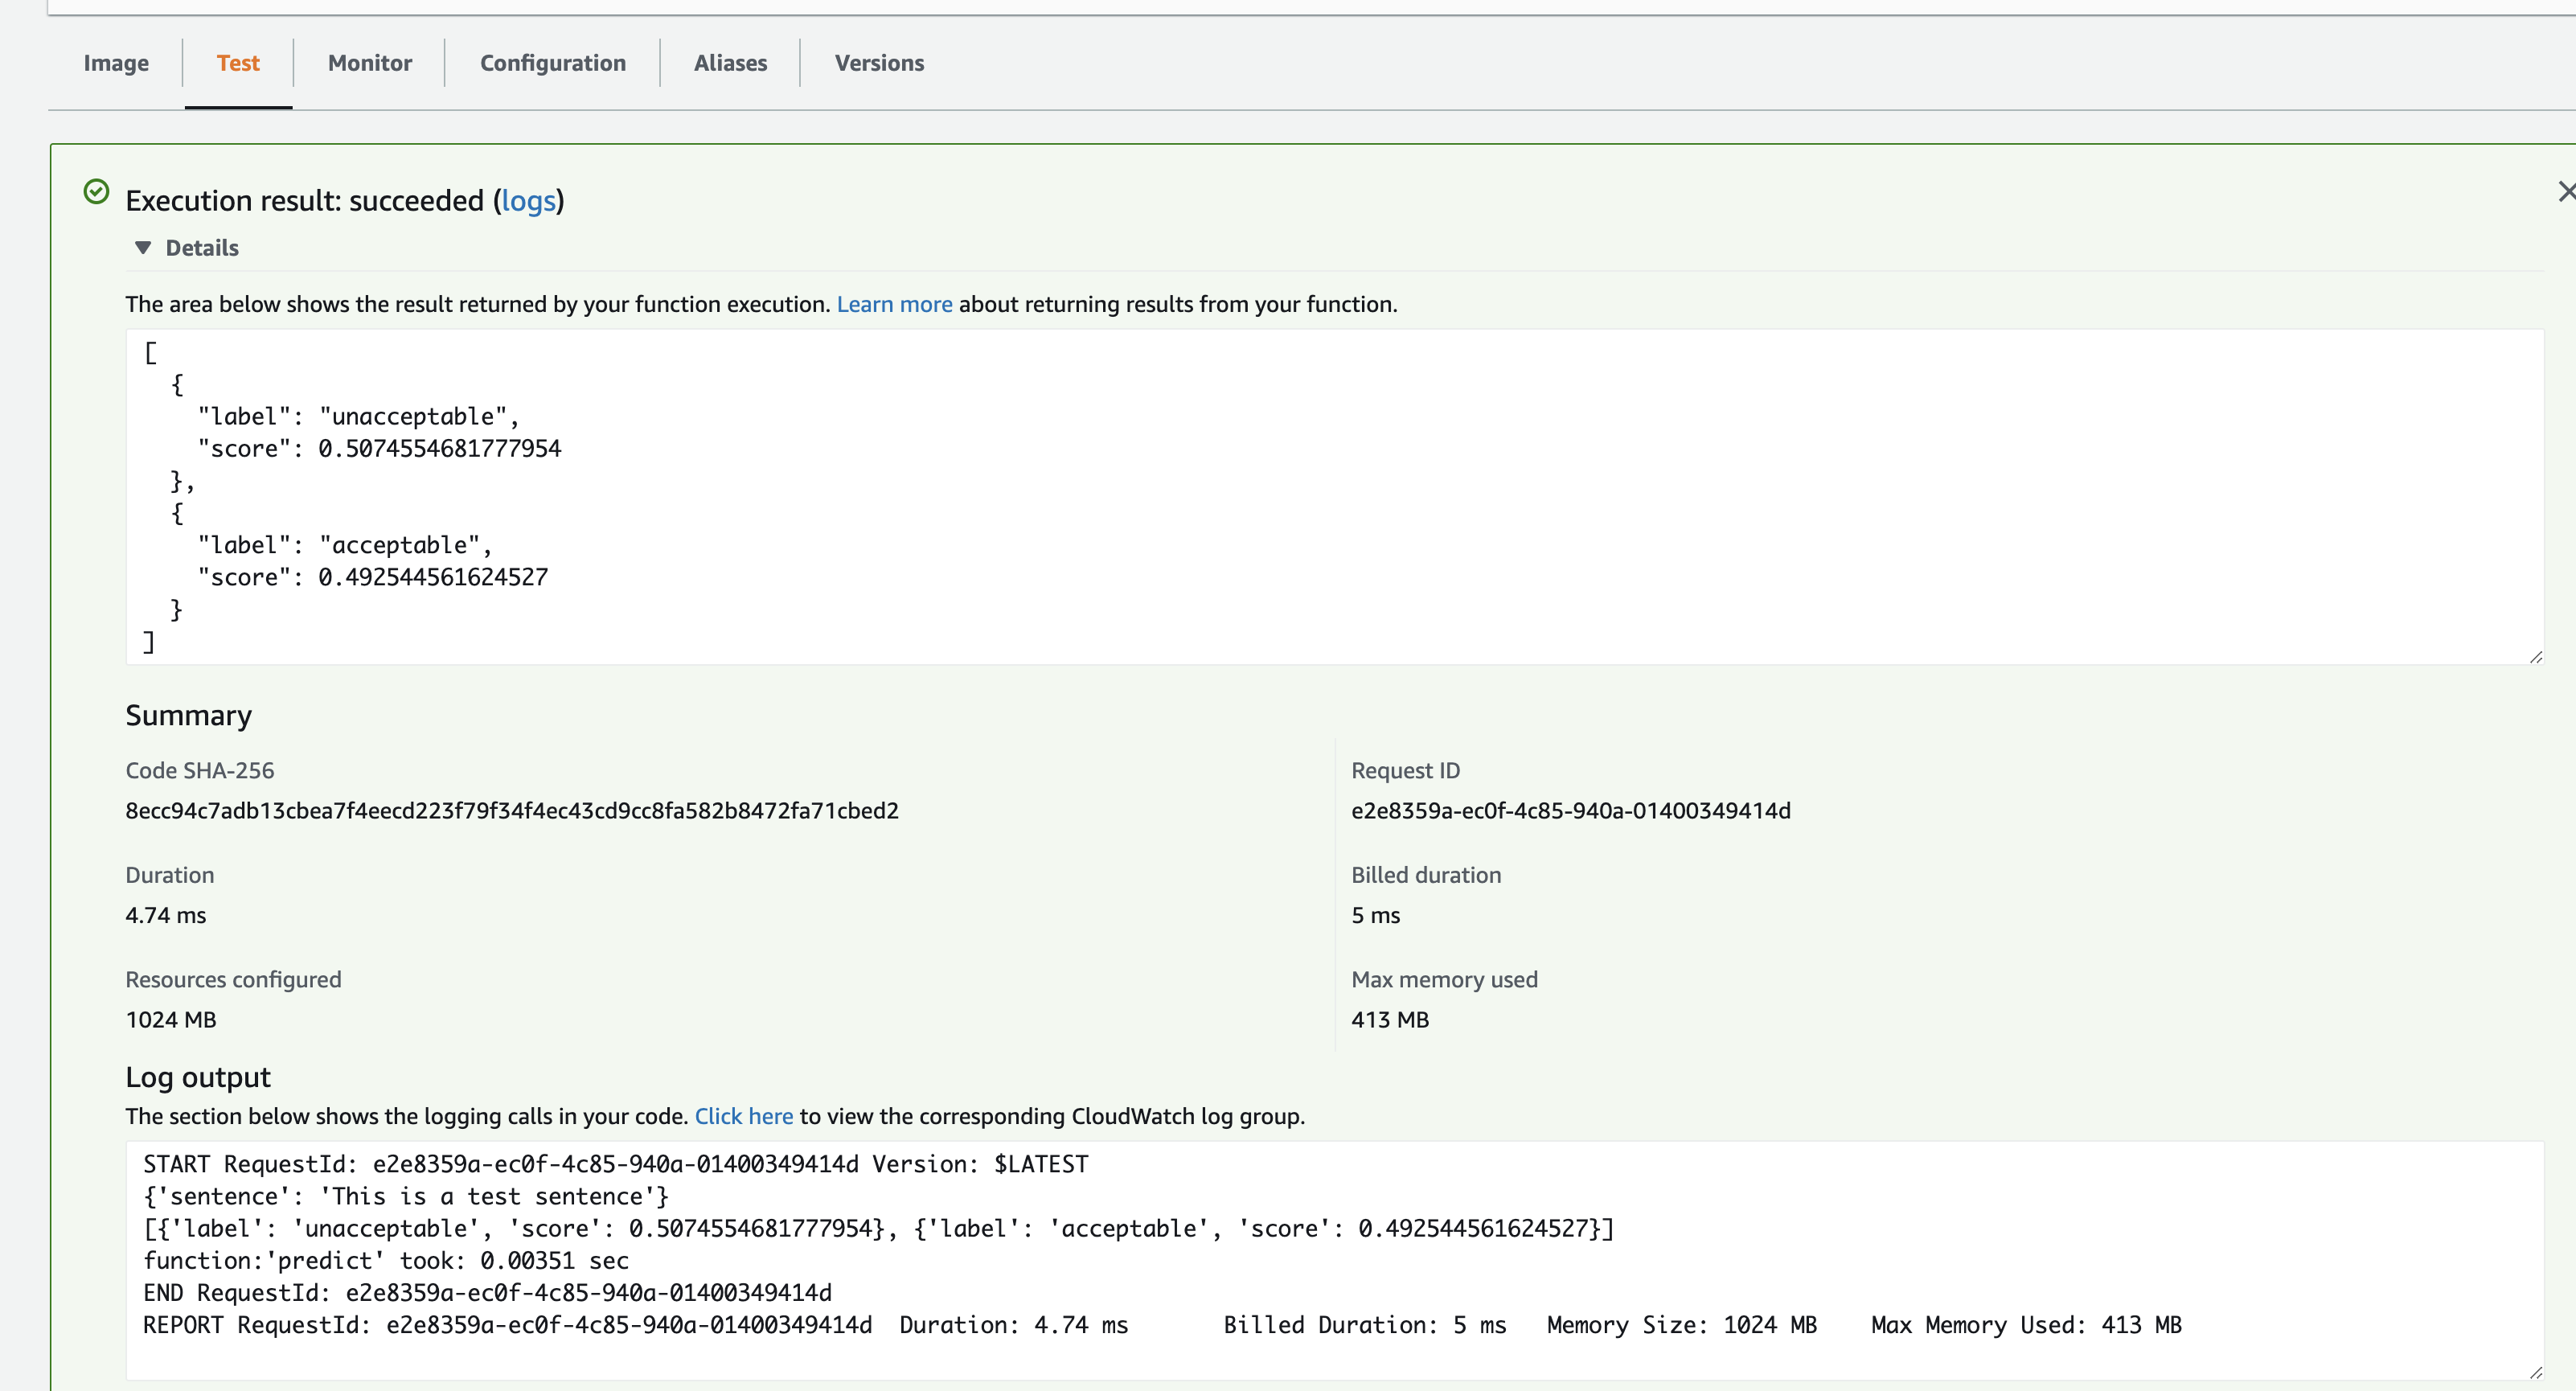
Testso that the lambda can be tested. Go to theTestsection and configure the test event.

- Click on
Testbutton, after a while logs can be visible as following:

Now that the lambda is setup, let's trigger it using API Gateway. Before doing that some code changes needs to be done so that the lambda knows what function to call when it is triggered.
Create a file called lambda_handler.py in the root directory. The contents of the file are as follows:
import json
from inference_onnx import ColaONNXPredictor

inferencing_instance = ColaONNXPredictor("./models/model.onnx")

def lambda_handler(event, context):
    """
    Lambda function handler for predicting linguistic acceptability of the given sentence
    """

    if "resource" in event.keys():
        body = event["body"]
        body = json.loads(body)
        print(f"Got the input: {body['sentence']}")
        response = inferencing_instance.predict(body["sentence"])
        return {
            "statusCode": 200,
            "headers": {},
            "body": json.dumps(response)
        }
    else:
        return inferencing_instance.predict(event["sentence"])
Let's understand what's happening here:
- When lambda is triggered with API it recevies some information regarding the request. A sample looks like the following:
{
  "resource": "/prediction",
  "path": "/prediction",
  "httpMethod": "POST",
  "headers": {
    "Accept": "*/*",
    "Accept-Encoding": "gzip, deflate, br",
    "Content-Type": "application/json",
    "Host": "ttaq1i1kvi.execute-api.us-west-2.amazonaws.com",
    "Postman-Token": "f5b1d731-7903-431e-a96f-b9353e7e9ec6",
    "User-Agent": "PostmanRuntime/7.28.2",
    "X-Amzn-Trace-Id": "Root=1-6106f00c-564e363f6389eaff72b07cfb",
    "X-Forwarded-For": "157.47.15.62",
    "X-Forwarded-Port": "443",
    "X-Forwarded-Proto": "https"
  },
  "multiValueHeaders": {
    "Accept": ["*/*"],
    "Accept-Encoding": ["gzip, deflate, br"],
    "Content-Type": ["application/json"],
    "Host": ["ttaq1i1kvi.execute-api.us-west-2.amazonaws.com"],
    "Postman-Token": ["f5b1d731-7903-431e-a96f-b9353e7e9ec6"],
    "User-Agent": ["PostmanRuntime/7.28.2"],
    "X-Amzn-Trace-Id": ["Root=1-6106f00c-564e363f6389eaff72b07cfb"],
    "X-Forwarded-For": ["157.47.15.62"],
    "X-Forwarded-Port": ["443"],
    "X-Forwarded-Proto": ["https"]
  },
  "queryStringParameters": None,
  "multiValueQueryStringParameters": None,
  "pathParameters": None,
  "stageVariables": None,
  "requestContext": {
    "resourceId": "nfb8ha",
    "resourcePath": "/prediction",
    "httpMethod": "POST",
    "extendedRequestId": "DZpx8FzXPHcFWAQ=",
    "requestTime": "01/Aug/2021:19:03:40 +0000",
    "path": "/deploy/prediction",
    "accountId": "246113150184",
    "protocol": "HTTP/1.1",
    "stage": "deploy",
    "domainPrefix": "ttaq1i1kvi",
    "requestTimeEpoch": 1627844620249,
    "requestId": "c4d0a77b-acd1-42c7-9304-8b1183c6a32f",
    "identity": {
      "cognitoIdentityPoolId": None,
      "accountId": None,
      "cognitoIdentityId": None,
      "caller": None,
      "sourceIp": "157.47.15.62",
      "principalOrgId": None,
      "accessKey": None,
      "cognitoAuthenticationType": None,
      "cognitoAuthenticationProvider": None,
      "userArn": None,
      "userAgent": "PostmanRuntime/7.28.2",
      "user": None
    },
    "domainName": "ttaq1i1kvi.execute-api.us-west-2.amazonaws.com",
    "apiId": "ttaq1i1kvi"
  },
  "body": "{\n    \"sentence\": \"this is a sample sentence\"\n}",
  "isBase64Encoded": False
}
- Since the input for the model is under
body, we need to parse the event and get that information. That's what thelambda_handlerfunction is doing.
Now let's modify the Dockerfile to include these changes.
FROM amazon/aws-lambda-python

ARG AWS_ACCESS_KEY_ID
ARG AWS_SECRET_ACCESS_KEY
ARG MODEL_DIR=./models
RUN mkdir $MODEL_DIR

ENV TRANSFORMERS_CACHE=$MODEL_DIR \
    TRANSFORMERS_VERBOSITY=error

ENV AWS_ACCESS_KEY_ID=$AWS_ACCESS_KEY_ID \
    AWS_SECRET_ACCESS_KEY=$AWS_SECRET_ACCESS_KEY

RUN yum install git -y && yum -y install gcc-c++
COPY requirements_inference.txt requirements_inference.txt
RUN pip install -r requirements_inference.txt --no-cache-dir
COPY ./ ./
ENV PYTHONPATH "${PYTHONPATH}:./"
ENV LC_ALL=C.UTF-8
ENV LANG=C.UTF-8
RUN pip install "dvc[s3]"
# configuring remote server in dvc
RUN dvc init --no-scm
RUN dvc remote add -d model-store s3://models-dvc/trained_models/

# pulling the trained model
RUN dvc pull dvcfiles/trained_model.dvc

RUN python lambda_handler.py
RUN chmod -R 0755 $MODEL_DIR
CMD [ "lambda_handler.lambda_handler"]
Most of the contents of the Dockerfile stays the same. Changes are the following:
Changed the base image to
amazon/aws-lambda-pythonAdded the Transformers cache directory as
modelsAdded a sample run
python lambda_handler.py. This will download the tokenizer required and saves it in the cacheGiven permissions to the
modelsdirectoryModified the default CMD to run as
lambda_handler.lambda_handler. Now the lambda knows what function to invoke when the container is created.
Adding API Gateway trigger to the Lambda
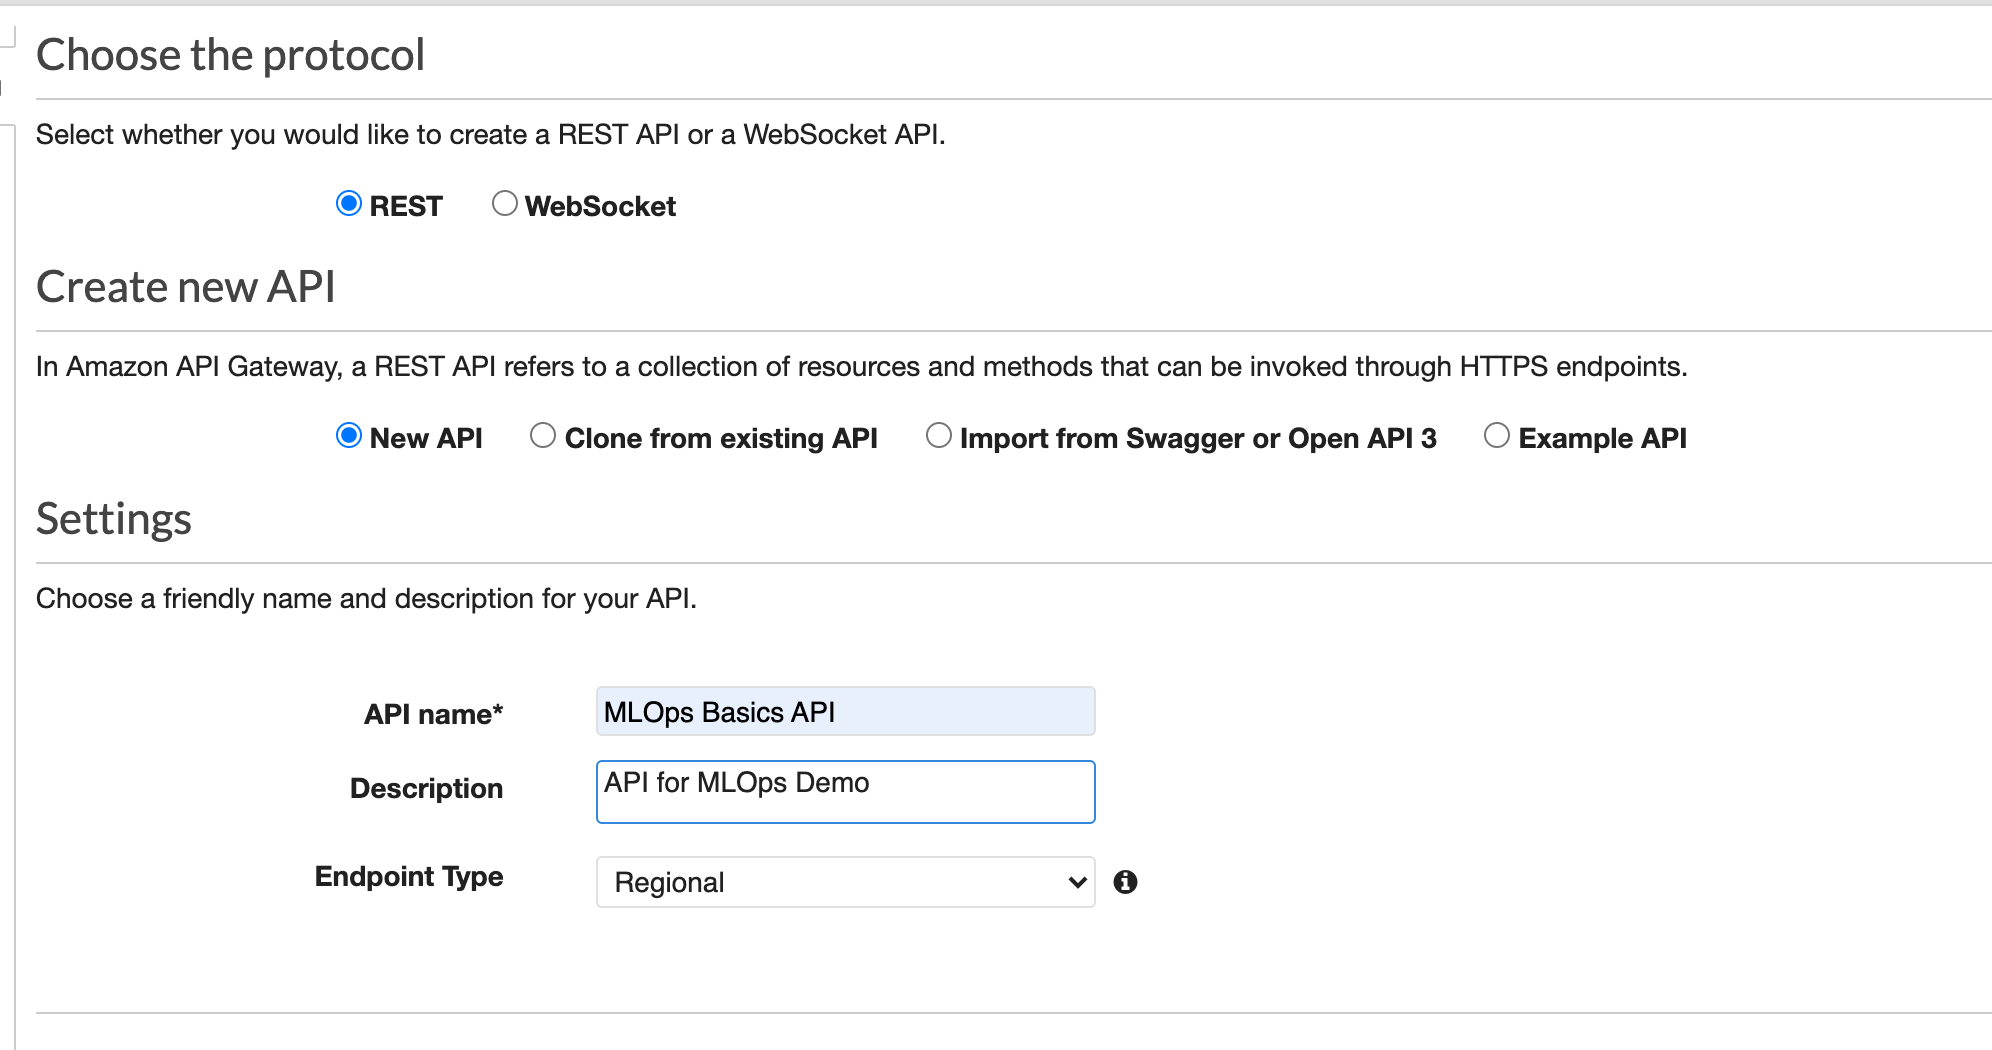
- Go to the API Gateway and create a
New API


- Select the API type as
REST API

- Give it a name

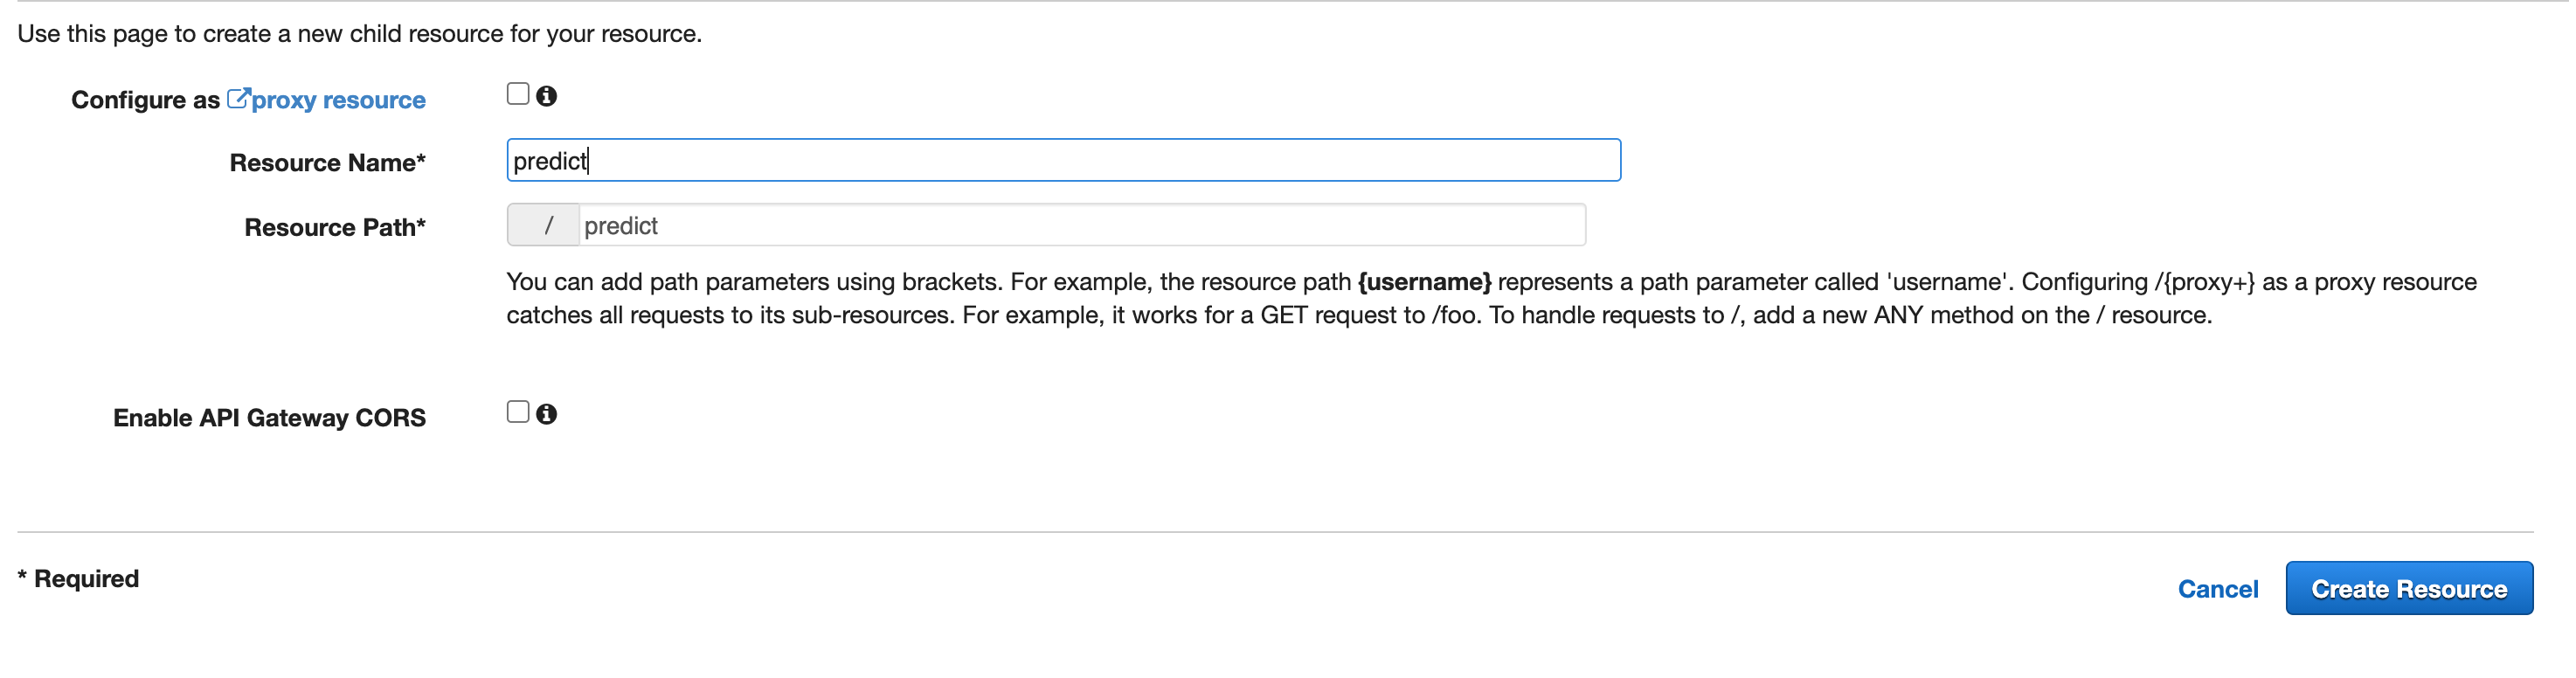
- Now let's create a resource. Resource is like endpoint.

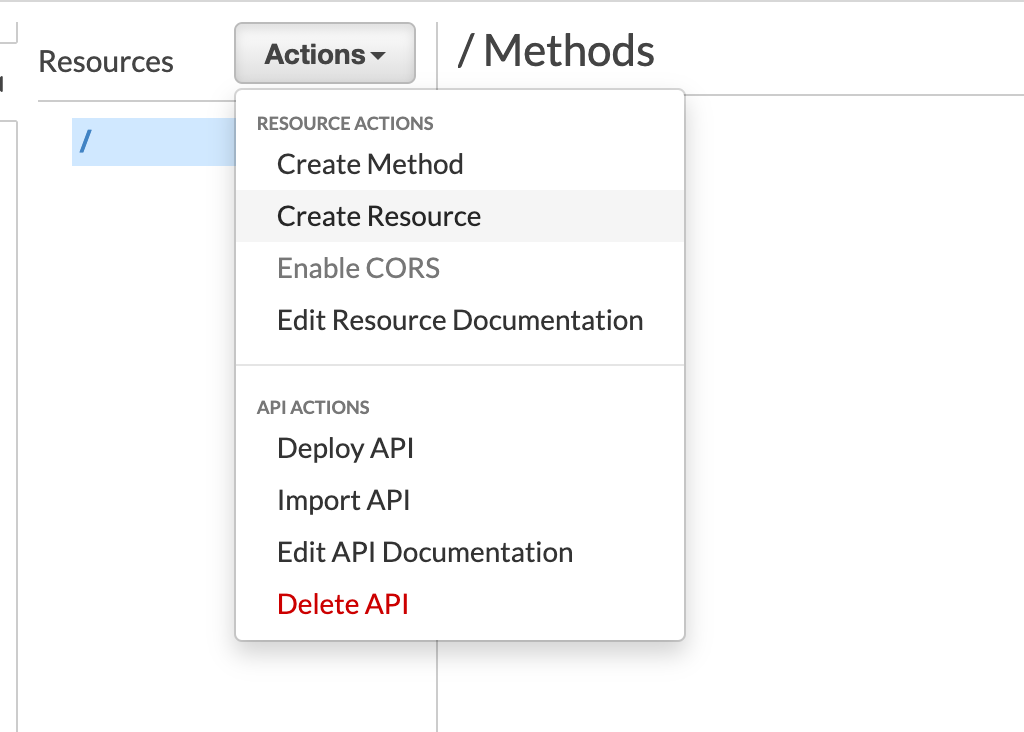
- Give it a name. Here I am naming it as
predict.

- Now let's create a method for that resource

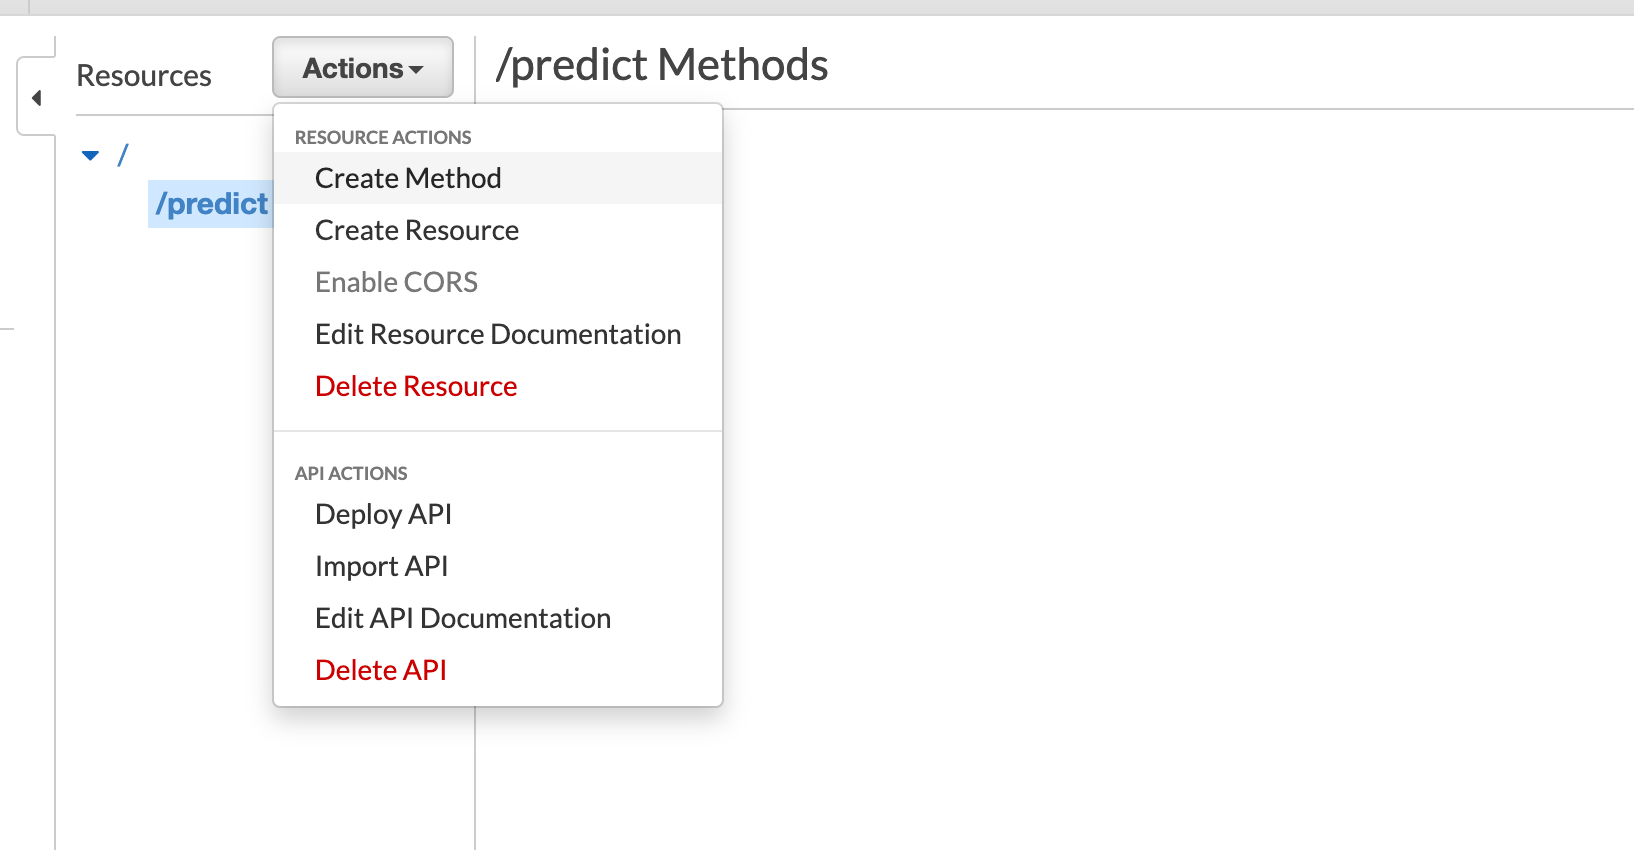
- Type of the method. I am creating method type as
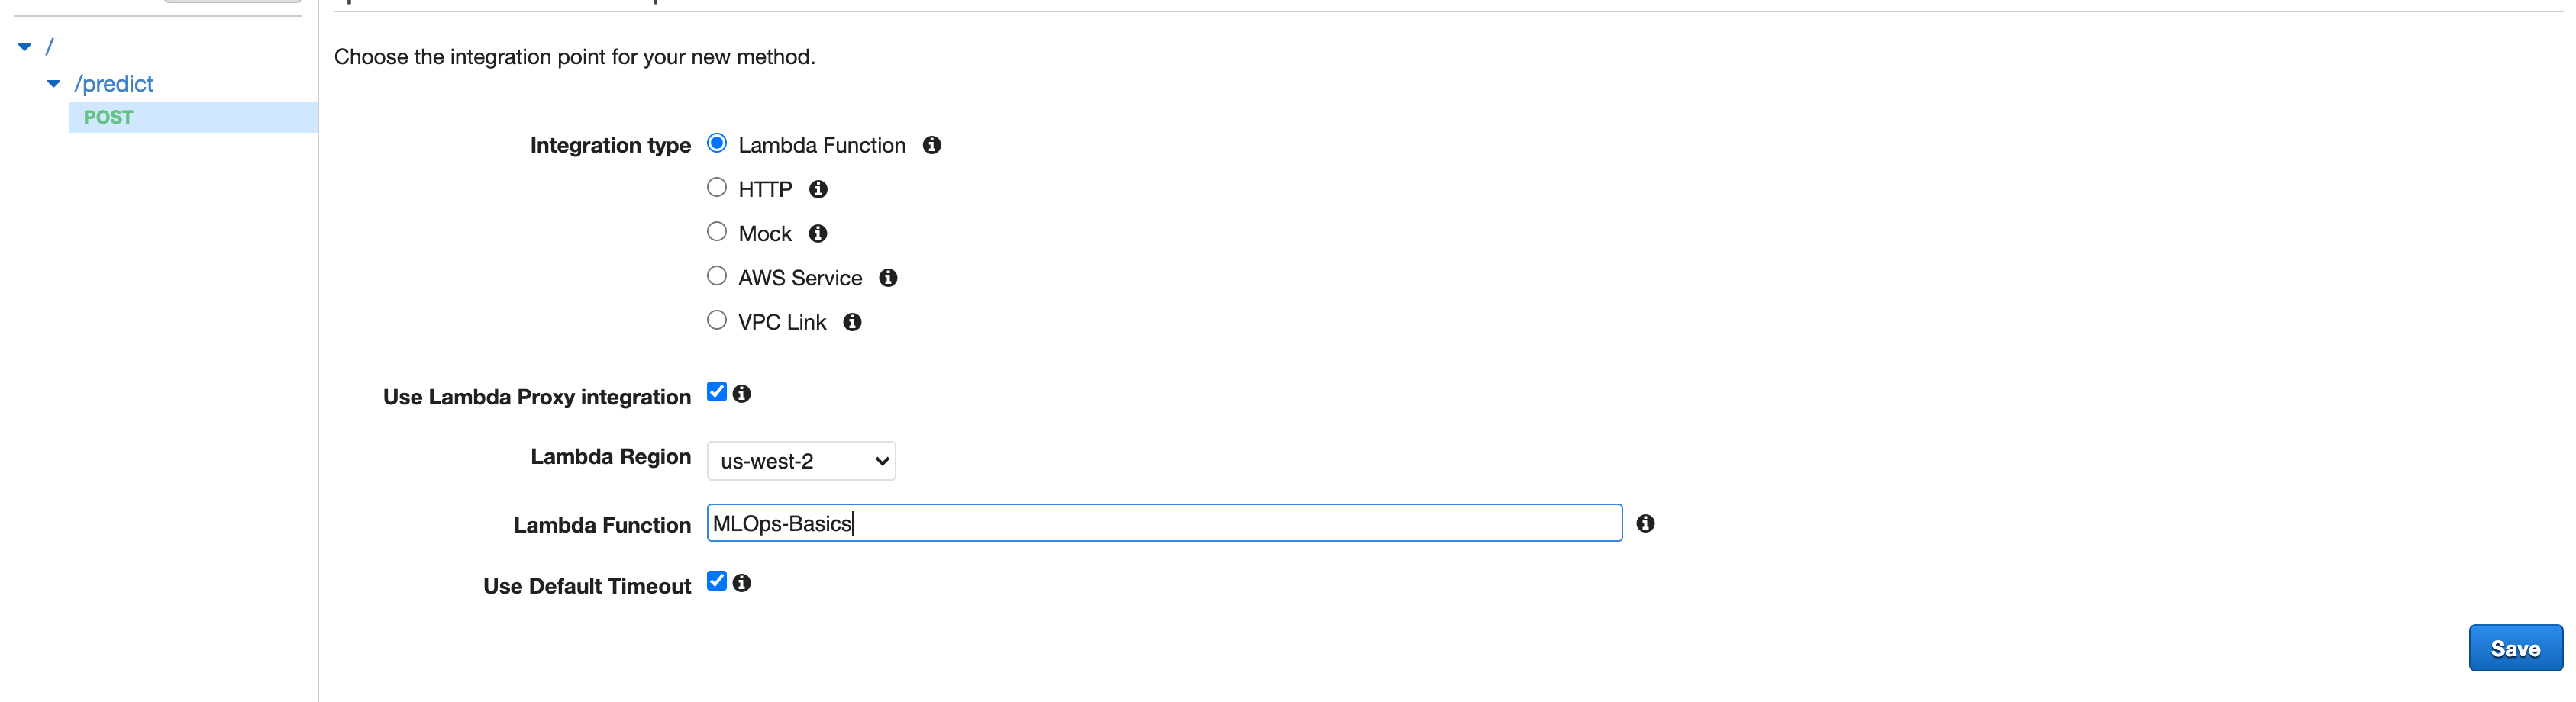
POST. Since we are connecting the API to Lambda, choose the Integration type as Lambda function and select the correct Lambda function. Make sure to check the boxUse Lambda Proxy Integration

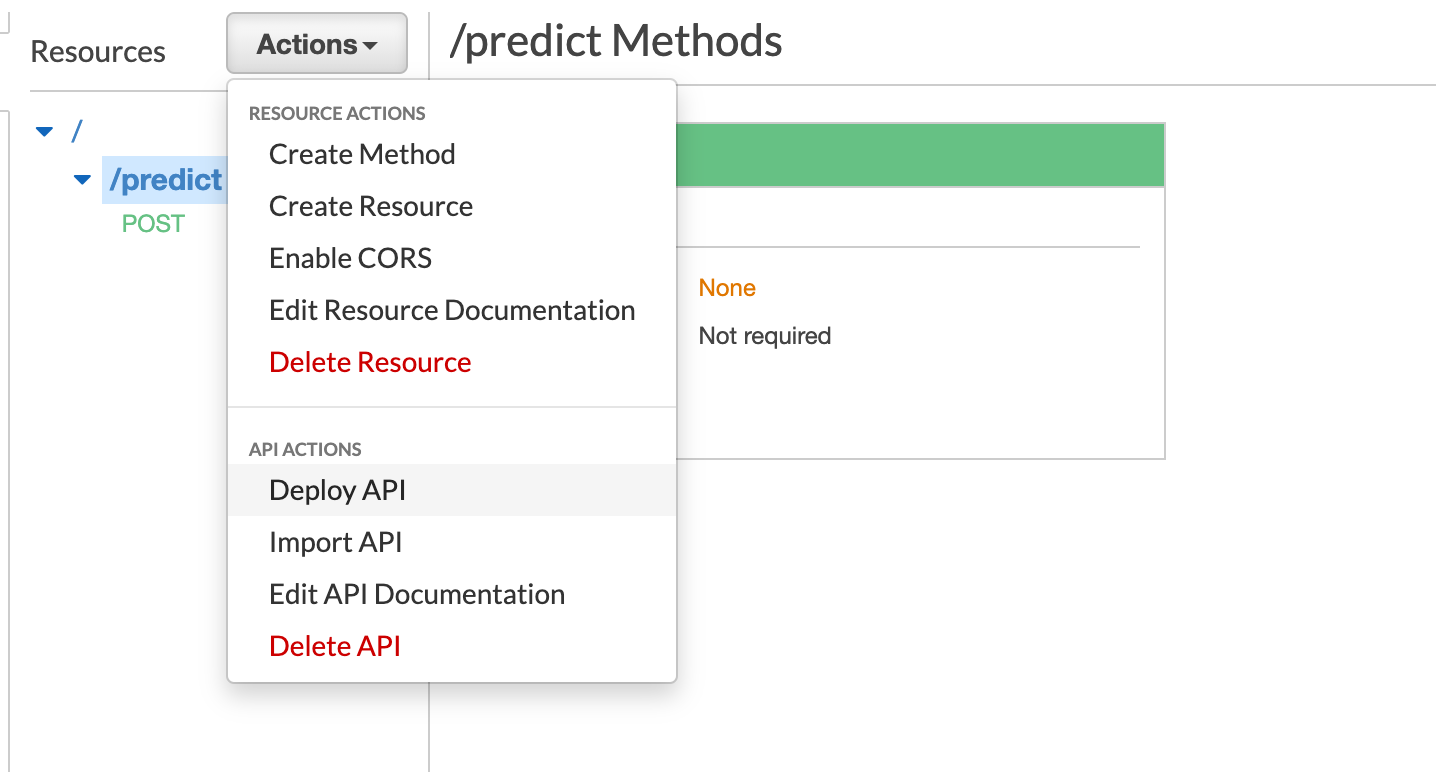
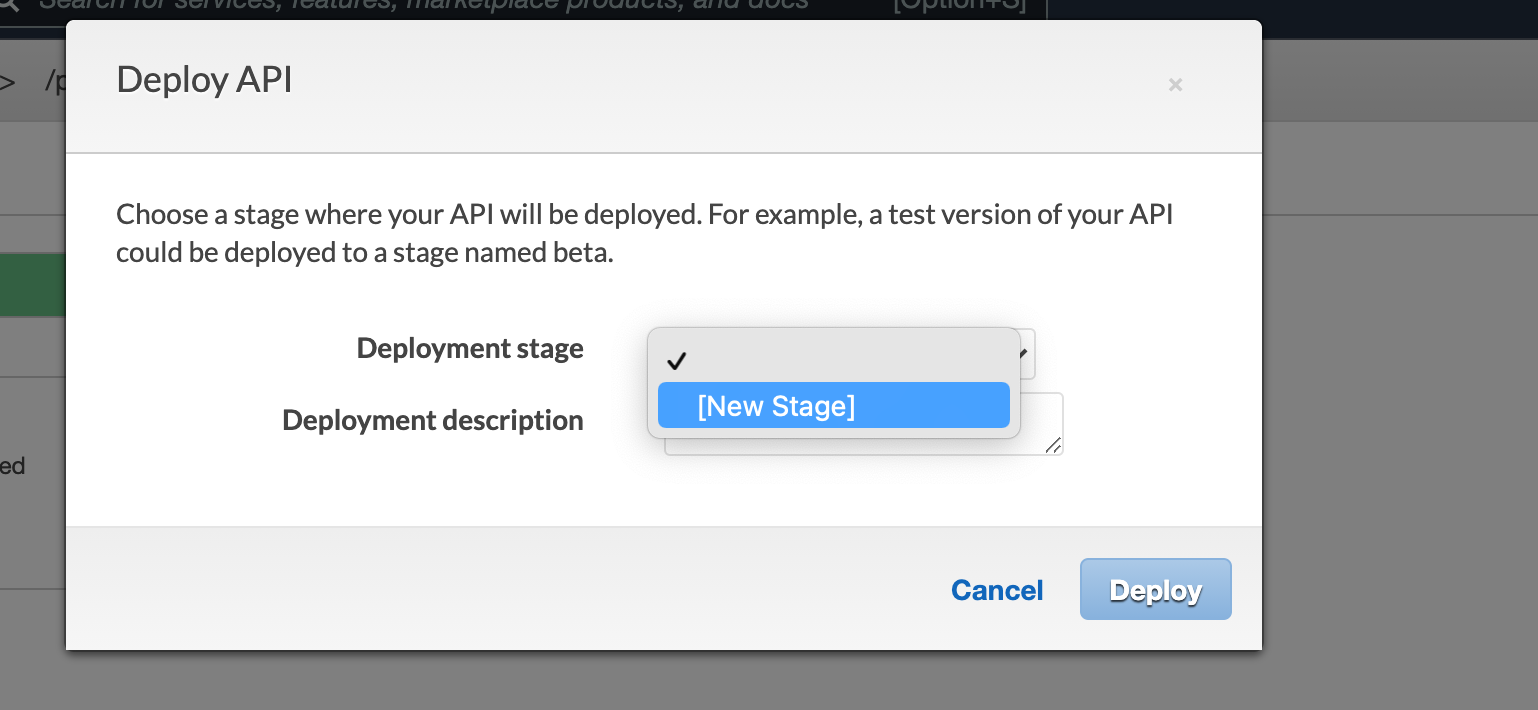
- In order to be able to use the API, it has to be deployed.

- Create a stage name for the API. I am creating the stage name as
deploy

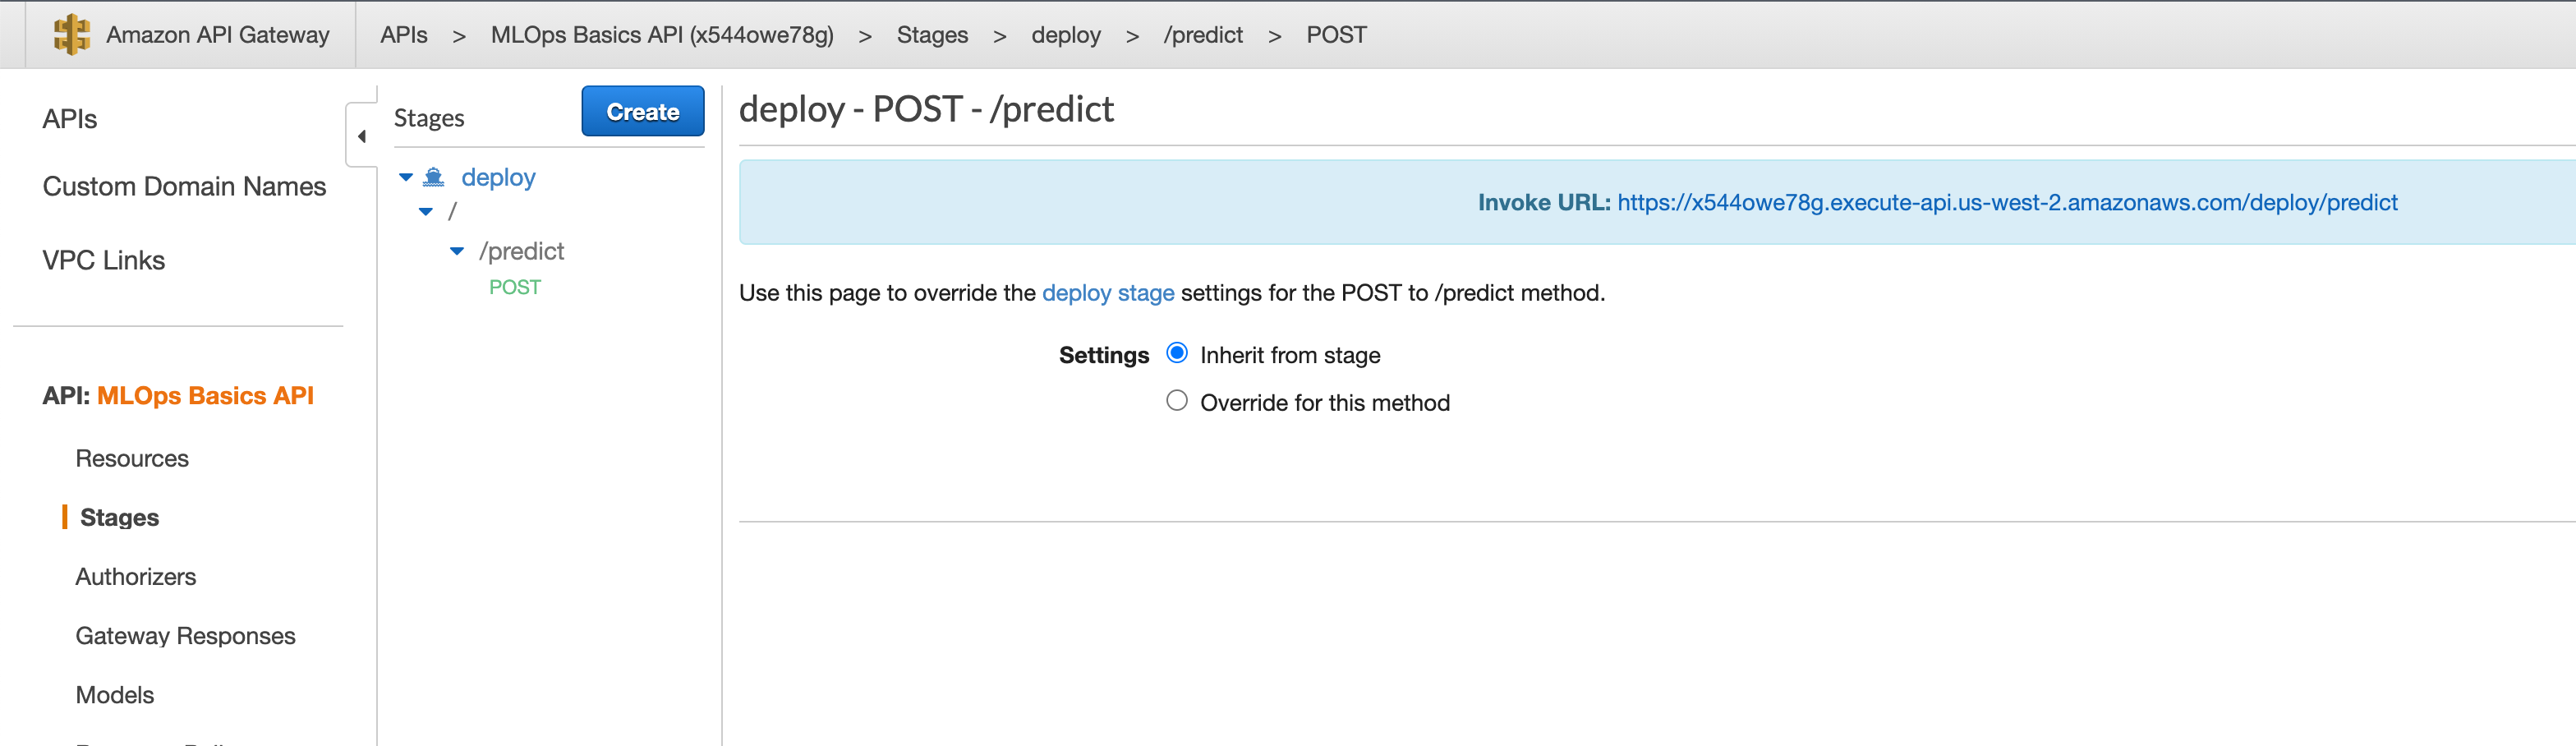
- Navigate to the
Stagessection and thepostmethod of the resourcepredict. AInvoke URLwill be present.

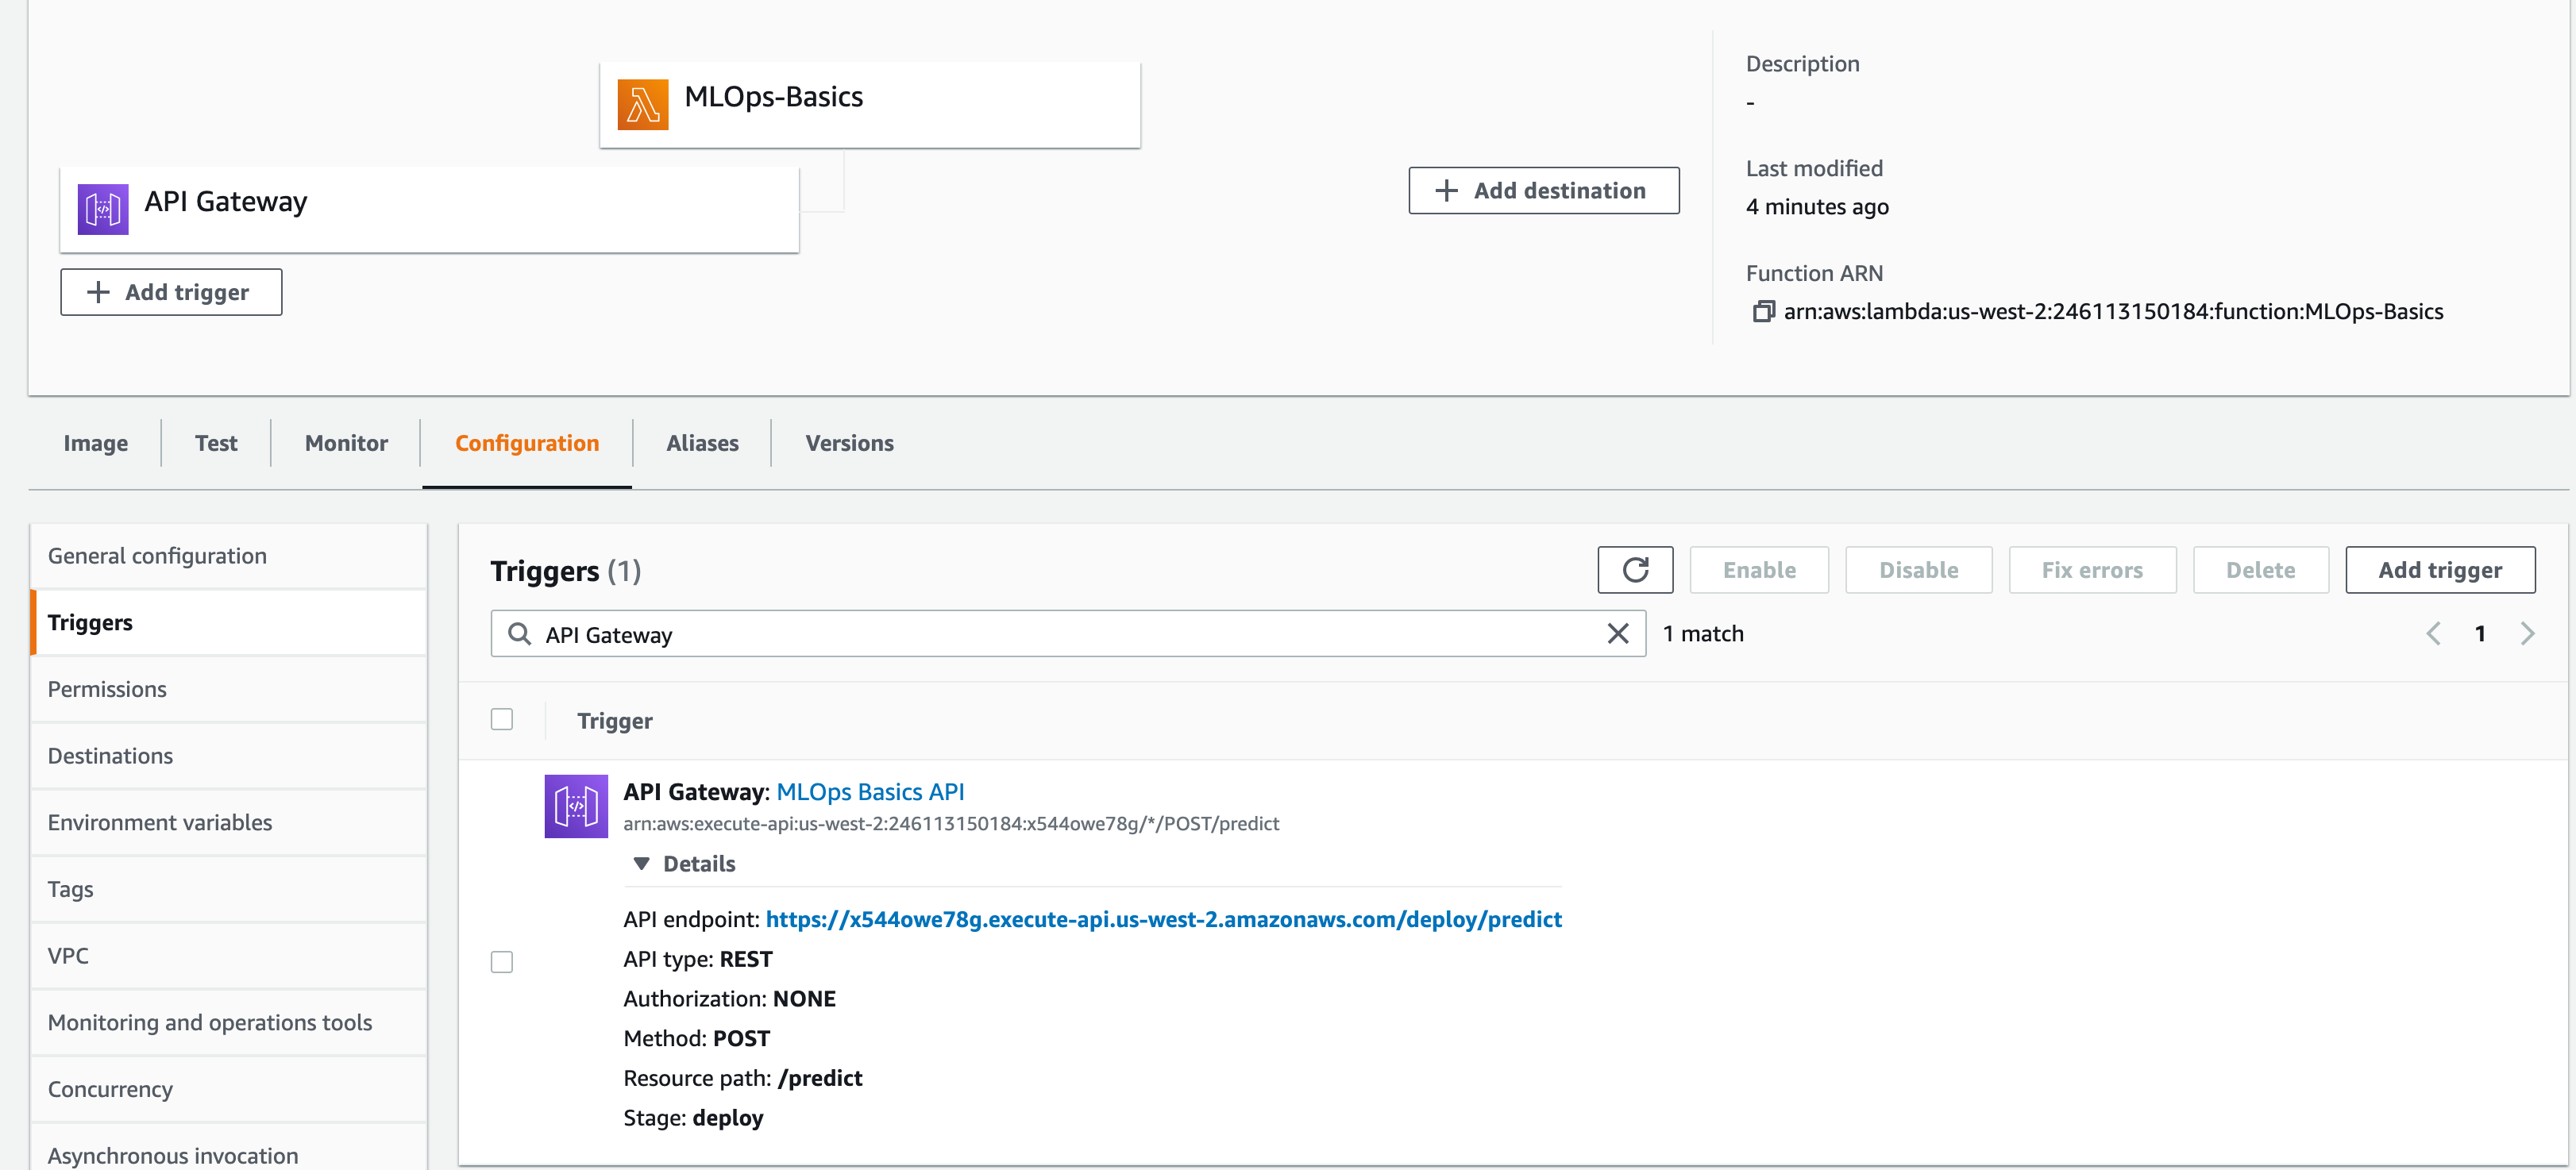
- Go the Lambda and refresh.
API Gatewaytrigger is enabled. Click on the API Gateway to check the configuration

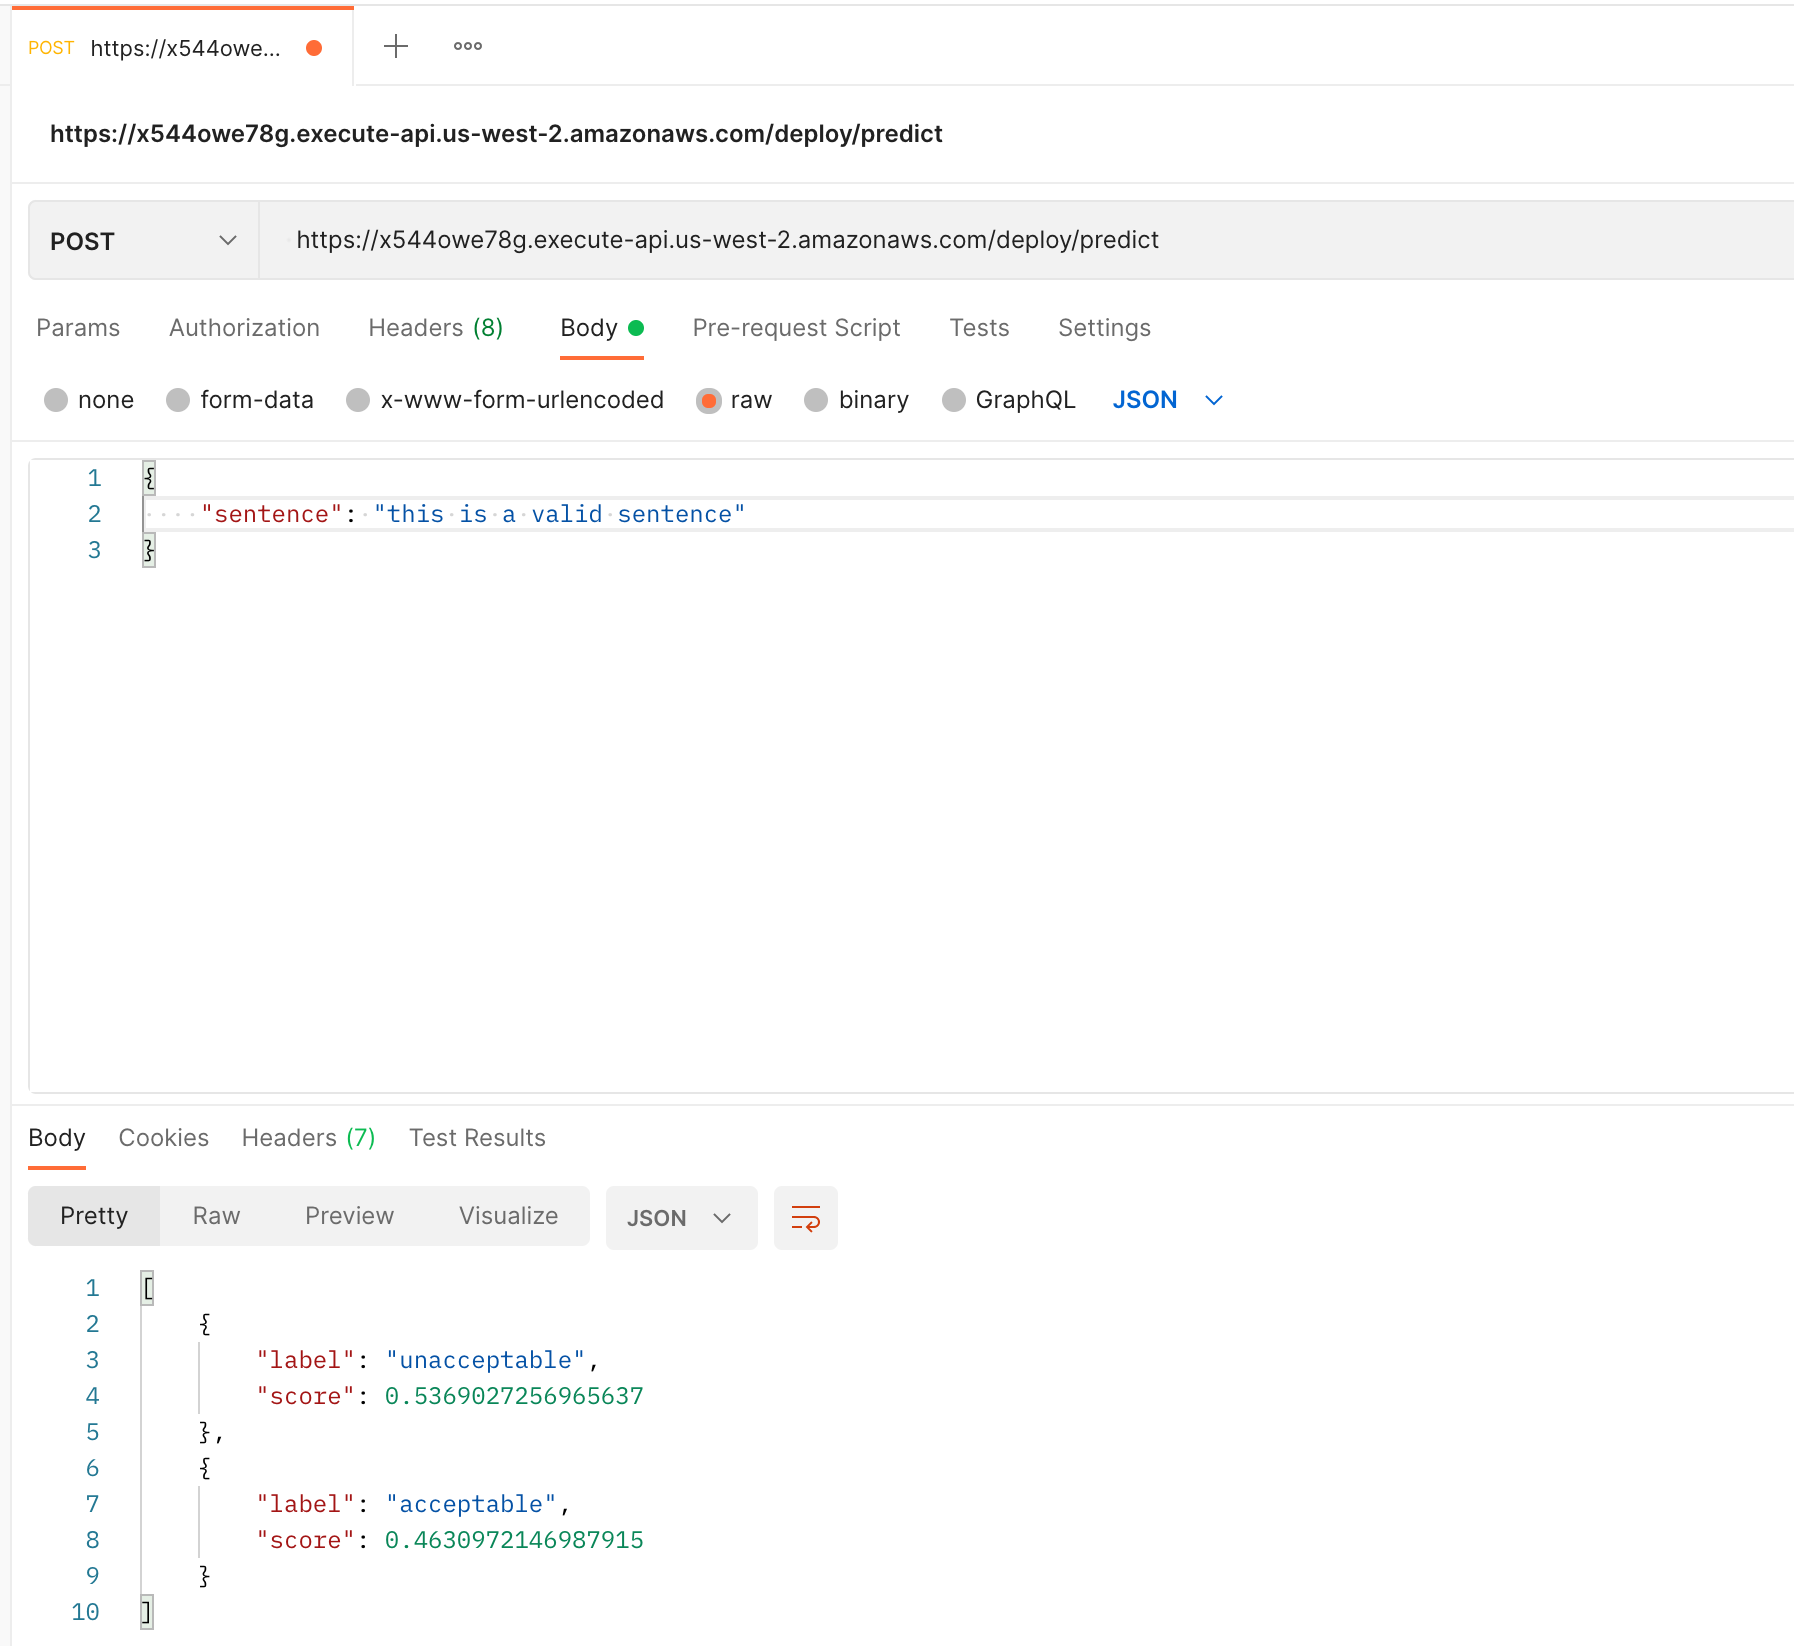
Now that the API Gateway is integrated, let's call it. Go to Postman and create a POST method with the Invoke URL and body containing sentence parameter.

Automating deployment to Lambda using Github Actions
Now whenever we want to change some code or update model, the lambda also needs to be updated with the latest image. And it becomes hectic to do all the things manually. So let's create a Github Action for updating the Lambda function whenever the ECR image is updated.
Go to the .github/workflows/build_docker_image.yaml file and add the following:
- name: Update lambda with image
  run: aws lambda update-function-code --function-name  MLOps-Basics --image-uri 246113150184.dkr.ecr.us-west-2.amazonaws.com/mlops-basics:latest
This step will now update the lambda function MLOps-Basics with the image 246113150184.dkr.ecr.us-west-2.amazonaws.com/mlops-basics:latest. (Modify this according to the image tag)
🔚
This concludes the post. We have seen how to create serverless application using AWS Lambda from the docker image and how to invoke it using API Gateway.
Complete code for this post can also be found here: Github