- Published on
MLOps Basics [Week 2]: Configurations - Hydra
- Authors

- Name
- Raviraja Ganta
- @raviraja_ganta
⚙️ Configurations
Why do you need configurations? Configuration management is a necessary for managing complex software systems. Lack of configuration management can cause serious problems with reliability, uptime, and the ability to scale a system.
There are many ways to add configurations to the python code. The prominent ways are:
and many more...
I will be using Hydra.
In this post, I will be going through the following topics:
Basics of HydraOverridding configurationsSplitting configuration across multiple filesVariable InterpolationHow to run model with different parameter combinations?
🐉 Basics of Hydra
First things first. Let's install the library
🏗 Installation
pip install hydra-core==1.1.0
Hydra operates on top of OmegaConf, which is a YAML based hierarchical configuration system, with support for merging configurations from multiple sources (files, CLI argument, environment variables) providing a consistent API regardless of how the configuration was created.
Let's look at a basic yaml file and import it
preferences:
  user: raviraja
  trait: i_like_my_sleeping
Let's load this file using OmegaConf
from omegaconf import OmegaConf
# loading
config = OmegaConf.load('config.yaml')

# accessing
print(config.preferences.user)
print(config["preferences"]["trait"])
Let's load this file using Hydra
import hydra
from omegaconf import OmegaConf

@hydra.main(config_name="basic.yaml")
def main(cfg):
    # Print the config file using `to_yaml` method which prints in a pretty manner
    print(OmegaConf.to_yaml(cfg))
    print(cfg.preferences.user)

if __name__ == "__main__":
    main()
preferences:
  user: raviraja
  trait: i_like_my_bed

raviraja
Config can also be loaded without using hydra.main decorator in the following way:
from hydra import initialize, compose

initialize(".")  # Assume the configuration file is in the current folder
cfg = compose(config_name="basic.yaml")
print(OmegaConf.to_yaml(cfg))
📝 Overriding configurations
By default the values which are allocated in the config file will be used. But we can also override the values of the variables during run time.
This can be done by 🐉 Override syntax
python main.py perferences.trait=i_like_stars
preferences:
  user: raviraja
  trait: i_like_stars
♻️ Converting the existing code into 🐉
Let's convert all the parameters in the existing code into yaml format and load it using 🐉
Let's create a folder called configs and a file inside it as config.yaml
The folder structure looks like
├── configs
│   └── config.yaml
The contents of the config.yaml is
model:
  name: google/bert_uncased_L-2_H-128_A-2
  tokenizer: google/bert_uncased_L-2_H-128_A-2

processing:
  batch_size: 64
  max_length: 128

training:
  max_epochs: 1
  log_every_n_steps: 10
  deterministic: true
  limit_train_batches: 0.25
  limit_val_batches: 0.25
Now let's load the file in the train.py code and use the values present in that file
# NOTE: Need to provide the path for configs folder and the config file name
@hydra.main(config_path="./configs", config_name="config")
def main(cfg):
    # print(OmegaConf.to_yaml(cfg))
    cola_data = DataModule(
        cfg.model.tokenizer, cfg.processing.batch_size, cfg.processing.max_length
    )
    cola_model = ColaModel(cfg.model.name)

    checkpoint_callback = ModelCheckpoint(
        dirpath="./models",
        filename="best-checkpoint.ckpt",
        monitor="valid/loss",
        mode="min",
    )

    wandb_logger = WandbLogger(project="MLOps Basics", entity="raviraja")
    trainer = pl.Trainer(
        max_epochs=cfg.training.max_epochs,
        logger=wandb_logger,
        callbacks=[checkpoint_callback, SamplesVisualisationLogger(cola_data)],
        log_every_n_steps=cfg.training.log_every_n_steps,
        deterministic=cfg.training.deterministic,
        limit_train_batches=cfg.training.limit_train_batches,
        limit_val_batches=cfg.training.limit_val_batches,
    )
    trainer.fit(cola_model, cola_data)
䷖ Splitting configuration across multiple files
In the example we are exploring, the amount of variables are less only. But in real scenarios there could be lot of modules and each module may have many parameters. Having all those parameters in a single file can look messy. Fortunately 🐉 offers a way to have configurations in multiple files and can be tied together. This can be done via 🐉 configuration groups
Let's create a separate folder model in the configs folder for containing the model specific configurations.
Let's create a file called default.yaml containing the default model configurations
The folder structure looks like:
├── configs
│   ├── config.yaml
│   └── model
│       └── default.yaml
The contents of the model/default.yaml looks like
name: google/bert_uncased_L-2_H-128_A-2 # model used for training the classifier
tokenizer: google/bert_uncased_L-2_H-128_A-2 # tokenizer used for processing the data
Now let's modify the config.yaml
defaults:
  - model: default
Let's take a step to understand what's going on.
What we have done here is:
Created a separate folder called
modeland then created a file calleddefault.yamlShifted all the model specific parameters to that file
Created a new key called
defaults(reserved keyword in 🐉) in theconfig.yamlfiledefaultshere is a list itemadd a (key, value) to the defaults list ->
model(this has to same as folder name):default(this has to same as file name)
Here we are saying to hydra that refer to model specific parameters in the model/default.yaml file.
The accessing stays the same.
model_name = cfg.model.name
For example, if have a database and want to configure different type of instances. Let's say postgres, mongodb and want to keep postgres as the default. Then the config.yaml looks like:
defaults:
  - database: postgres
The corresponding folder structure looks like:
├── configs
│   ├── config.yaml
│   ├── database
│   │   └── postgres.yaml
│   │   └── mongodb.yaml
Now let's create processing specific folder and training specific folder and shift the corresponding parameters to that files.
Final folder structure looks like:
├── configs
│   ├── config.yaml
│   ├── model
│   │   └── default.yaml
│   ├── processing
│   │   └── default.yaml
│   └── training
│       └── default.yaml
The contents of the config.yaml file looks like:
defaults:
  - model: default
  - processing: default
  - training: default
🕵 Variable Interpolation
Some times variables can also depend on other variables. For example, which layer to use may depend on kind of dataset. As a simple example, let's set the limit_val_batches variable values same as limit_training_batches.
This file training/default.yaml looks like:
max_epochs: 1
log_every_n_steps: 10
deterministic: true
limit_train_batches: 0.25
limit_val_batches: ${training.limit_train_batches}
When you load and print the complete config, the value will be printed as
print(OmegaConf.to_yaml(cfg))
${training.limit_train_batches}
In order to overcome this pass resolve=True to the OmegaConf.to_yaml call. i.e
print(OmegaConf.to_yaml(cfg, resolve=True))
0.25
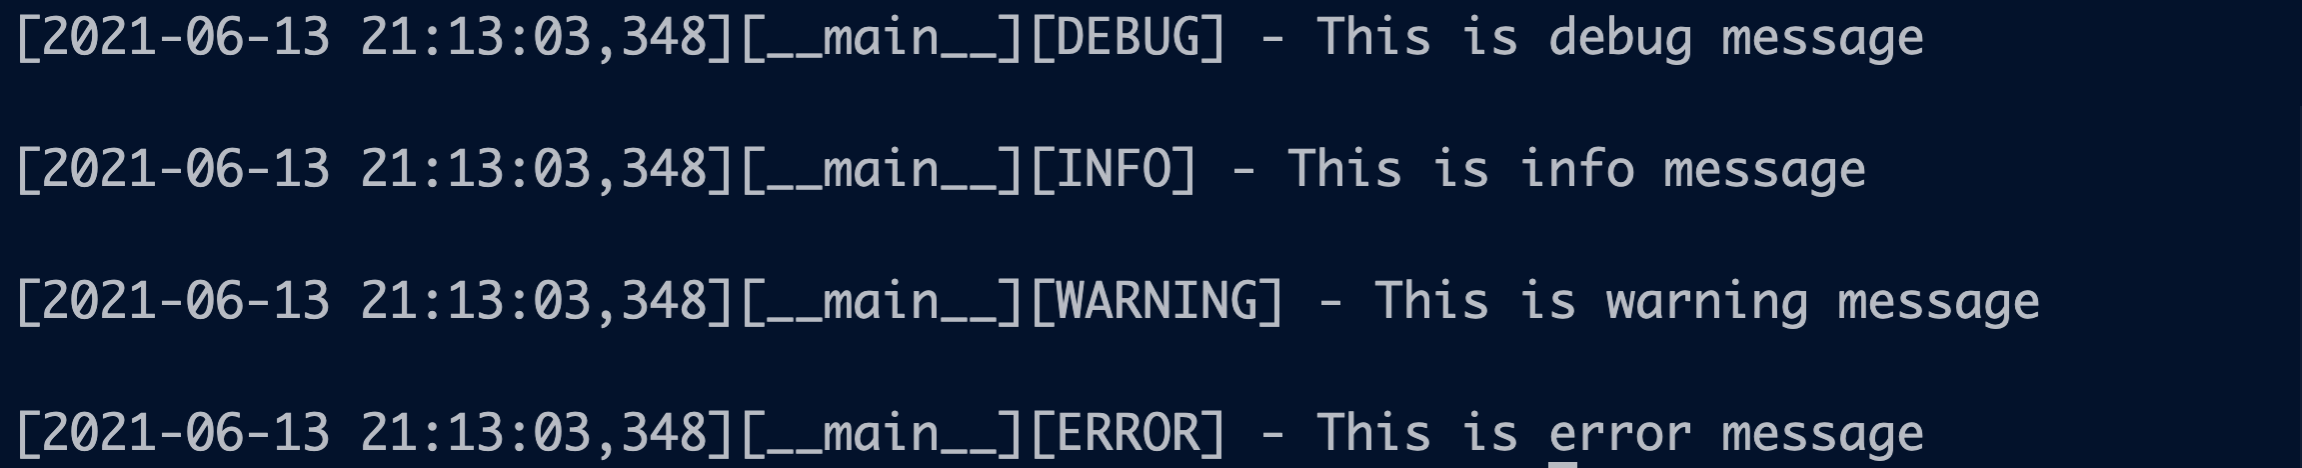
💄 Color coding the logs
Logging helps in understanding the status of the program. Having colorful logs will help in identifying the specific logs even faster (and also logs look prettier.)
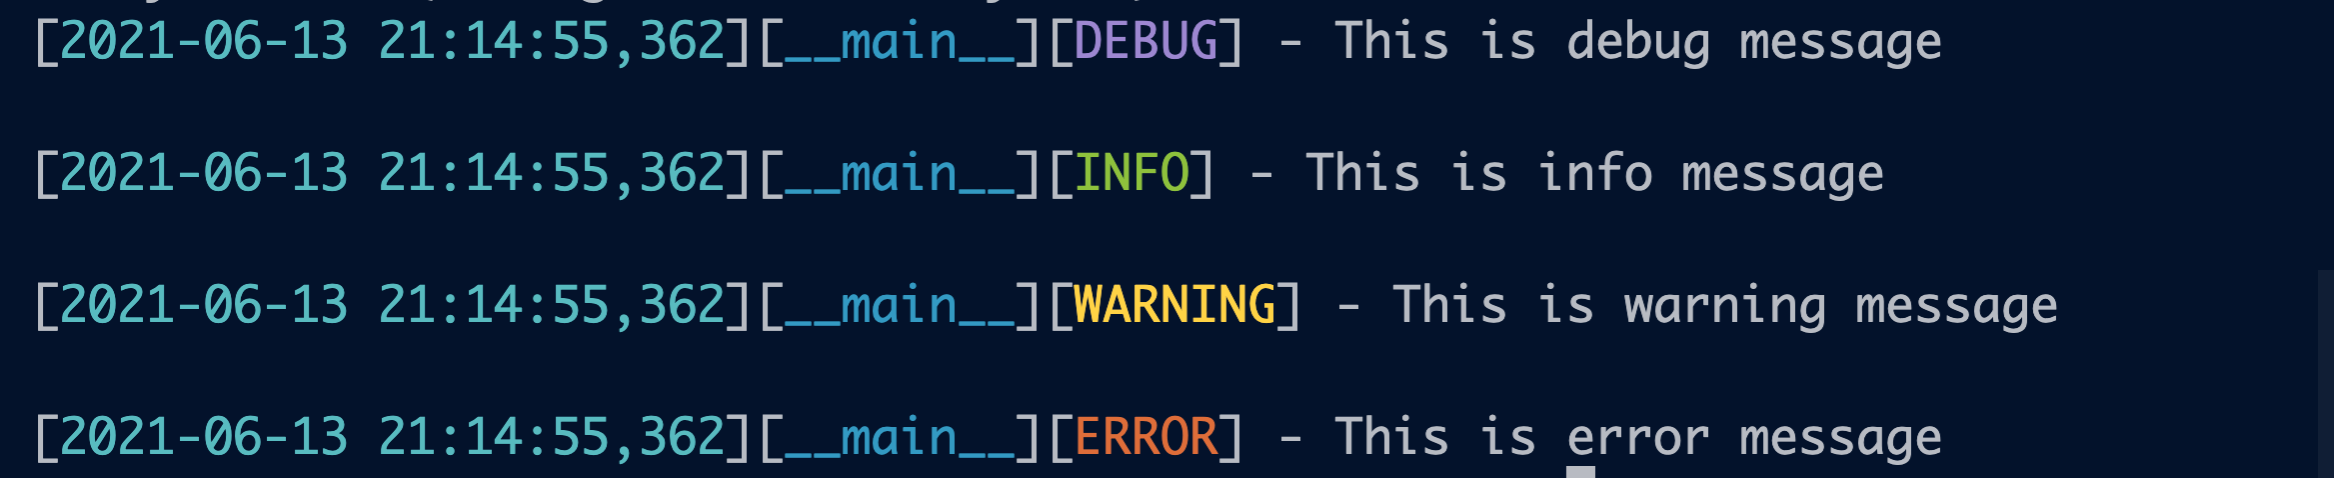
This can be done easily in 🐉 without changing any logging code. (usually people define color syntax for each kind of log method / use different libraries which has color support). In 🐉 by chaning the default logging mode is sufficient.
In order to do this, we need to install a hydra extension:
pip install hydra_colorlog
Let's override hydra/job_logging and hydra/hydra_logging in the config. The config.yaml looks like:
defaults:
  - override hydra/job_logging: colorlog
  - override hydra/hydra_logging: colorlog
Before color coding the logs look like:


After adding the colors:

By default, Hydra executes each script inside a different directory, to avoid overwriting results from different runs. The default name for the directory is outputs/<day>/<time>/
Each directory contains the output of your script, a .hydra folder containing the configuration files used for the run, and a <name>.log file containing all the data that was sent to the logger.
👟 Running model with different parameter combinations
Sometimes you want to run the same application with multiple different configurations. This can be done in 🐉 via Multi-run
Use the --multirun (-m) flag and pass a comma separated list specifying the values for each dimension you want to sweep.
For example, in order to run the application with epochs 1 and 2, the command looks like:
python train.py -m training.max_epochs=1,2
Then 🐉 launches 2 jobs:


If the parameters are spread over different folders means all the combinations will be taken. For example, by running the command
python train.py -m training.max_epochs=1,2 processing.batch_size=32,64,128
A total of 6 jobs will be launched
[2021-06-13 17:25:03,317][HYDRA] Launching 6 jobs locally
[2021-06-13 17:25:03,318][HYDRA]        #0 : training.max_epochs=1 processing.batch_size=32
[2021-06-13 17:25:03,458][HYDRA]        #1 : training.max_epochs=1 processing.batch_size=64
[2021-06-13 17:25:03,602][HYDRA]        #2 : training.max_epochs=1 processing.batch_size=128
[2021-06-13 17:25:03,755][HYDRA]        #3 : training.max_epochs=2 processing.batch_size=32
[2021-06-13 17:25:03,895][HYDRA]        #4 : training.max_epochs=2 processing.batch_size=64
[2021-06-13 17:25:04,040][HYDRA]        #5 : training.max_epochs=2 processing.batch_size=128
🔚
This concludes the post. These are only a few capabilities of 🐉. There are many other functionalities like:
and much more... Refer to the original documentation for more information.
Complete code for this post can also be found here: Github